My living room reveal

Like all of the rooms in the house, prior to renovation the living room was horrible! Here’s how we transformed it into the living room of our dreams.
Photography: Mark Zeidler
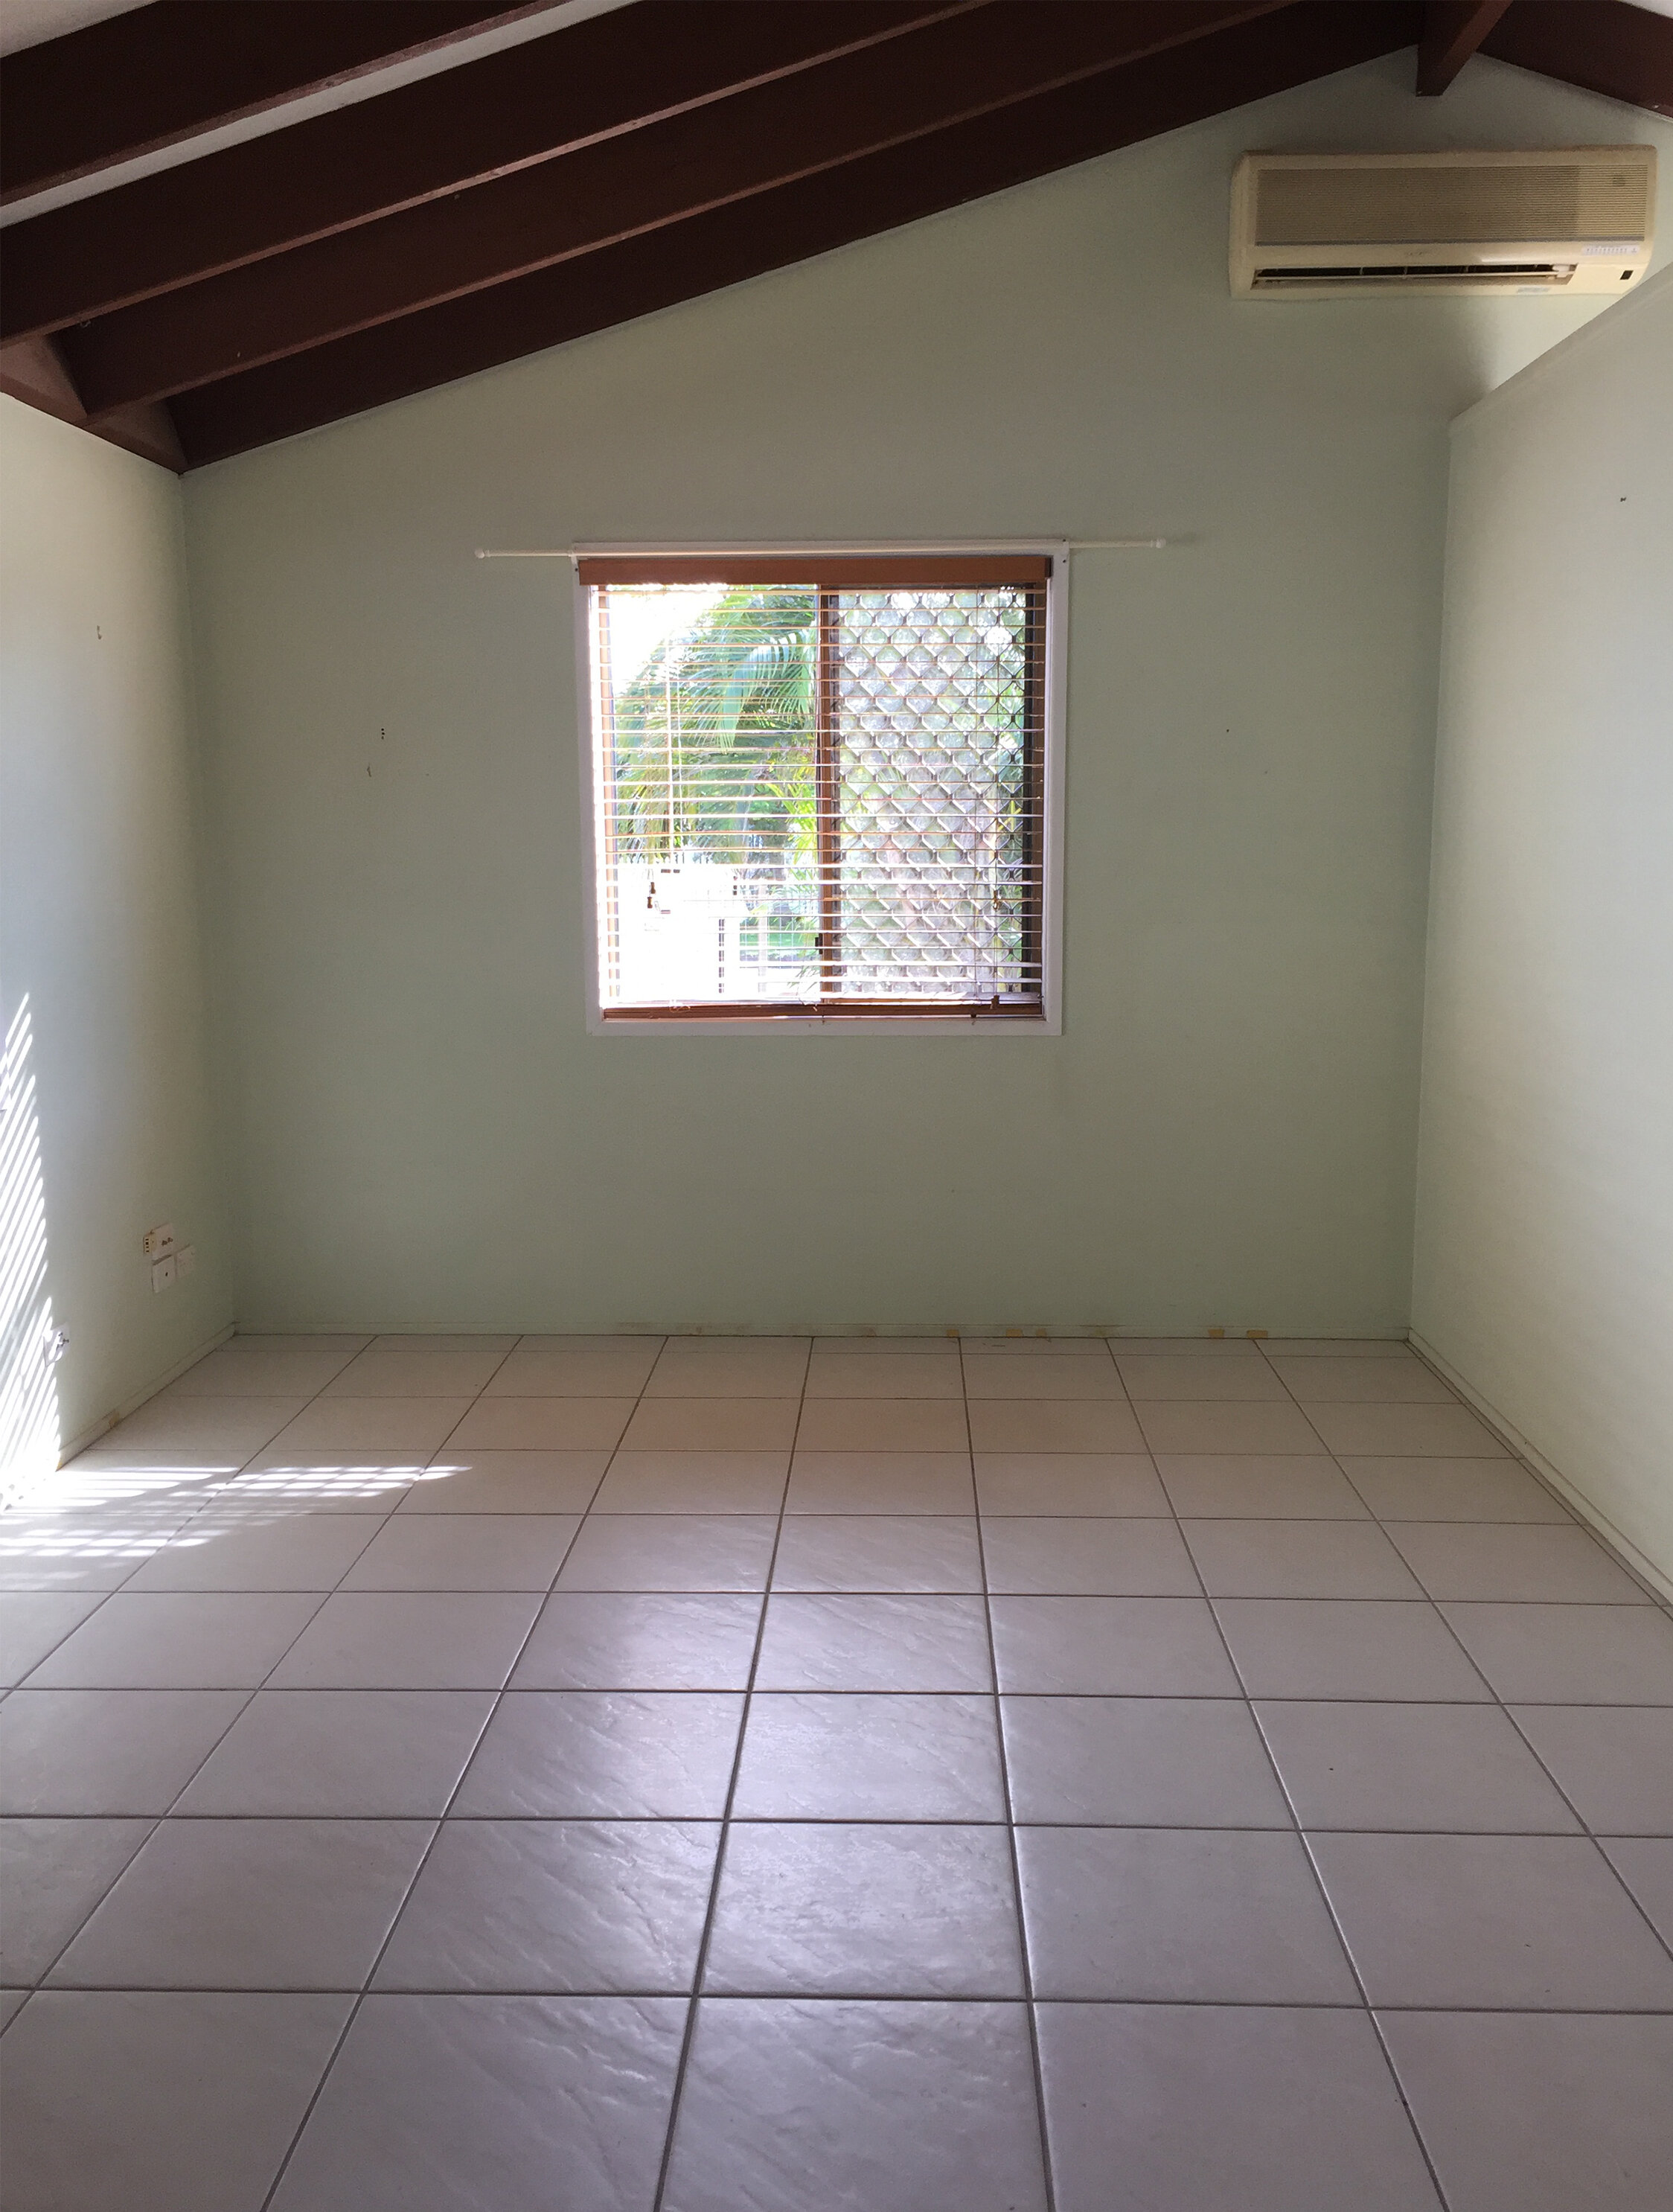
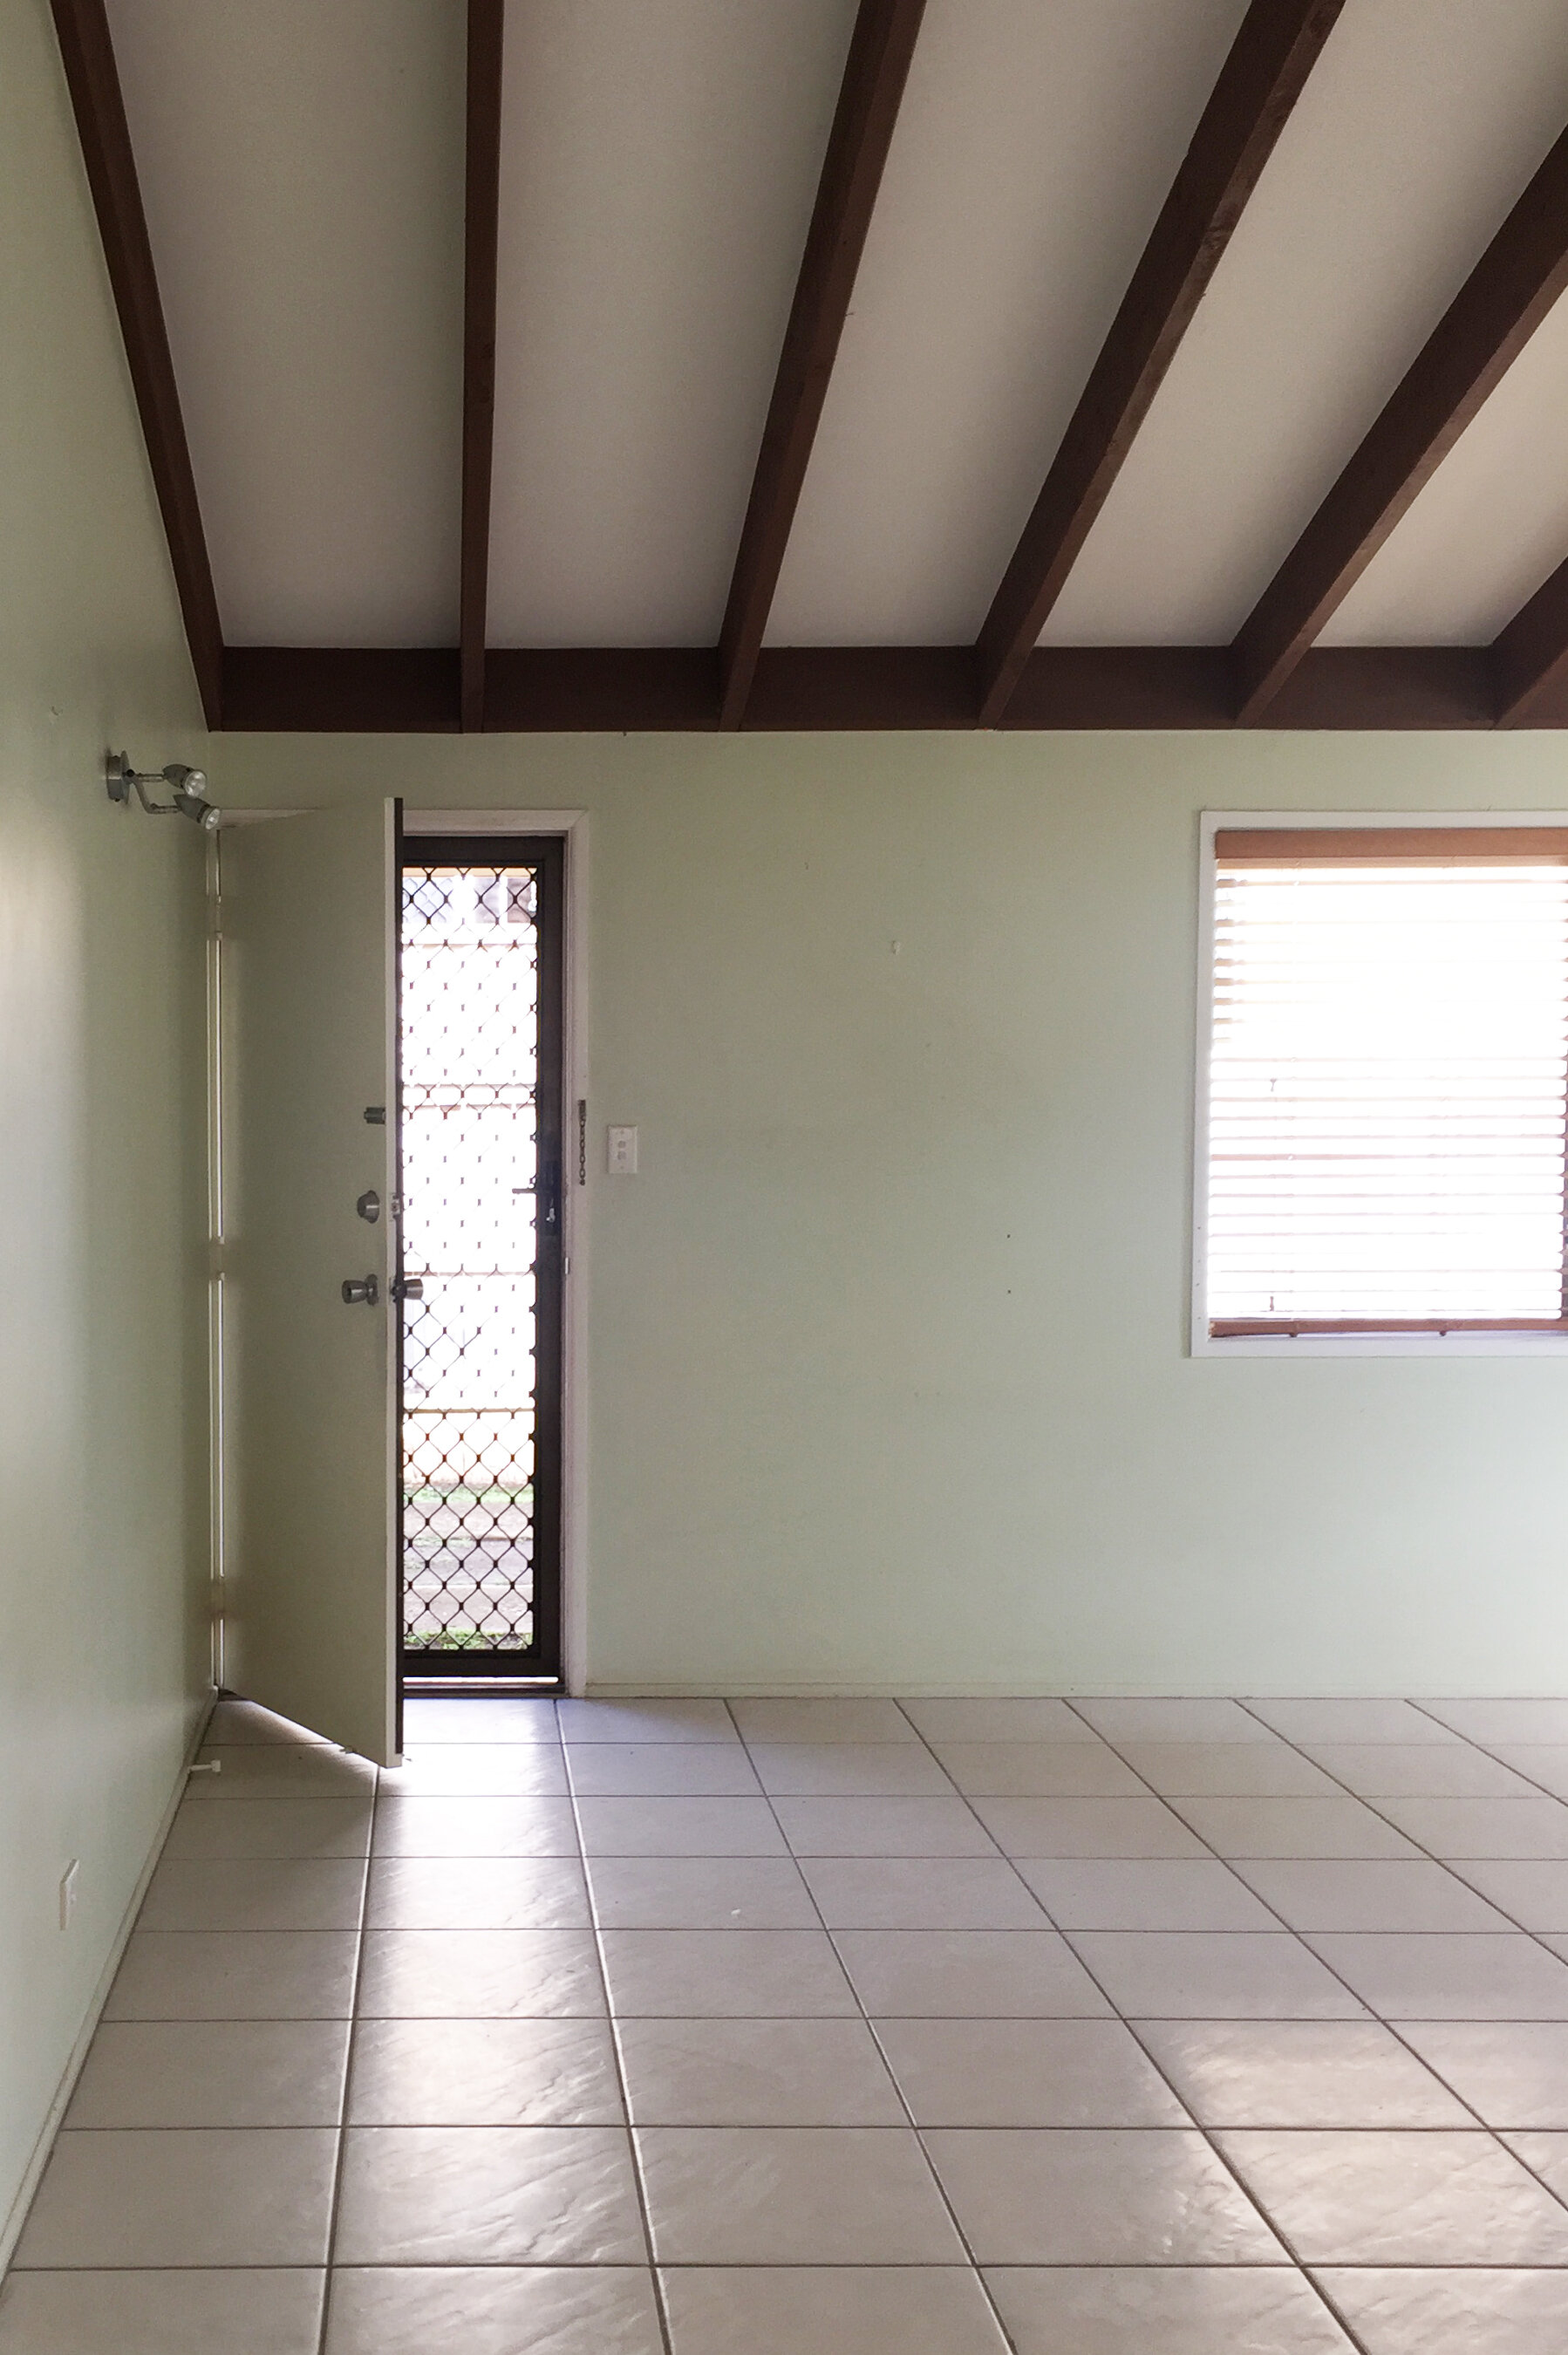
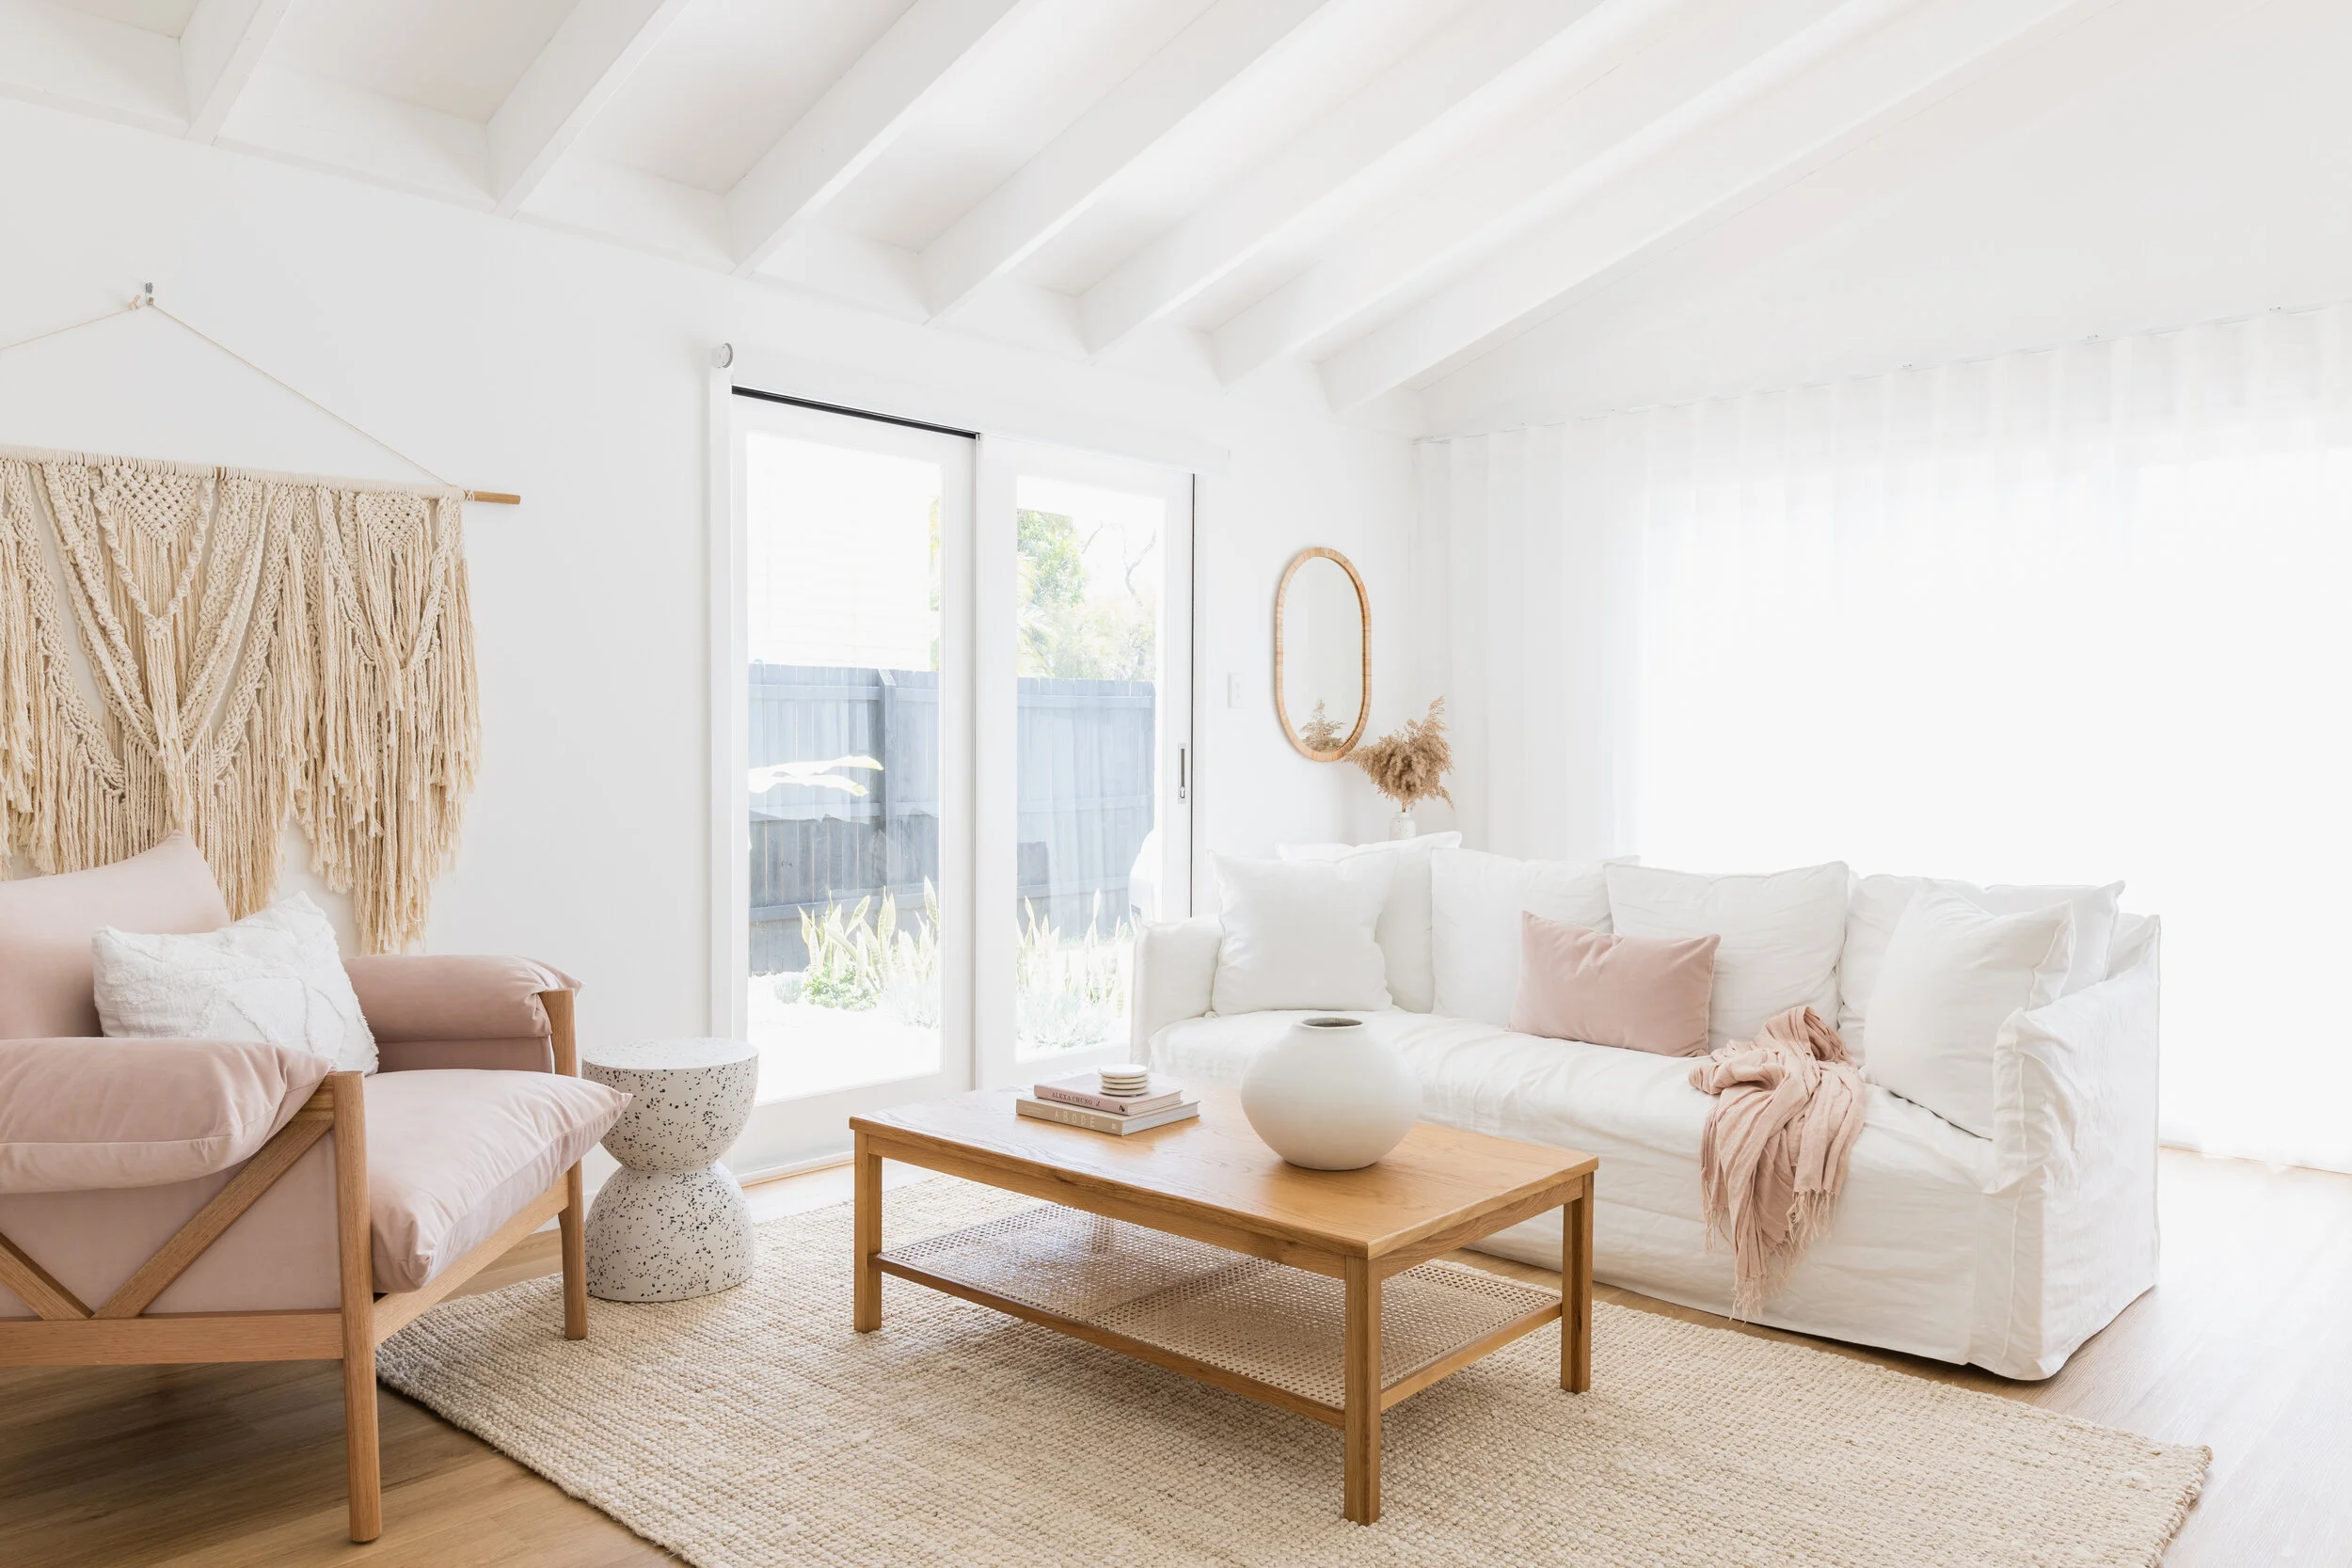
So when people ask me what attracted us to buying this home in the first place, it came down to pretty much one thing – the pitched ceiling and exposed beams in the living/dining/kitchen. It’s very rare to find this type of feature in my area (it’s predominantly old fibro shacks), so to find a brick and tile roof home with pitched ceilings in Scarborough was like hitting the jackpot. Of course though there were a whole bunch of downsides (like no carport, communal driveway, very small house, not in great condition, yada yada yada, the list goes on and on), so if it hadn’t been for that pitched ceiling I would have walked away from this one.
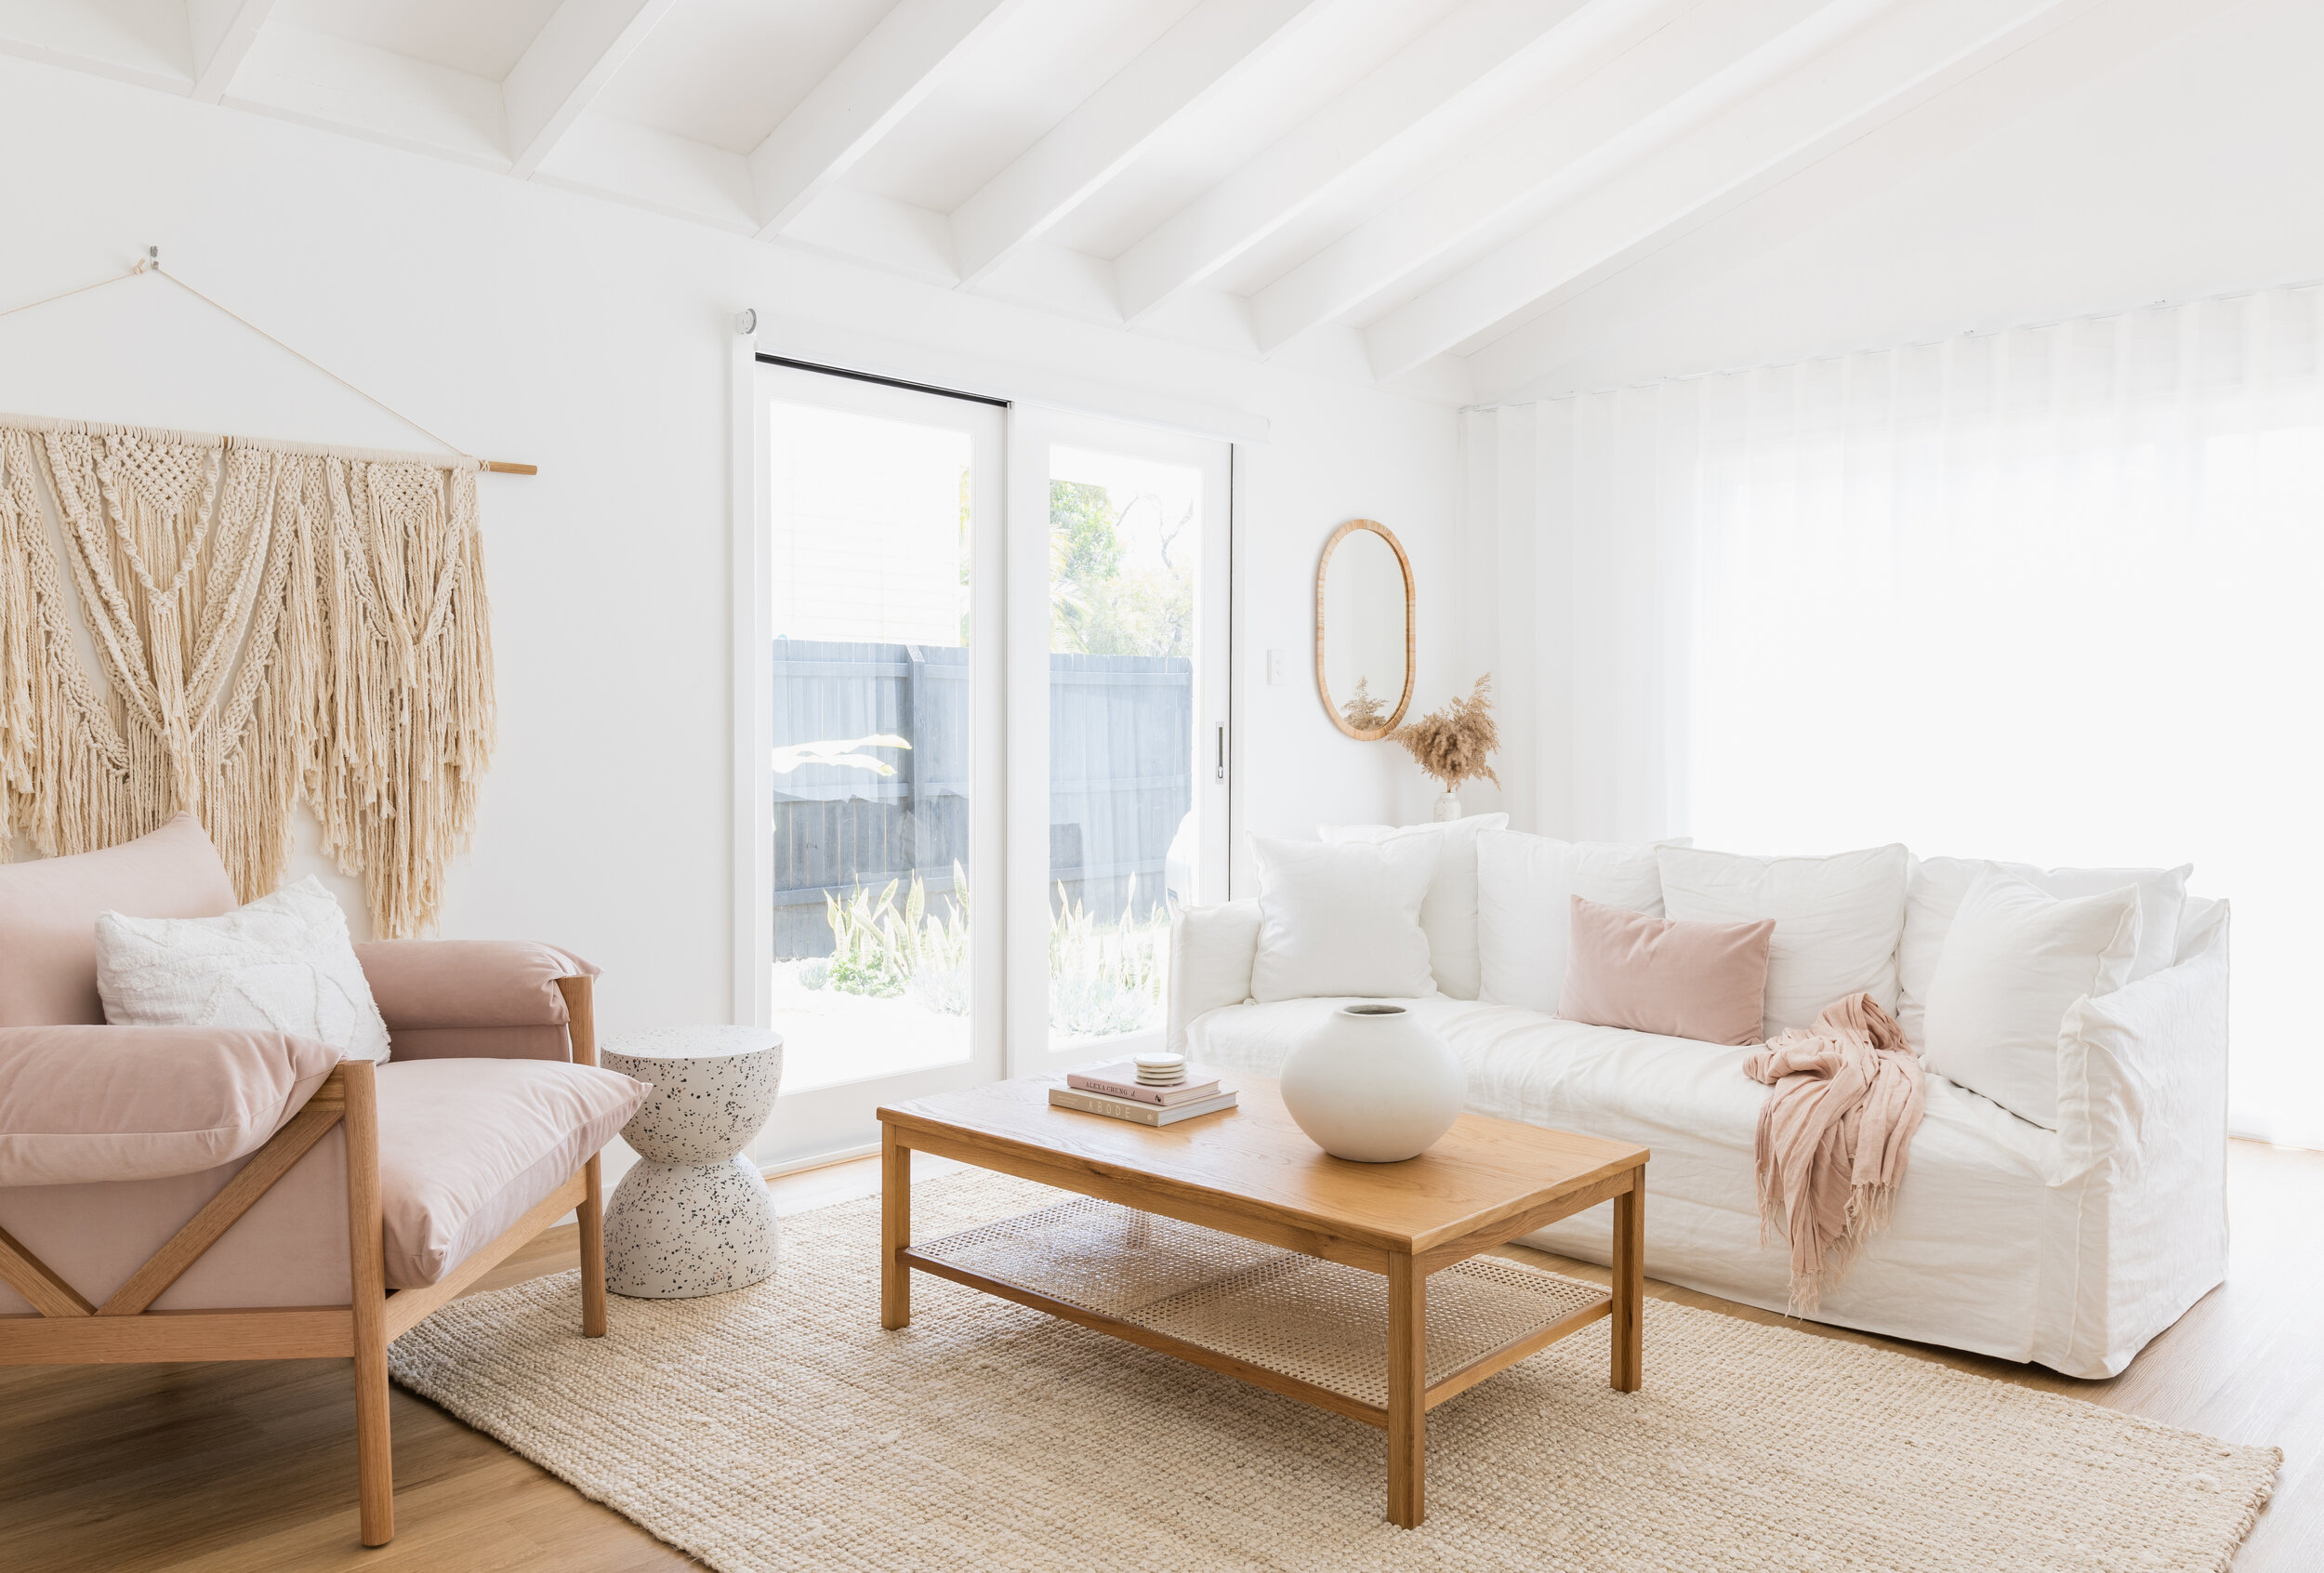
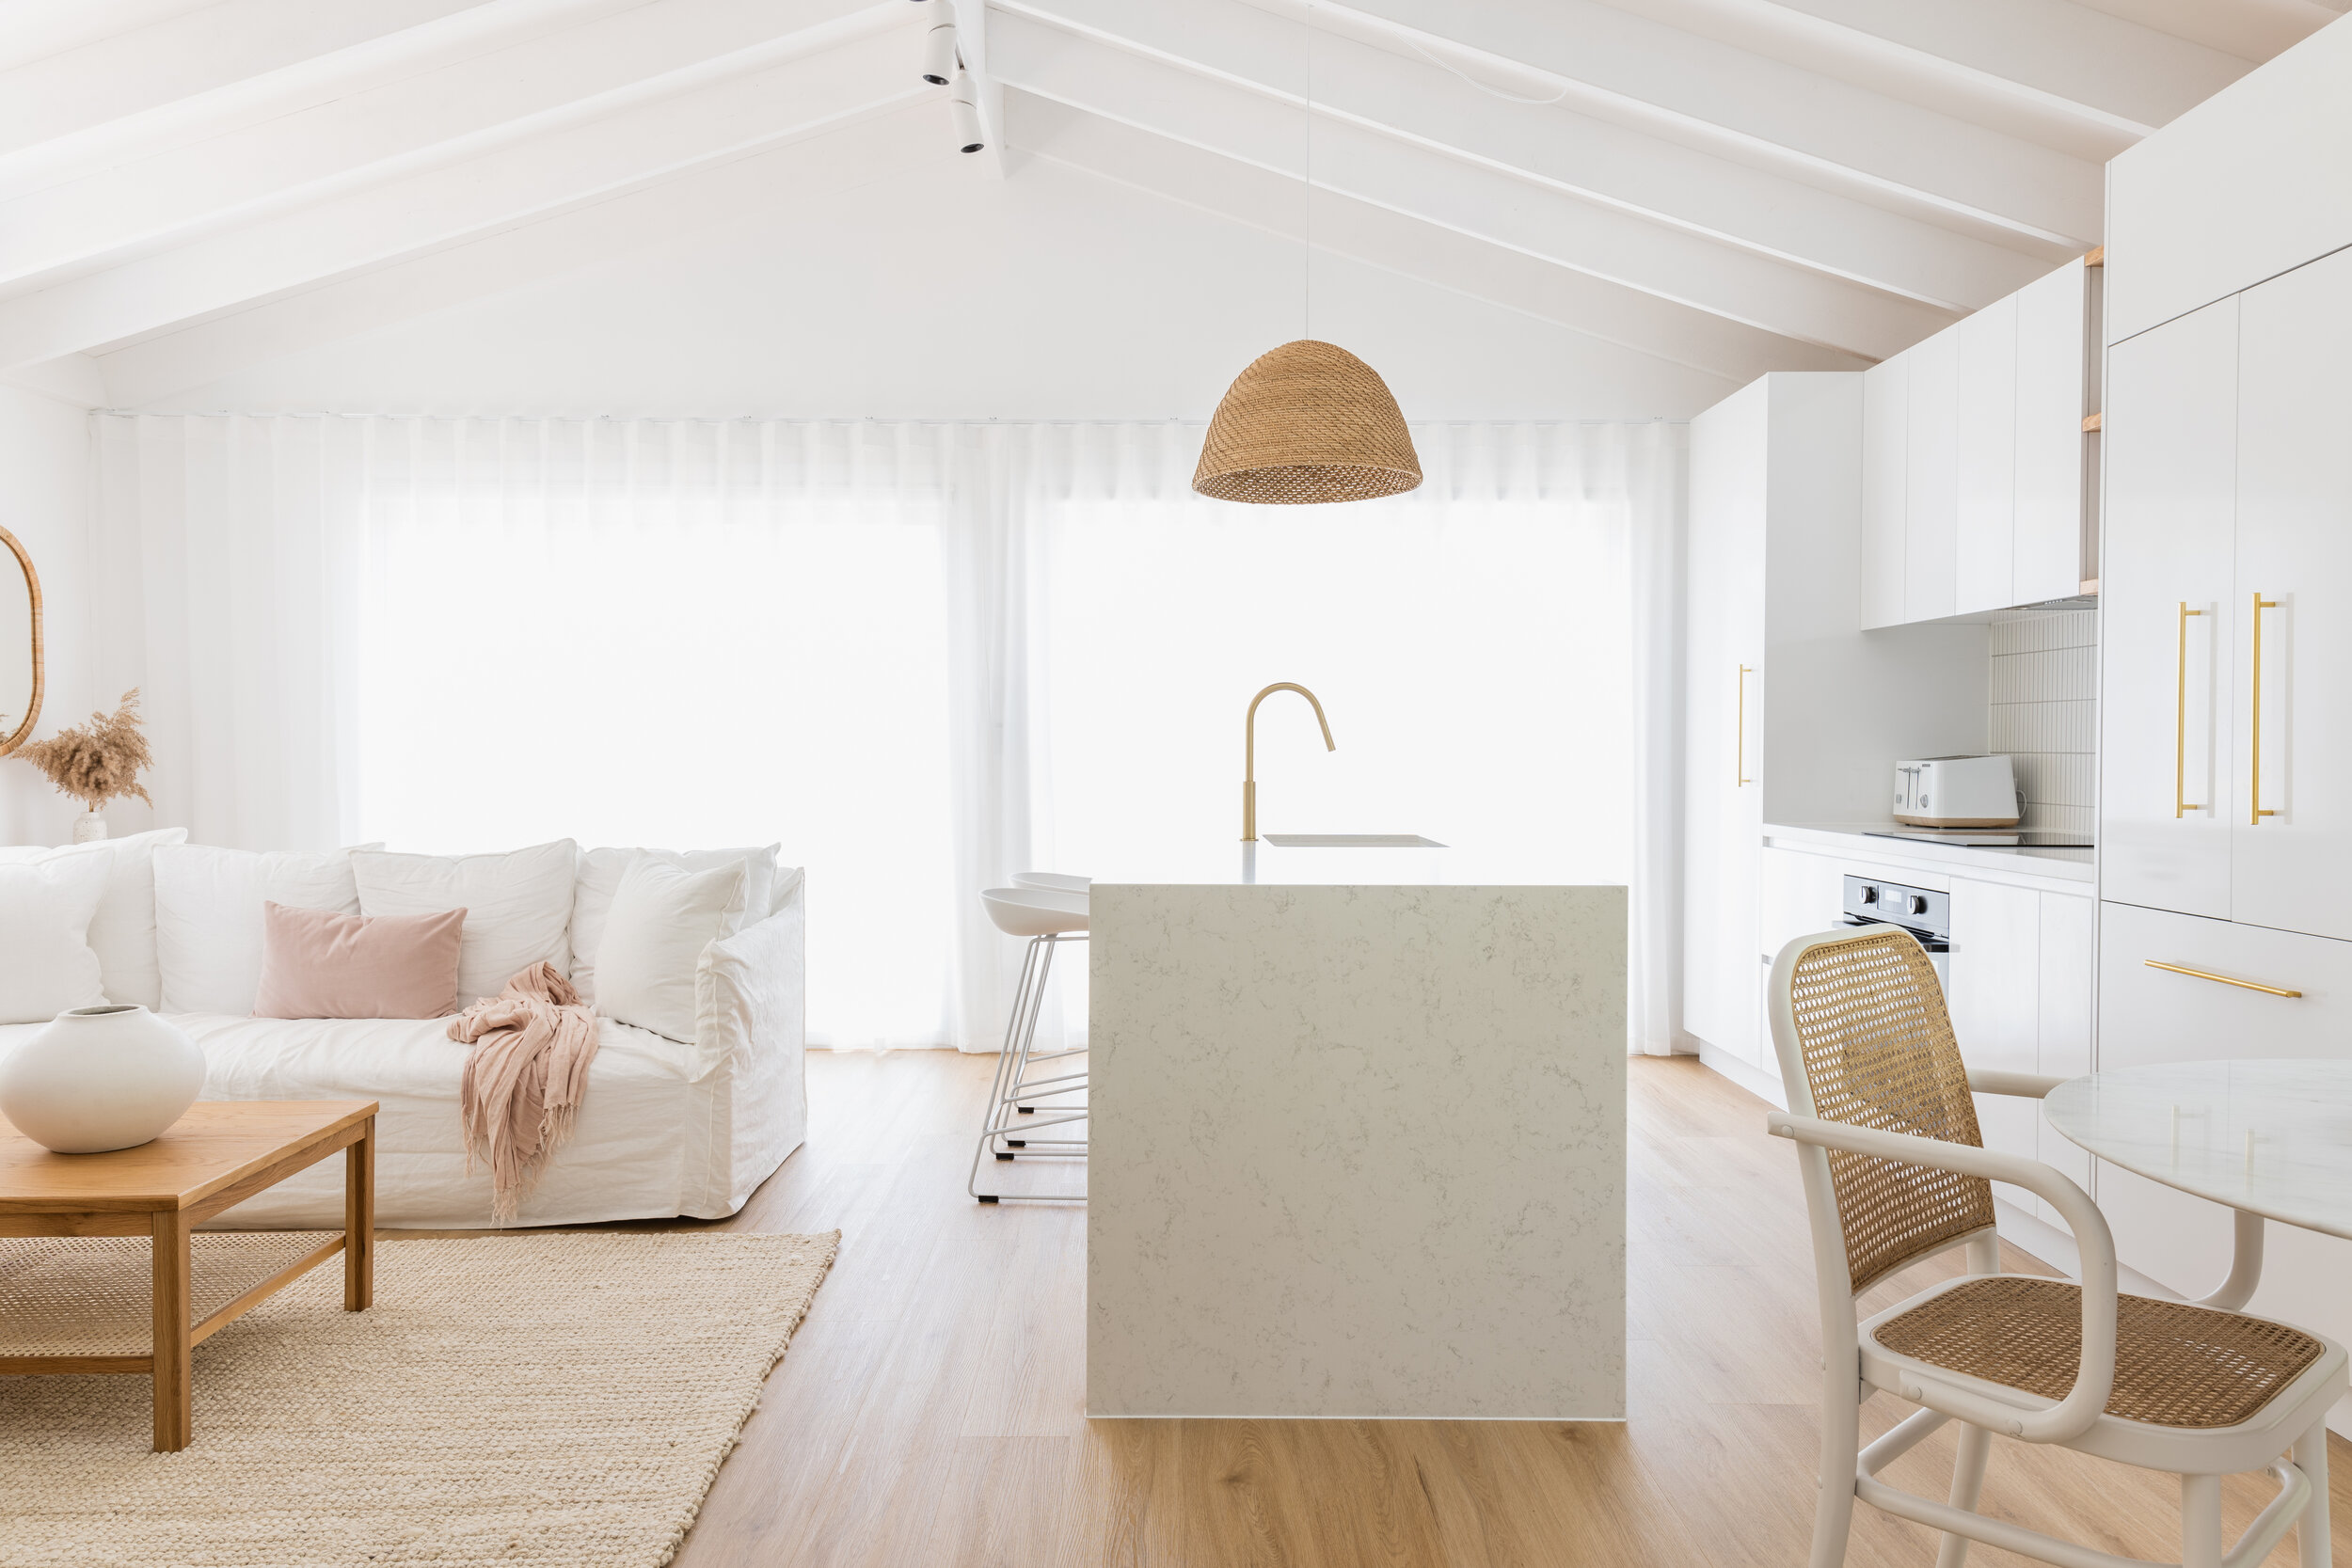
In terms of size – the living room measures approx. 3.4m wide x 5.4m long. Painted in toothpaste green, the walls in here were also filthy and I dare say, never cleaned. The front door which was on the side of the house was rotting, and overall it felt closed off and dingy (with no real lighting other than 2 Mr Squiggle wall sconces which shone into your eyes as they were at eye level)! This space was a hot mess and right before we moved in my partner painted the brown beams white, so that made a big improvement. Early on we also removed the wall lights and replaced with LED track lighting that ran the entire length of the room, added Easycraft easyVJ panels to the wall, bricked in the old front door (as it was just weird having it on the side of the house) and converted a window into a sliding door (which we used as our main entry/exit). More recently we painted every single wall in Dulux ‘Vivid White’, replaced the two front windows with large bifold doors from Trend Windows (which now is our front entry points, and put in new Tasmanian Oak hybrid flooring from Carpet Court. What a difference it’s made. There was also a nib wall dividing the kitchen and the living room, now that’s been removed the space feels much more spacious.

ENTRY NOOK
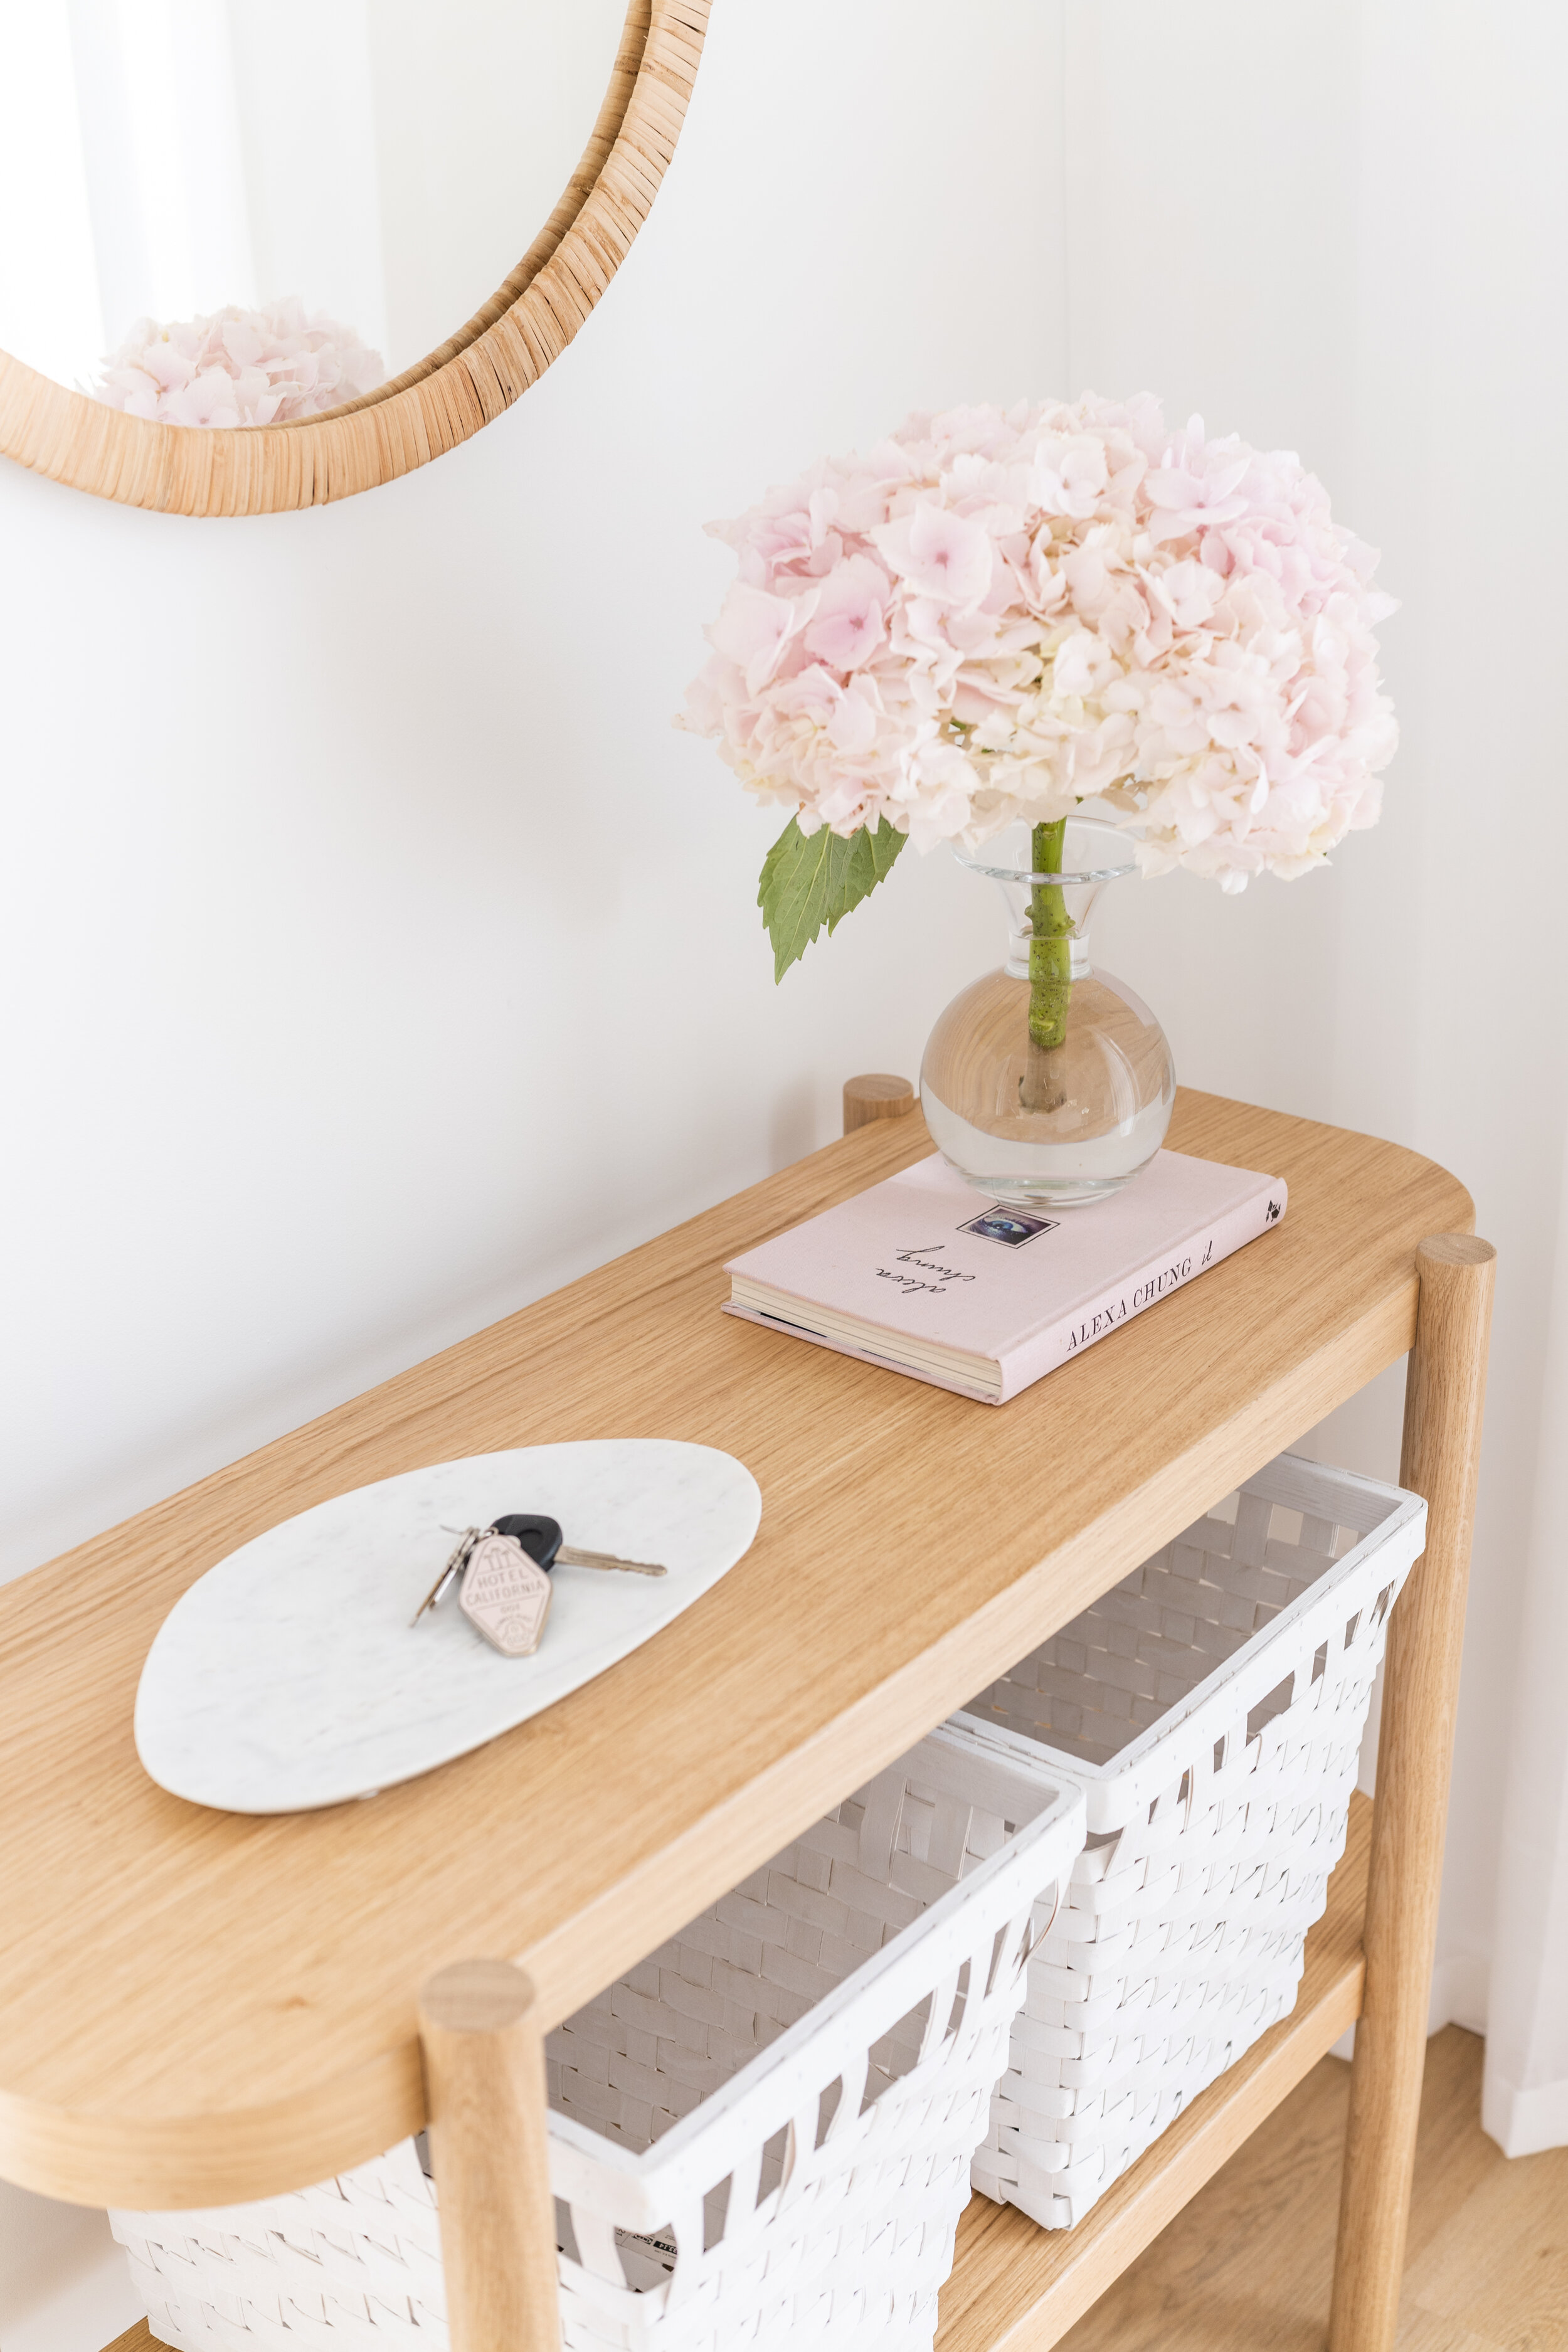
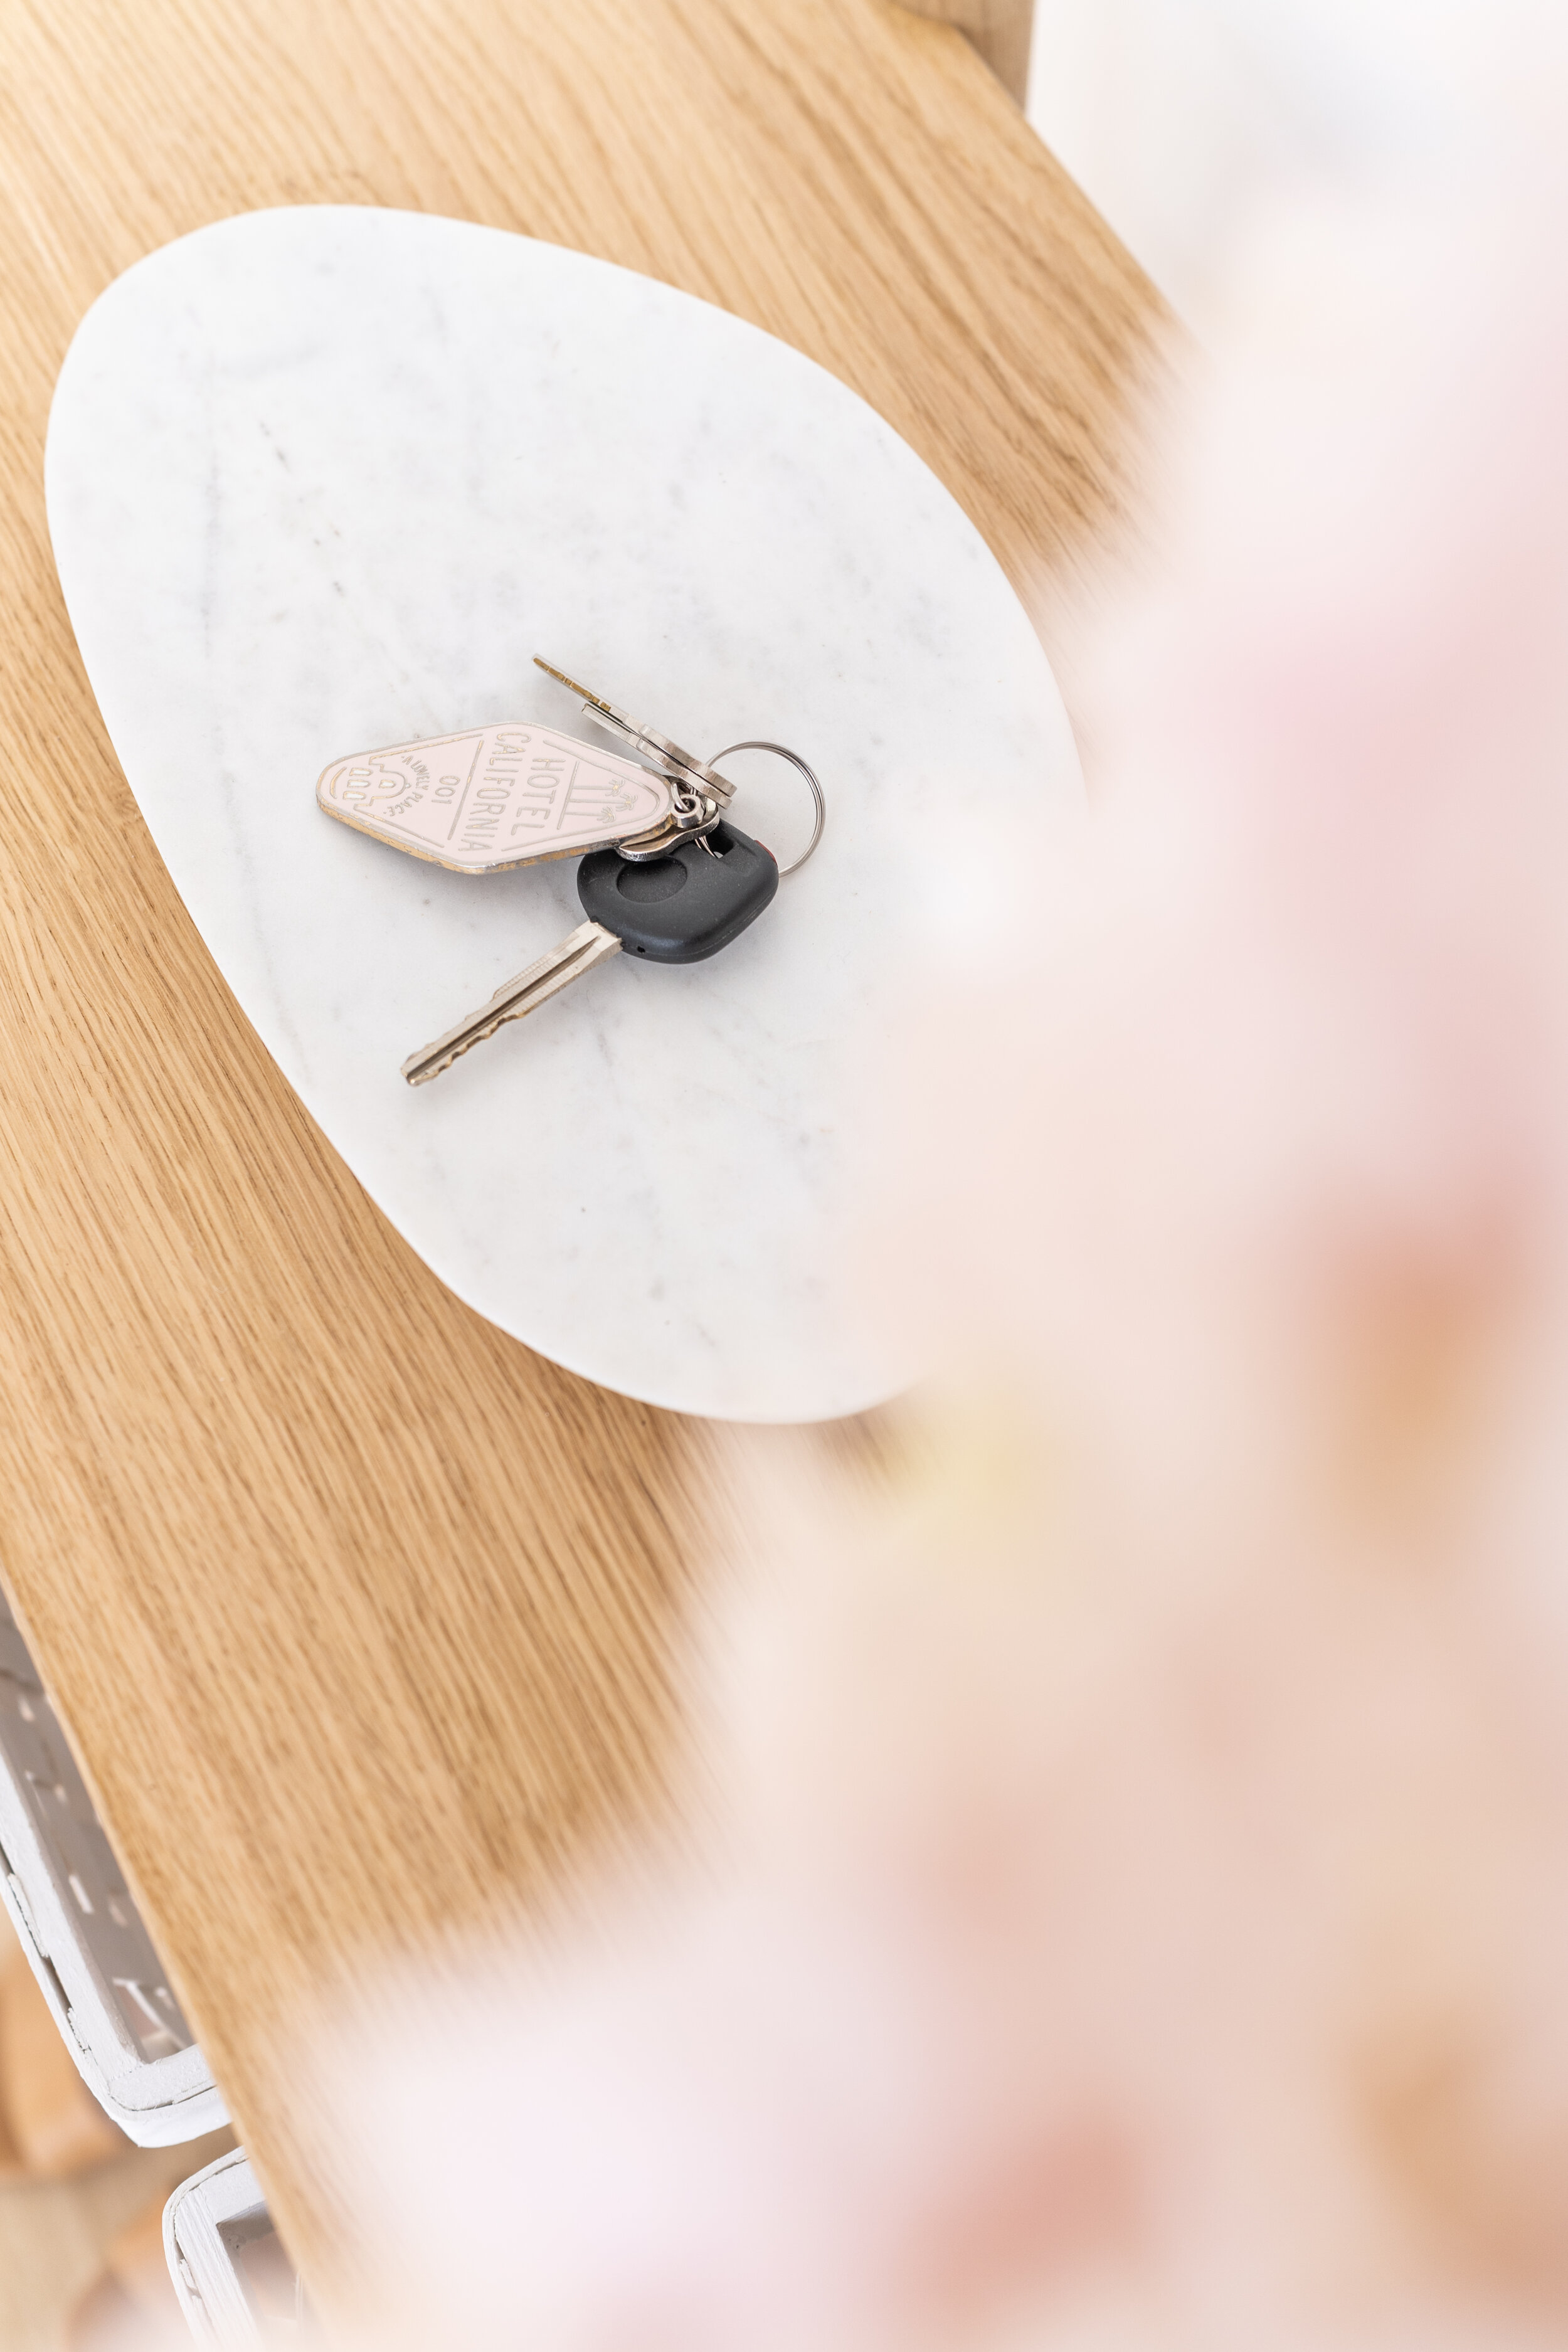
This space also includes our front entry nook. I had a small budget of $300 to give this space a makeover so decided to head to IKEA. I purchased the Opphem mirror, Listerby console table, and two Knarra baskets. All up spending $288. It’s a neat corner – an ideal spot for placing keys and storing our shoes.
CURTAINS + BLINDS
My go to store for affordably priced window coverings is Blinds Online. I have used their sheer curtains in a couple of my bedrooms so it was a no-brainer for me to use again in the living room/kitchen. I have opted for S-fold curtains in ‘Tahiti Sheer Snow’ fabric. It allows plenty of natural light to flood the space, but really helps to diffuse the light so it’s not so harsh. We are north-facing so as you can imagine this room can get quite hot, and I find having the sheers closed helps to cool the space. Plus they give privacy during the day (our living room faces the street) so this was essential.
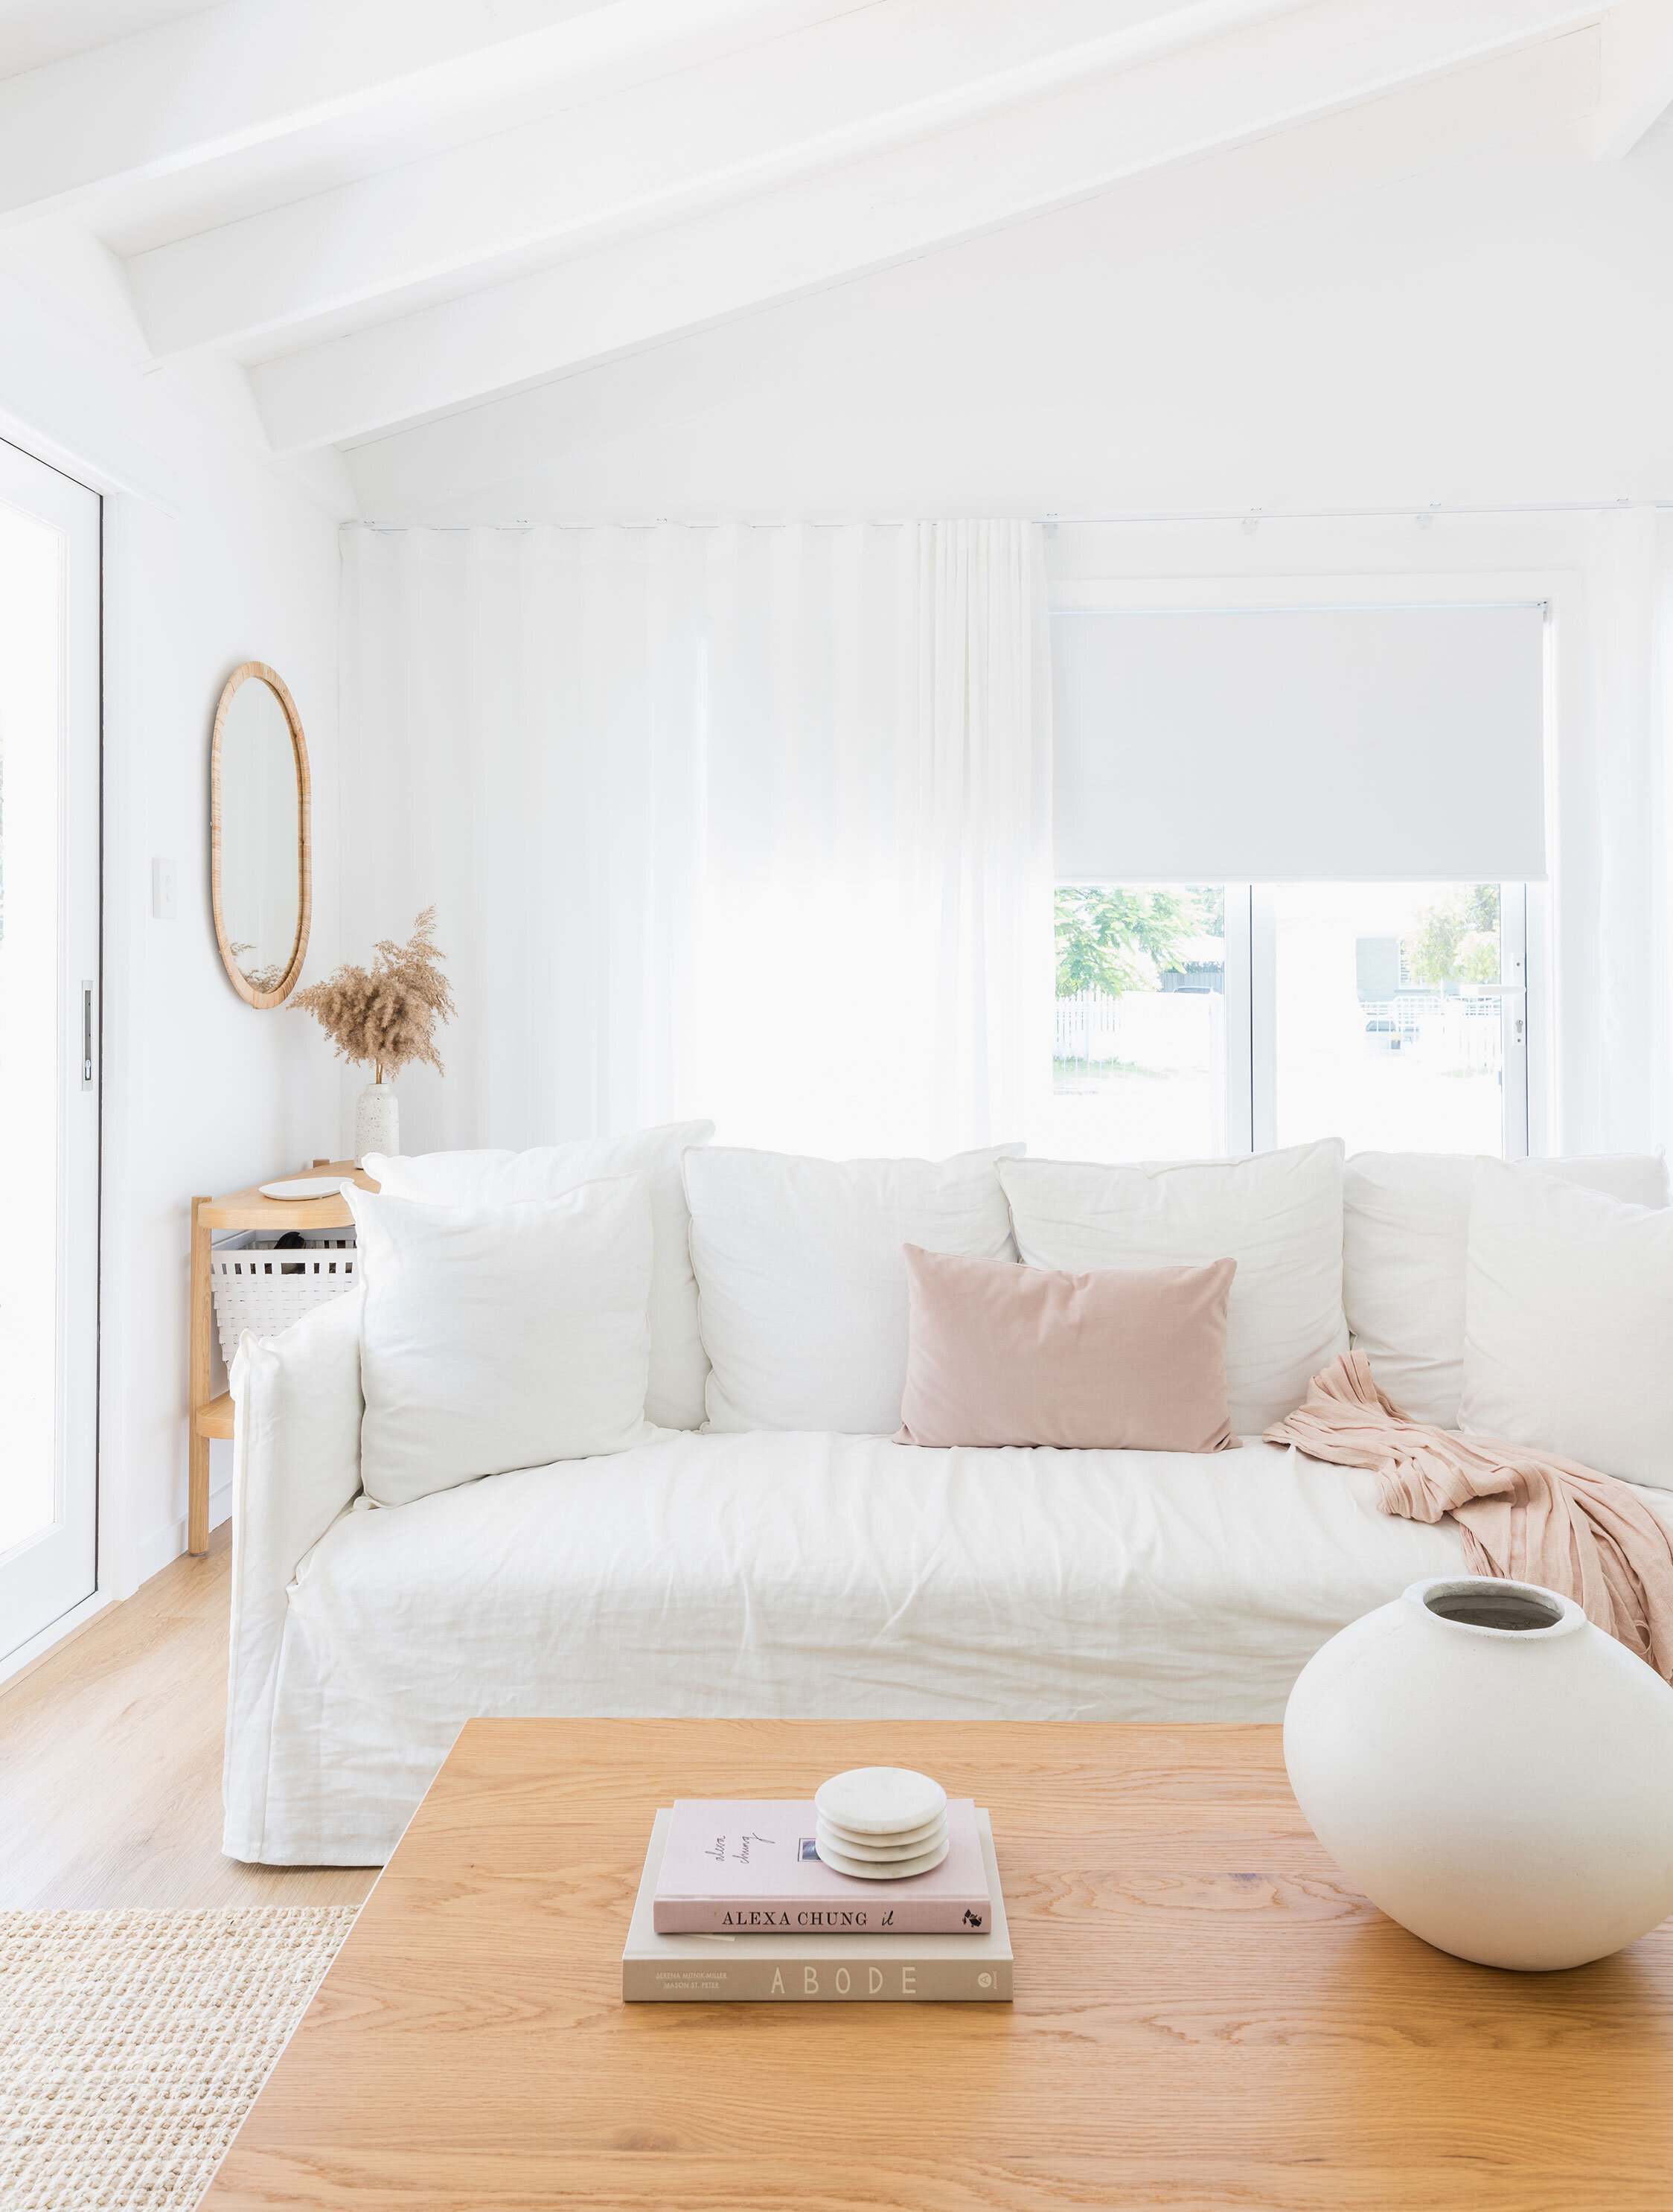
“To give full privacy at night, I’ve paired both of the bifold doors and side sliding door with ‘Moda White’ electric roller blinds. They’re operated with a remote control and all three are set up on the one remote, I just change the number and then can make them go up or down.”
To give full privacy at night, I’ve paired both of the bifold doors and side sliding door with ‘Moda White’ electric roller blinds. They’re operated with a remote control and all three are set up on the one remote, I just change the number and then can make them go up or down. I can even opt to have all three blinds go up or down altogether. It’s one of those smart additions to our home which I love (plus you don’t have a roller chain so the look is far more sleek). It’s a bit more pricey to have the electric option, but if you choose to do it anywhere in your house I would do the main bedroom and/or the living areas.

FURNITURE
I wanted to go for a really comfortable sofa – this was the number one request from my partner, so I made sure to try out the 3 seater Como sofa from James Lane in store first. Thankfully it is nice and soft and got his tick of approval. Phew! It has white slip covers and the cushion covers are also removable so I can take off and wash in the washing machine. This makes it a great option for families and this sofa also comes in a range of other colours if you really can’t live with white.
The rug is also from James Lane. It’s called the Boucle Ivory Jute rug. Nice and easy to keep clean (I just roll the rug up and vacuum underneath as any dirt just falls straight through the jute fibres onto the floor). It does yellow in a full sun position though (I’ve noticed it yellowing in the corner where it’s right next to the sliding door). So I’ve had to become a bit more vigilant at putting the roller blind down in the afternoon to prevent full sun from shining on it. This rug is best suited to a fully shaded spot with no direct sunlight. For the price point though, it can’t be beat.
And the white concrete vase on the coffee table is also from James Lane - it’s called the ‘Corfu’ vase and it’s quite affordably priced too.

The ‘Molina’ coffee table is from Interior Secrets – I love the woven rattan shelf on the bottom and the oak veneer finish (it really does look like a real timber one)!
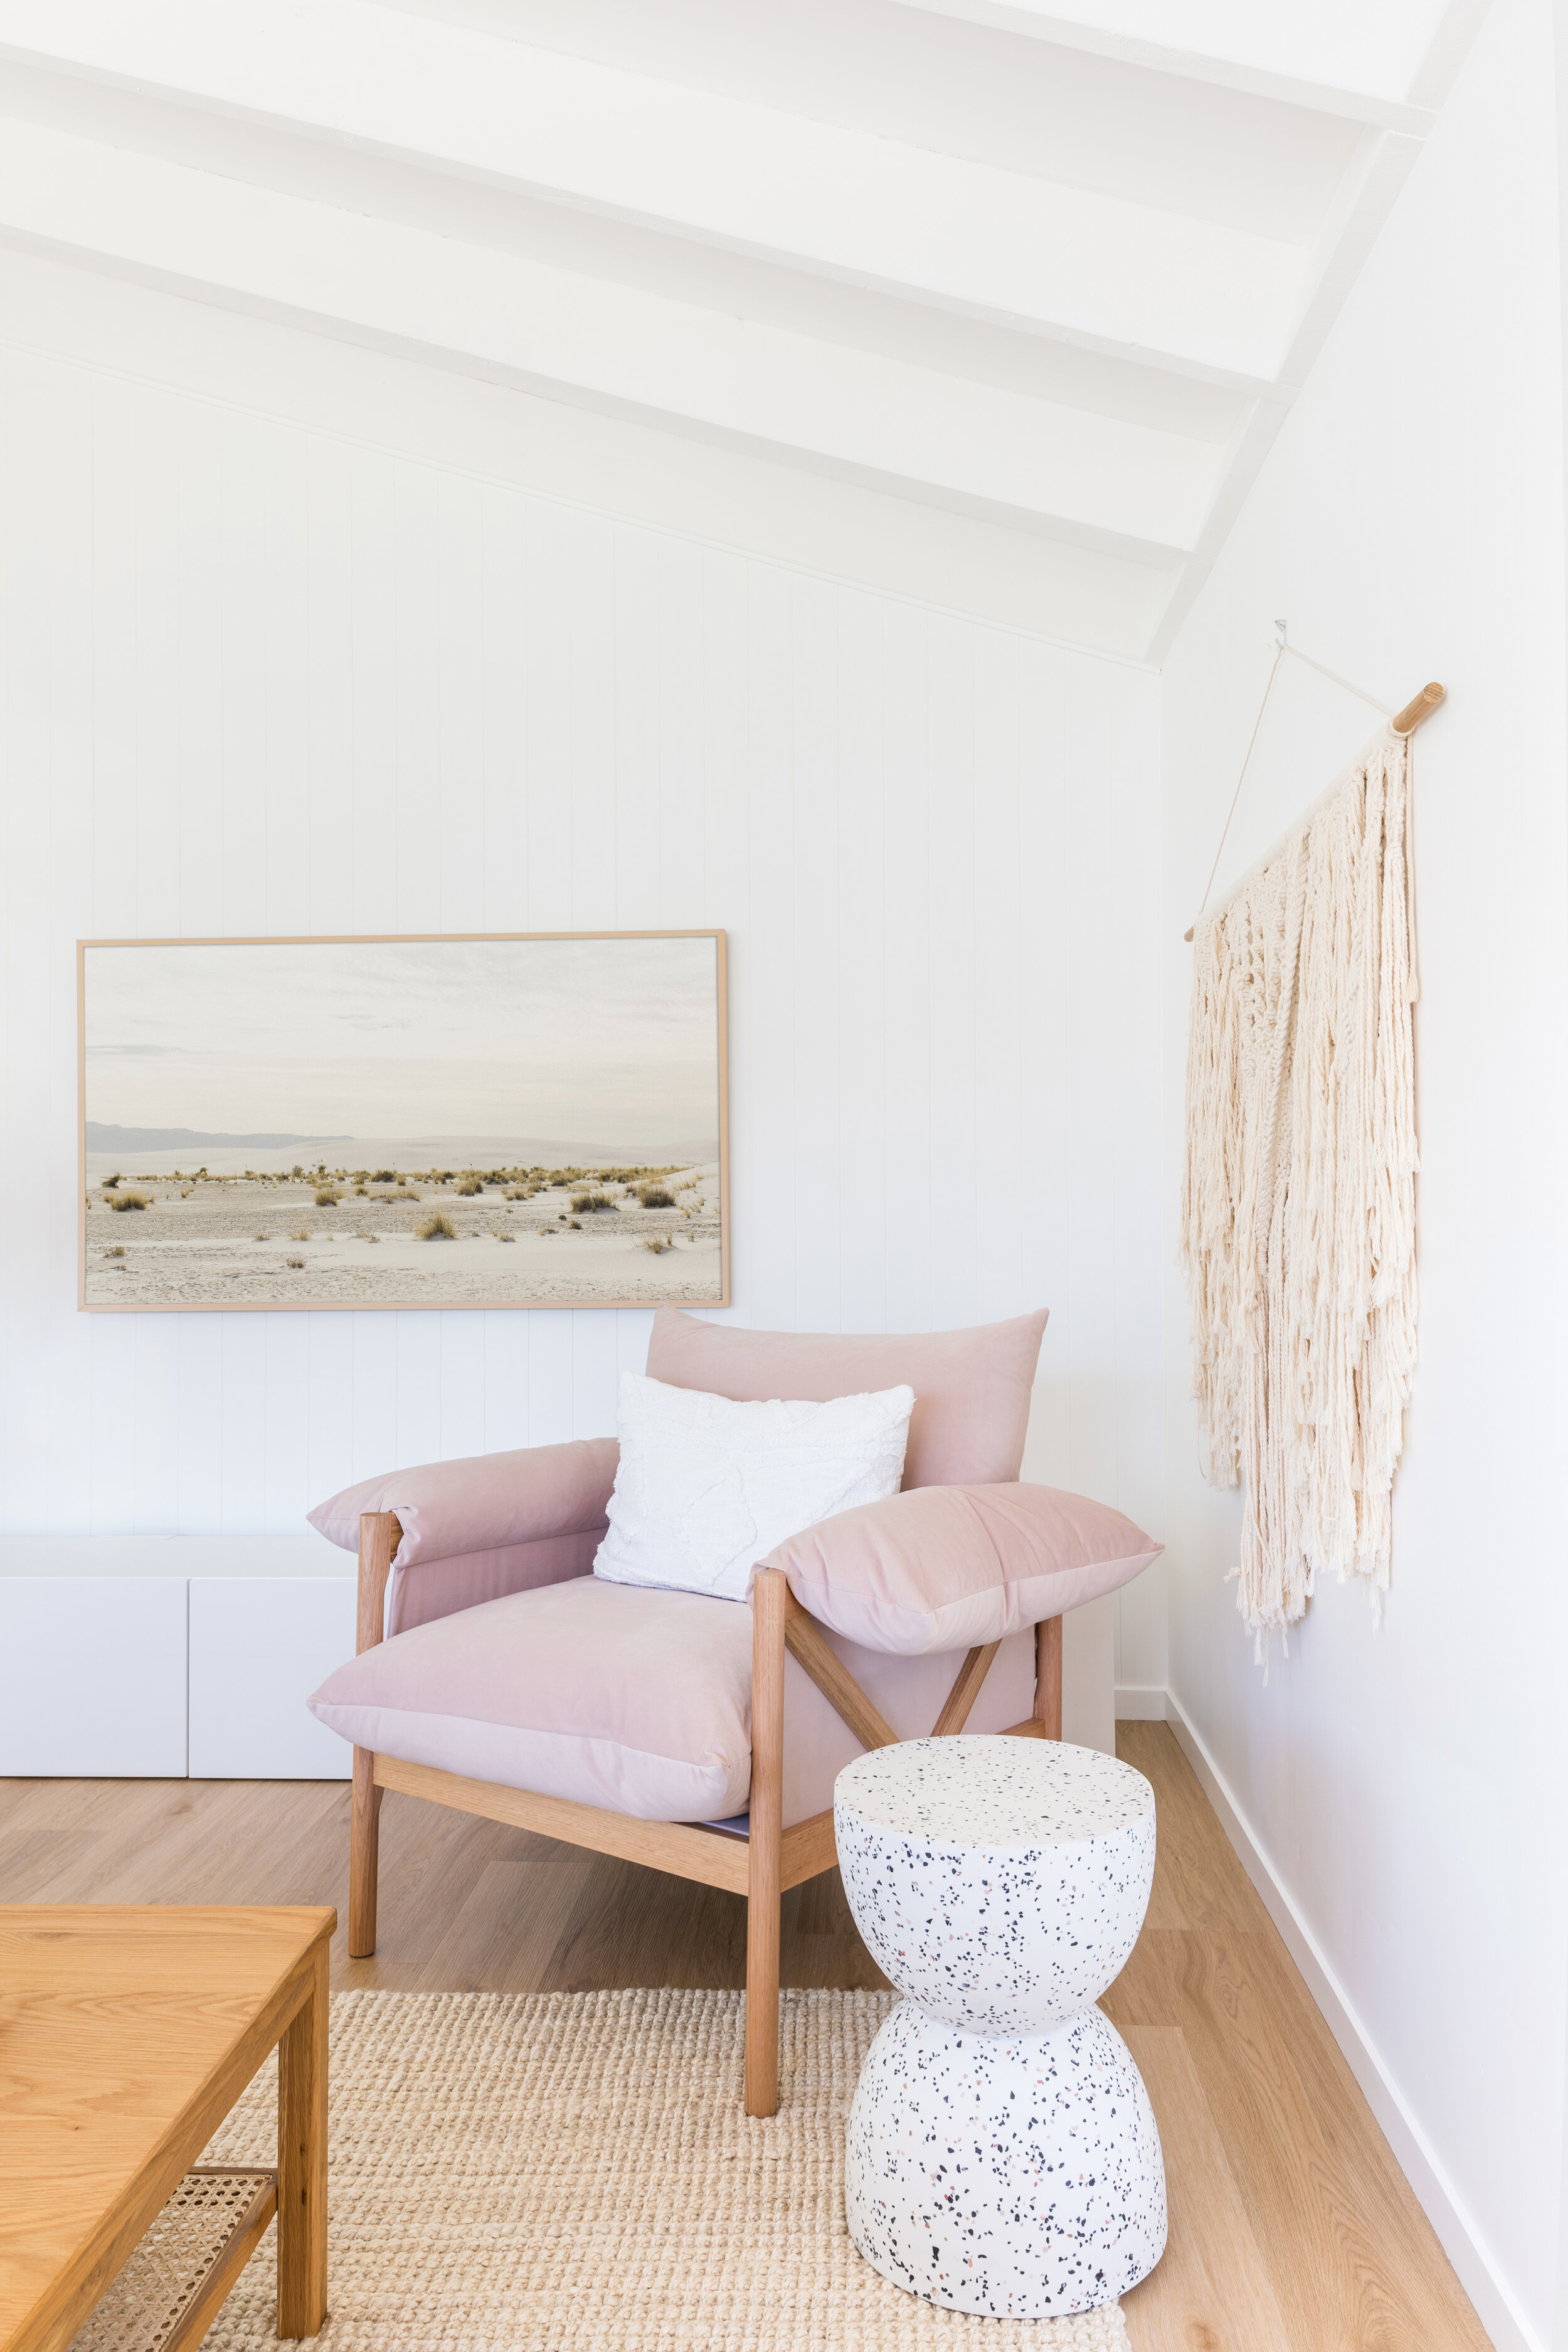
I think the hero of the room though has to be ‘The Loft Lounger’ armchair from The Cullin Design. The frame is hand crafted from Tasmanian Oak and ties in with all the Tasmanian Oak details in the kitchen. You can choose whatever fabric you want and Sheree at The Cullin Design was so helpful in getting me lots of samples to check out before making the big decision. In the end, I chose Warwick Fabrics Plush Petal and had matching cushions made up by my mum to tie in the dining nook with the living area and the colour also matched my Jai Vasicek ‘Lani’ art print. The chair is so comfortable to sit in – it’s like sitting on a cloud. It’s now my favourite spot to sit and read a magazine.
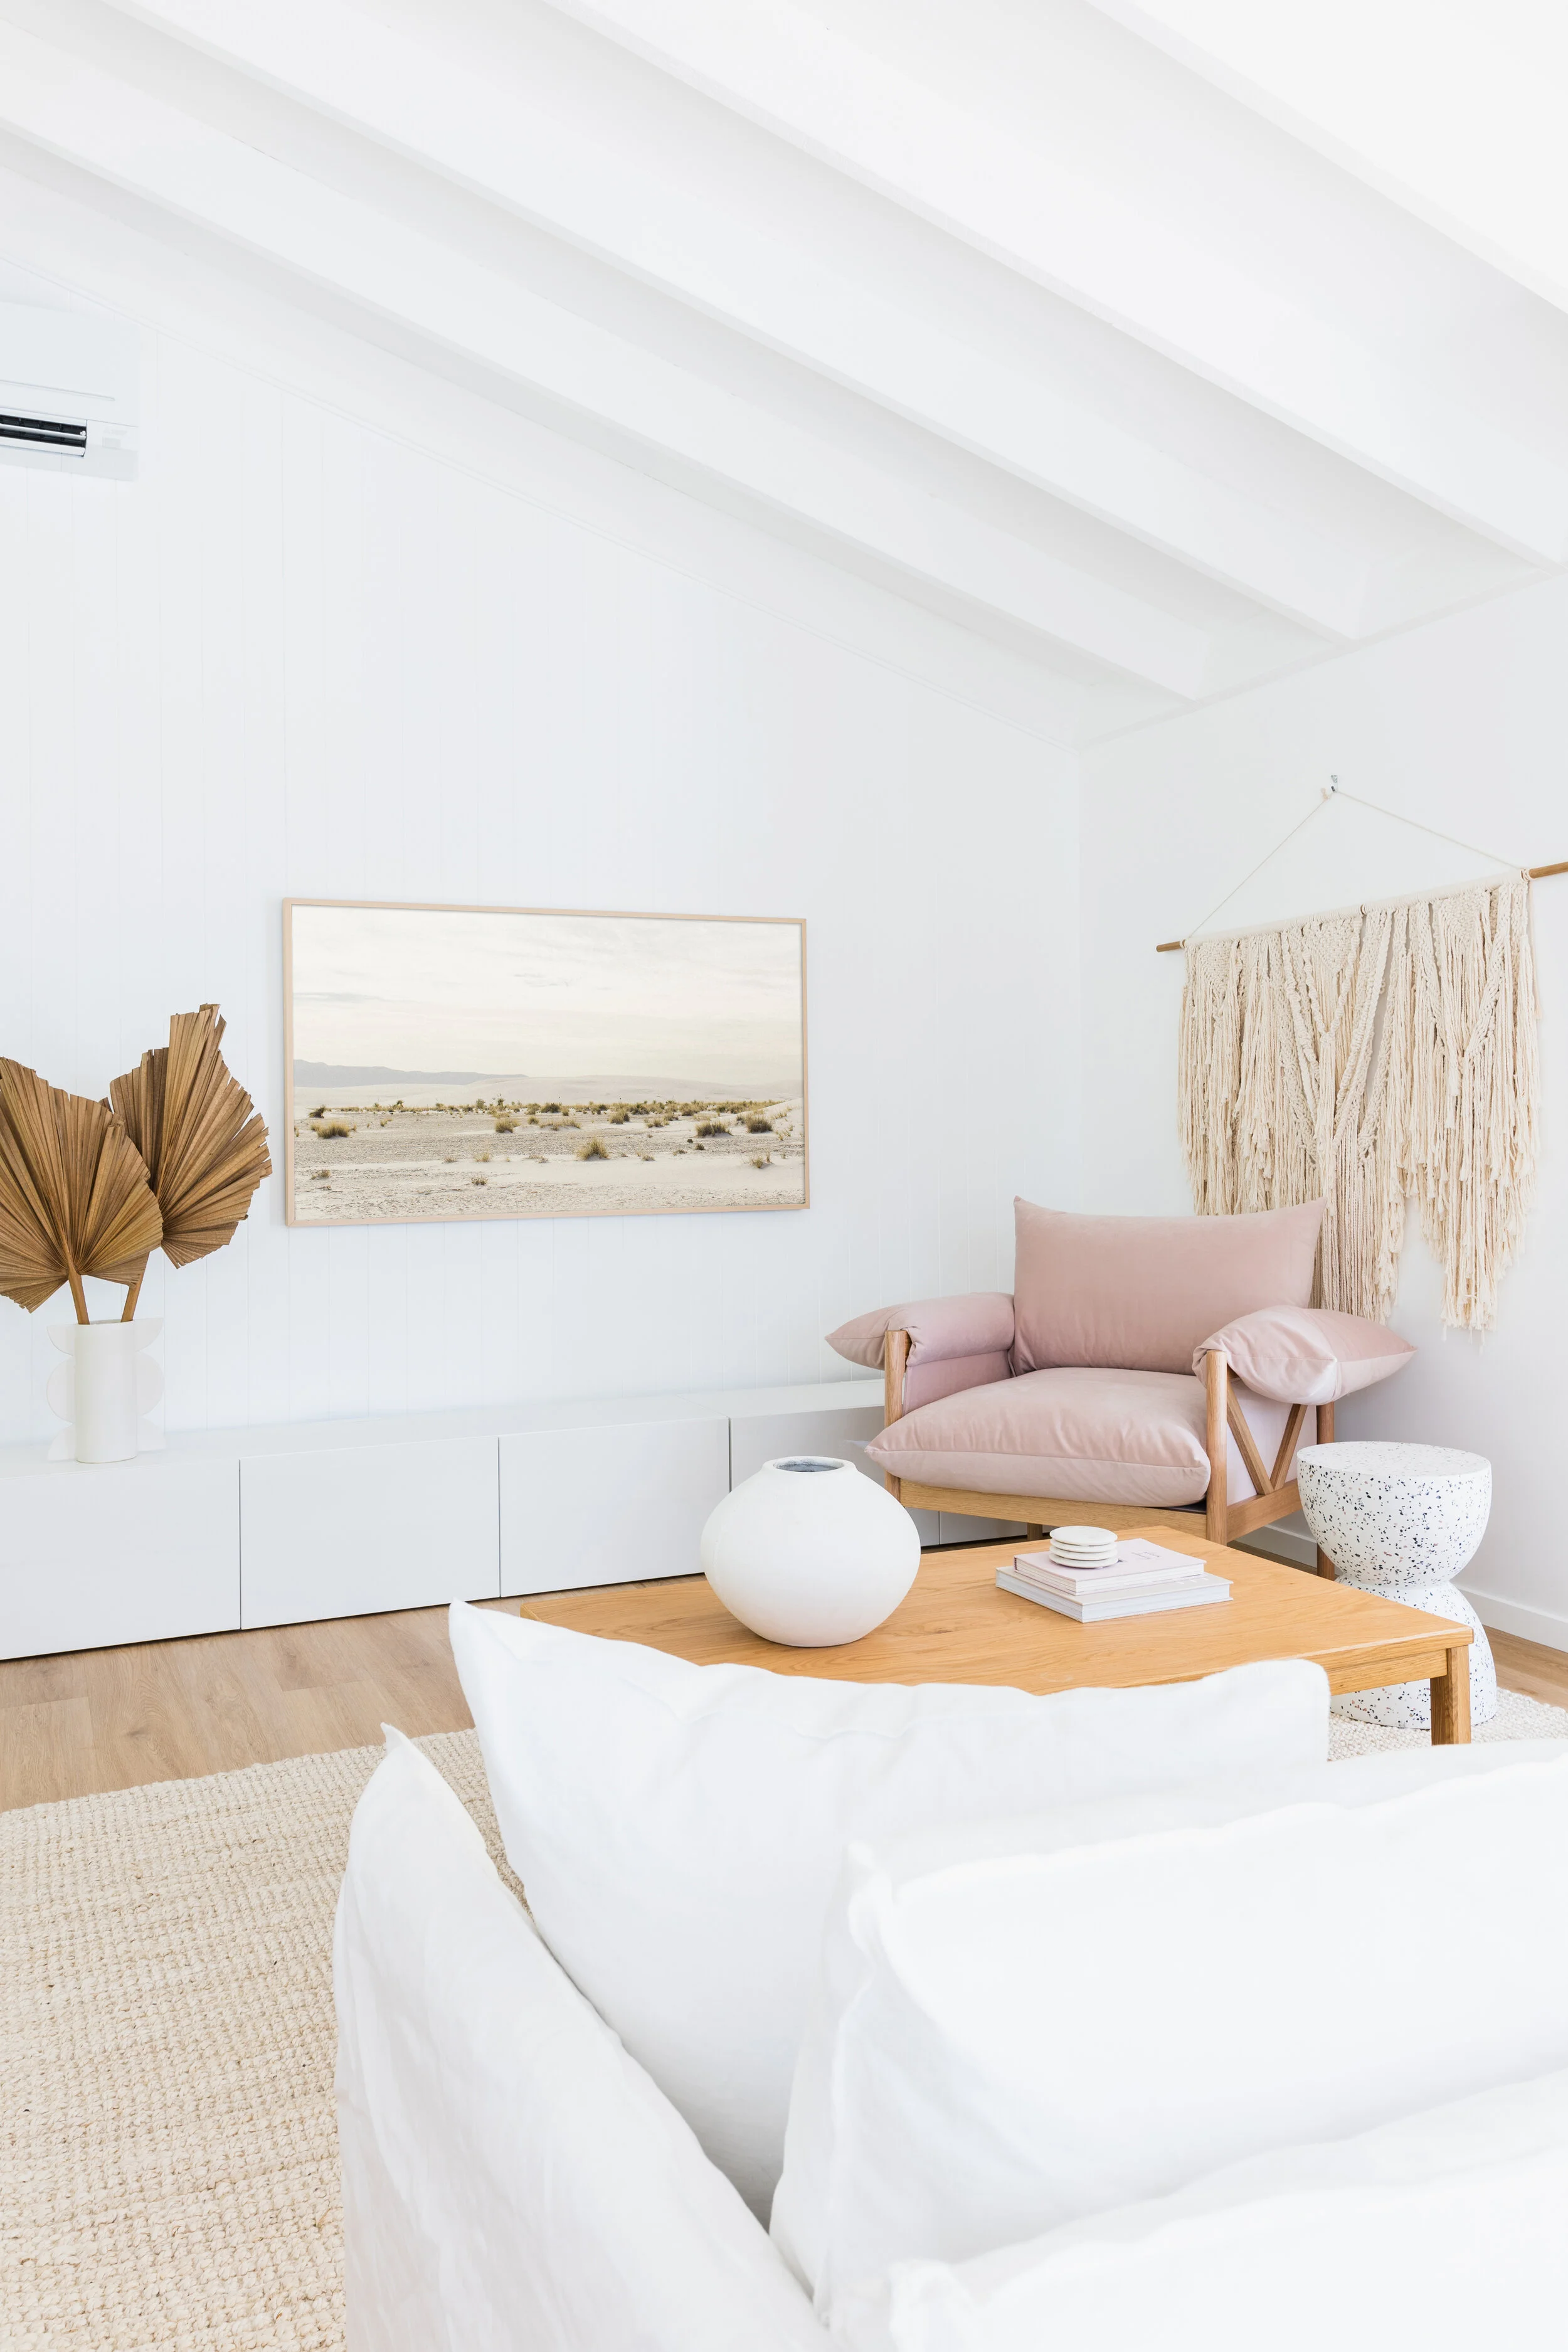
The entertainment unit is actually two Besta TV units from IKEA pushed together (one 2-door and another 3-door) so that it ran pretty much all the way along that wall. Above it is a Samsung The Frame TV. It looks like a piece of art when you turn art mode on, and you can choose from one of the free artworks (there isn’t much to choose from), or can even upload your own. I have used Etsy to find The Frame TV art and also used some prints from Juniper’s online store. Full disclosure I’ve had to photoshop the artworks in as there was too much sun and glare on the TV and it wasn’t photographing very well. You don’t have to turn art mode on, you can simply turn the TV off. There is a sensor in built into the TV which sense motion, so if art mode is on, and you leave the room it will turn off saving power. Genius.

PLEASE NOTE: *Bifold doors and installation was not included in the budget above - this pricing will be disclosed when our front of house is revealed on the blog (still a work in progress). Cost of flooring and install also not included as the flooring covers a larger area than just living - it includes kitchen, dining, living and hallway.
