My Front of House Renovation
A year in the making, the front of our house is pretty much fully finished. We converted an ugly brown brick house into a white weatherboard dream! Here’s how we did it.
Photography Mark Zeidler, Coast Park Creative
FRONT OF HOUSE MAKEOVER

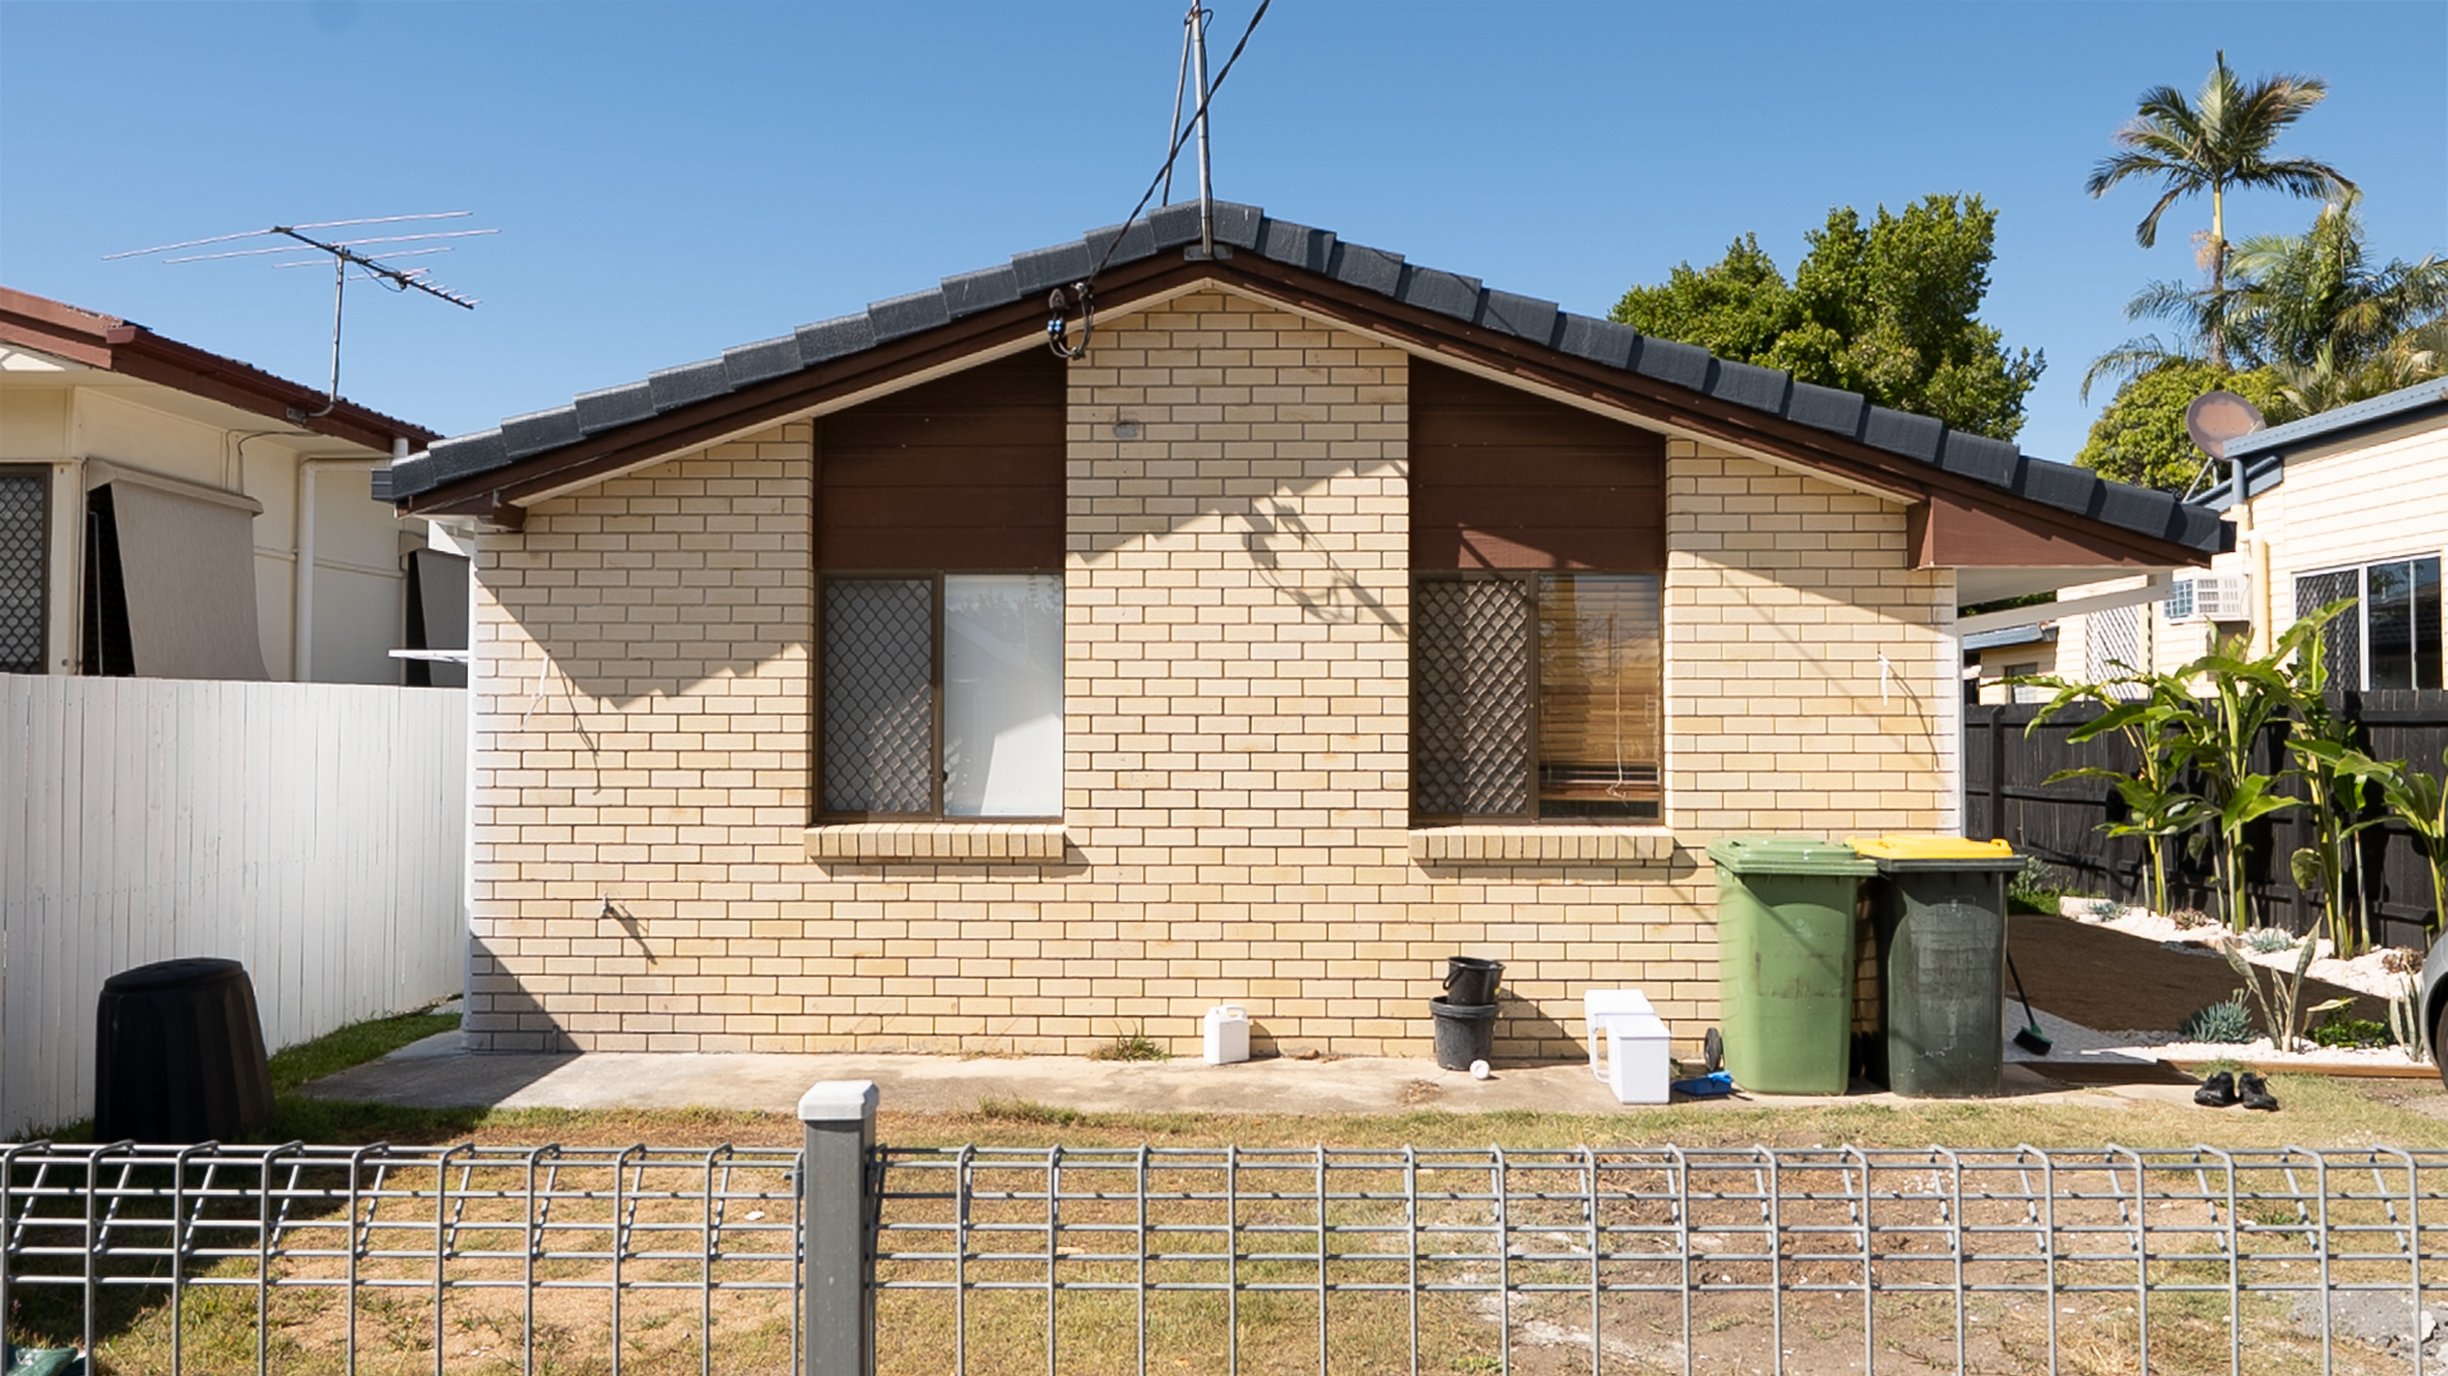
BEFORE
Our house was a typical 90s suburban home. It had no character. Oh and a big old air conditioner vent out the front! Who does that? It was both a blessing and curse that the vent caught on fire in the middle of a very hot summer. Yes we swelted it out for a few weeks, but our insurance came through and covered the cost to replace it. That meant we could replace and relocate the air conditioner to another spot in the living room and have the new vent out on the utility side of the house (much more discreet now).

Full disclosure: the driveway does NOT look like this. We photoshopped it because it hasn’t been resurfaced yet and looks bloody awful!
Also there are powerlines attached to our house, this looked like crap obviously so we photoshopped out for this reveal.
The first thing we did to the exterior was paint the roof - we hired a professional roof restoration company who painted the entire roof in ‘Charcoal’ by Industrial Roof Coatings, and fixed some broken roof tiles. The colour is a close-match to Colorbond ‘Monument’. I’m happy with it but Monument can throw blue-ish tones in certain light, so be mindful of that.
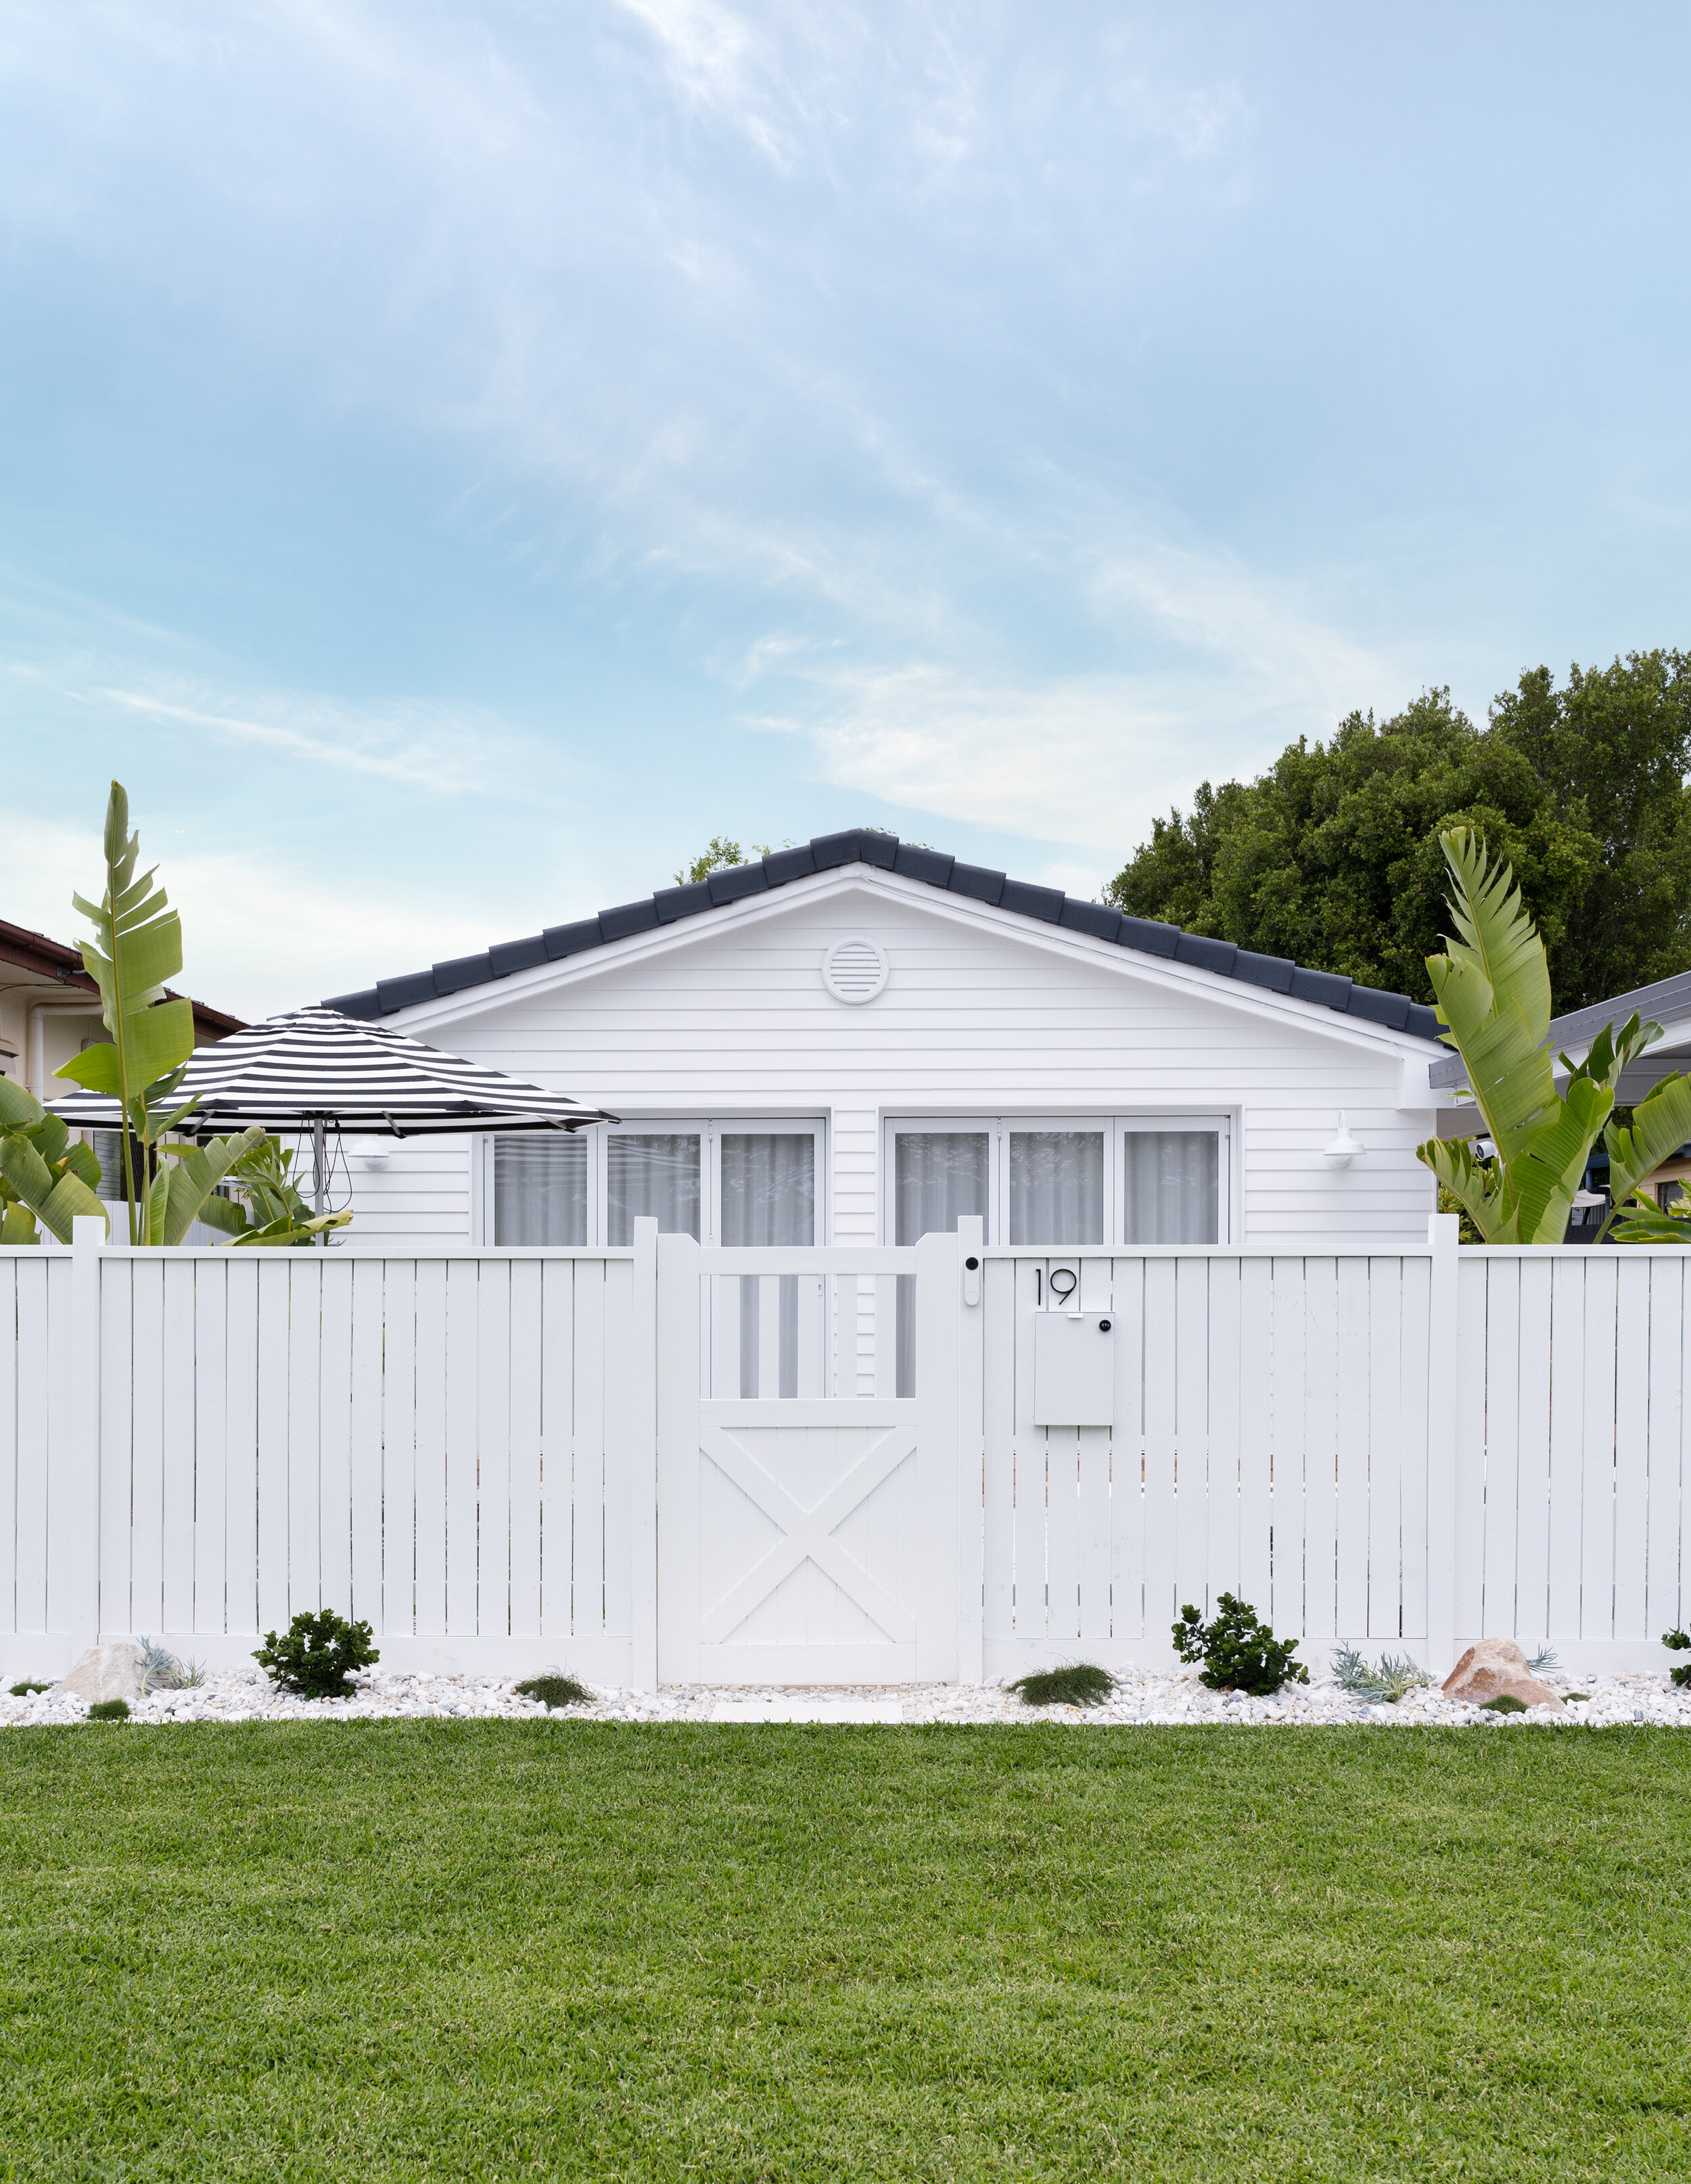
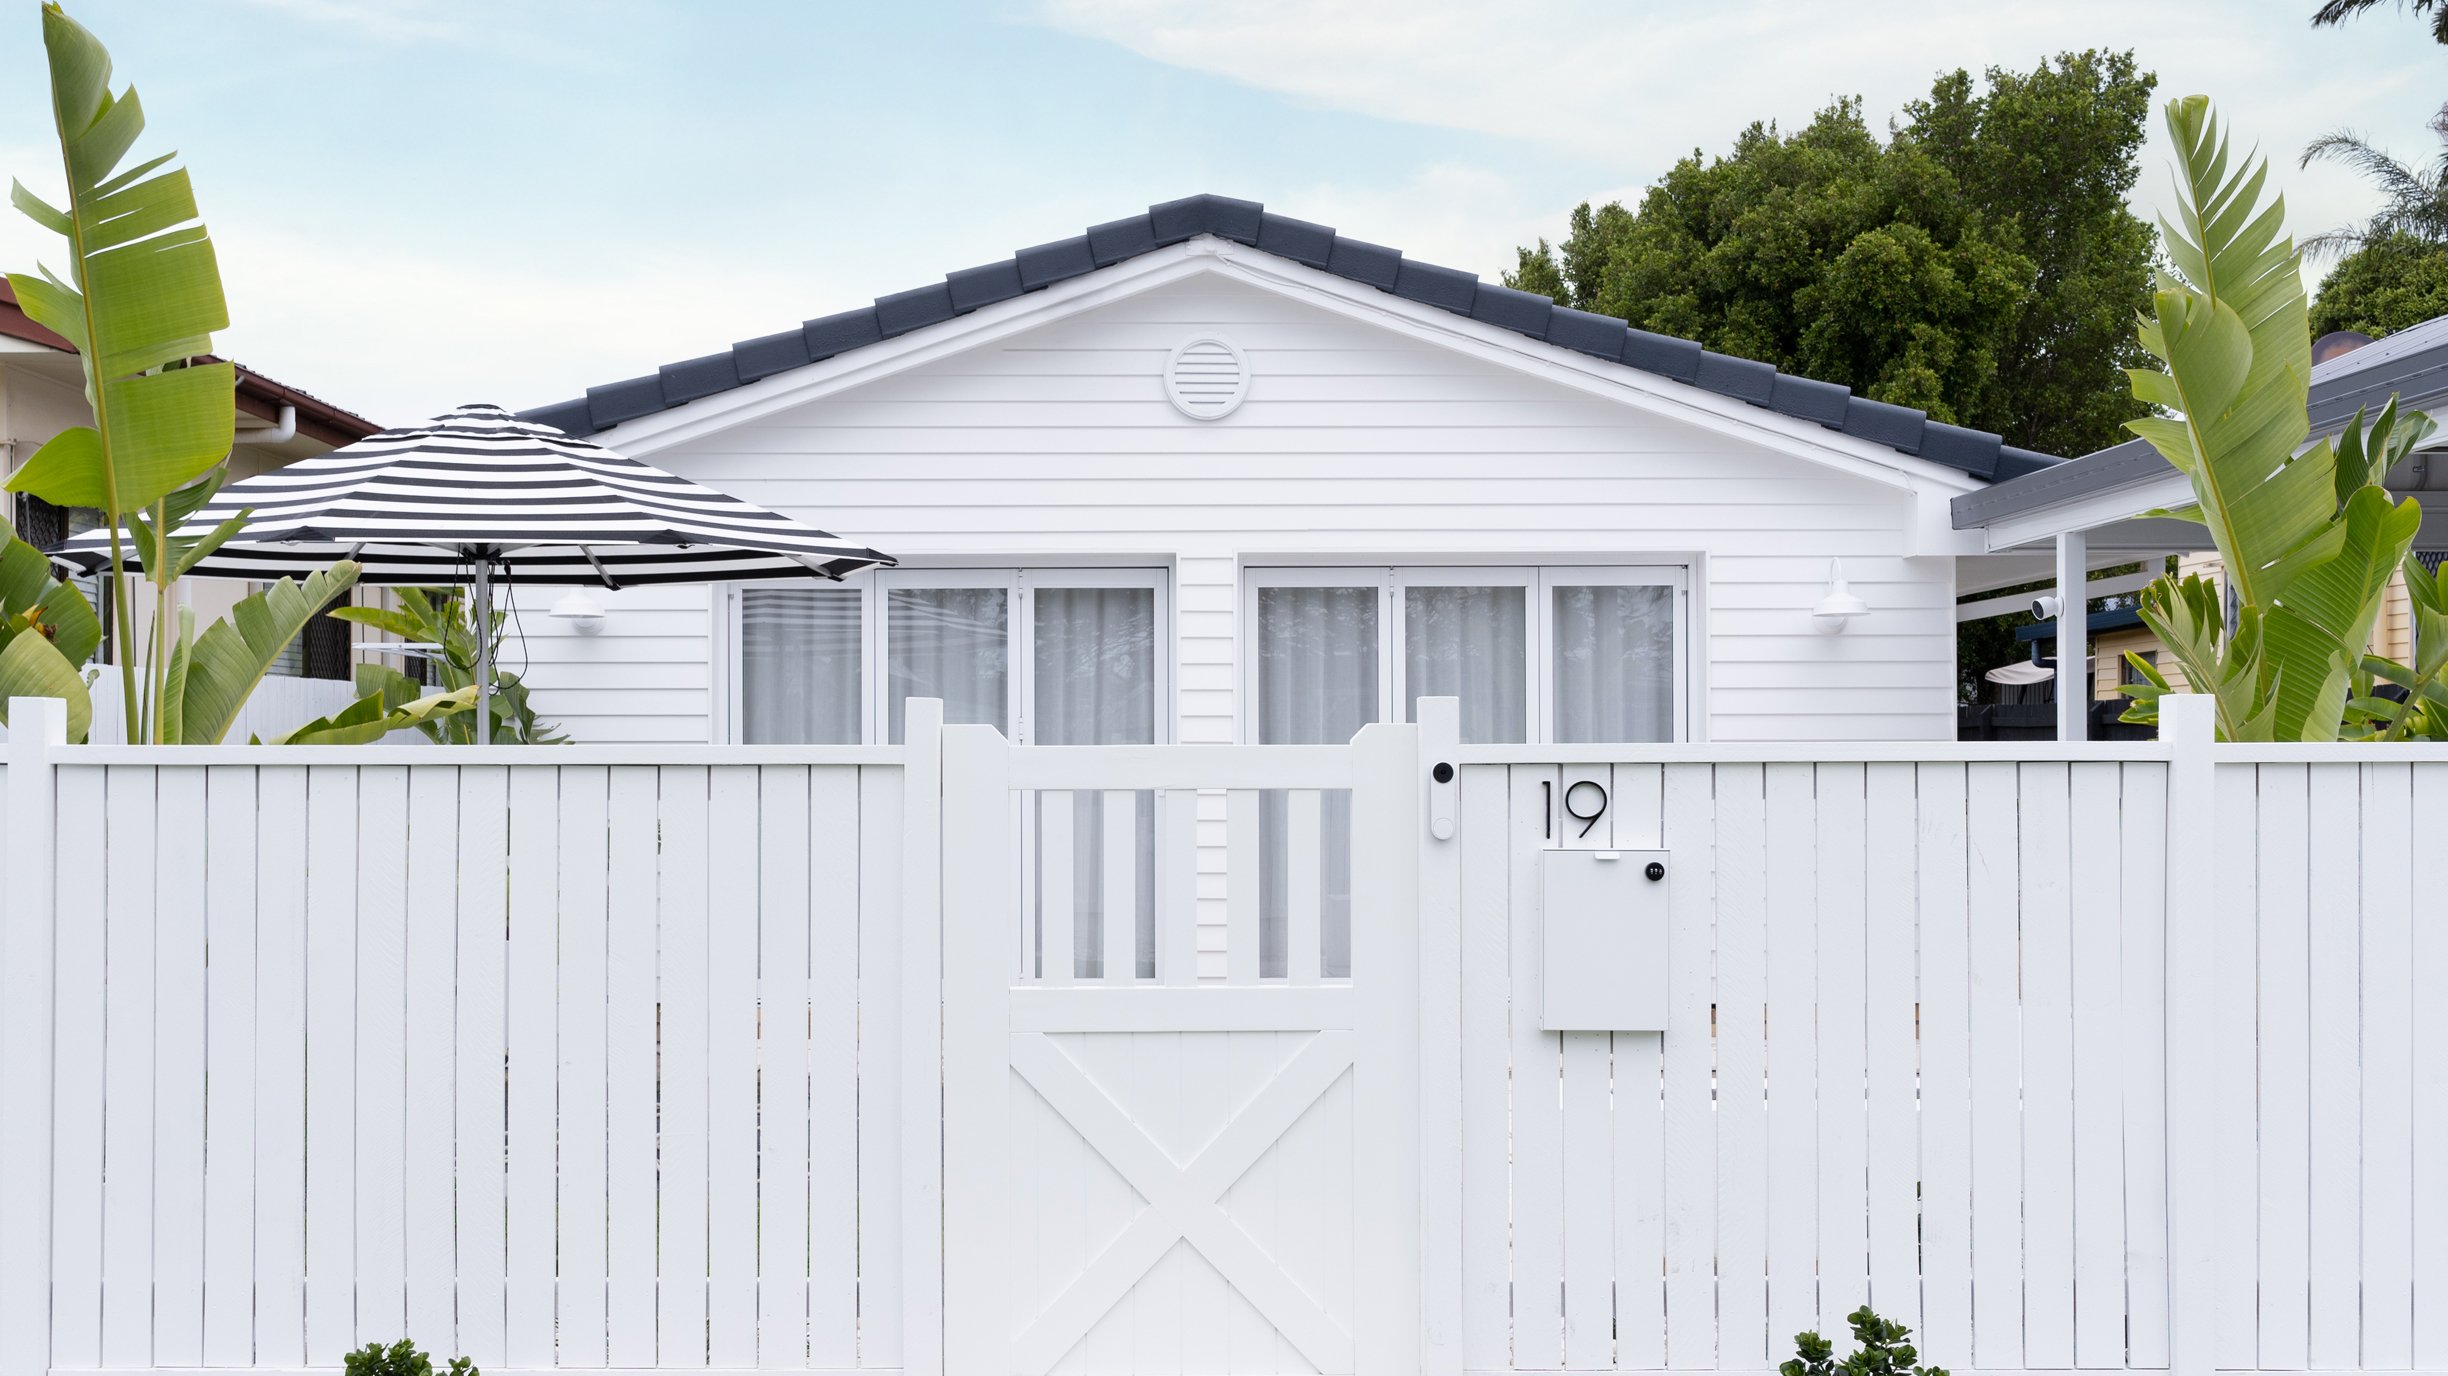
The next big thing we did was replace the two pokey windows at the front with two sets of bifold doors from Trend Windows. It certainly wasn’t a cheap exercise, but as the front of our house also contains our kitchen, living and dining, it just made sense that we would put bifolds here so they could let in lots of natural light and open out to our deck and entertaining area (still to come). We use these as our front door now. You can simply open one door up (same way you would with any door), you don’t need to open all of them up just because they’re bifolds.

Then we had the front clad in James Hardie ‘Linea’ weatherboards. Our carpenters attached battens to the brick, and then clad over that. That was another big ticket item for the front of house, but so worth it, it completely transforms the front of house now. It looks way more coastal, and more in keeping with my overall vision for the house.
We painted the house ourselves to keep costs down. We chose Taubmans ‘Crisp White’. It doesn’t throw any undertones of any other colour, it’s very much a true white. The fence, gate and carport are also painted in the same colour.
Adding some coastal farmhouse flair are the ‘Austin’ wall sconces in flat white from Barn Light Australia. We’ve put them on both the house and the carport to tie it all in together. My electrician always comments on the quality of these lights when he’s installing them.

CARPORT
The custom-made carport was a big ticket purchase, costing close to $22,000. I kind of hesitated about it – and I wish I hadn’t, because I love it now that it’s here! It has not only given us shelter for our car, but also given the whole home a much larger looking footprint. We hired Homestyle Living to build and design it. They are a company that specialise in carport builds and they took care of everything from the build, to the council approval process and even the concrete slab underneath it. I briefed them to make it look like the front of our house, so they used the same cladding and Colorbond ‘Monument’ for the roof colour (a very close match to our house’s roof). I highly recommend Homestyle Living, they were great to work with, and super helpful along the way. I’m equally happy with the workmanship too. Honestly I give them a 10/10.

The finishing touch on the carport was the sectional garage door from Steel-Line. I chose the ‘Slimline’ profile in ‘Perisher White’. It’s a premium colour, but so worth it to have the white closely match our house. They have other Colorbond colours and even timber-look finishes. Steel-Line’s doors include the motor, remote control and installation. I’m so thrilled with how it looks and how it provides some privacy from the street. It’s the cherry on top of the carport!


LANDSCAPING
For me, it was super important that the front of house made a good first impression, so that’s why I made the decision to replace the entire area of grass out the front. What was there before, was a combination of two different types of grasses and plenty of weeds. As it’s one of the first things you see, it was so vital I picked a great turf that can hold up to our hot conditions. I went with Buffalo Sapphire which is suitable for full sun conditions (we are North facing so this area gets full sun all day long). It’s also drought-tolerant and I’ve been told, looks green even in winter. It’s soft underfoot, and I just love the look of this turf. It honestly makes me smile when I walk on it.


The garden edging was actually left-over treated pine from our fence railing. I painted it in Dulux Colorbond Night Sky (to match our other side and back fence). We had this installed after we ripped out the grass, so that it could be level with the new grass and new garden beds. It’s one of my most-asked about things in the garden on Instagram funnily enough!

The front fence also makes a great first impression, it’s made of timber and painted in Taubmans ‘Crisp White’. We had Jarrod from @therenoproject_ build it for us (he also clad our front of house). It measures 1.5m high (and the posts are 1.6m high). We teamed it with a farmhouse style gate from Billygoat Barn Doors and it’s honestly my favourite feature out the front. It adds so much character to the house now. I think the height of the fence is just right – it allows some privacy, yet it doesn’t block too much of the house (afterall, we don’t want to hide too much of that good looking facade).
In terms of plant selection we went with some mature Nicolai Strelitzias which sit behind the fence (I’ll do a full reveal of that garden and space once that area is fully finished). Plants in the front garden bed include Cousin It, Desert Star, No Mow Grass, and Blue Chalk Stick. Everything is looking a bit small right now, but give it a year or two and this garden will absolutely be thriving and double the size.

I chose the ‘Siena’ parcel and mail box from Milkcan Outdoor for its simplicity and clean lines. It’s perfect for us as we receive parcels all the time. When I shop online I can just write a note at the checkout for the security code for the delivery driver to open the letterbox and leave the parcel inside (providing it fits of course). When the mailbox is locked, you can open it a small way down to fit things like letters.
The house numbers above it were actually the very first thing I purchased for our reno! I bought them from Bunnings and it was with great excitement that I finally could put them on two-and-a-half-years later!
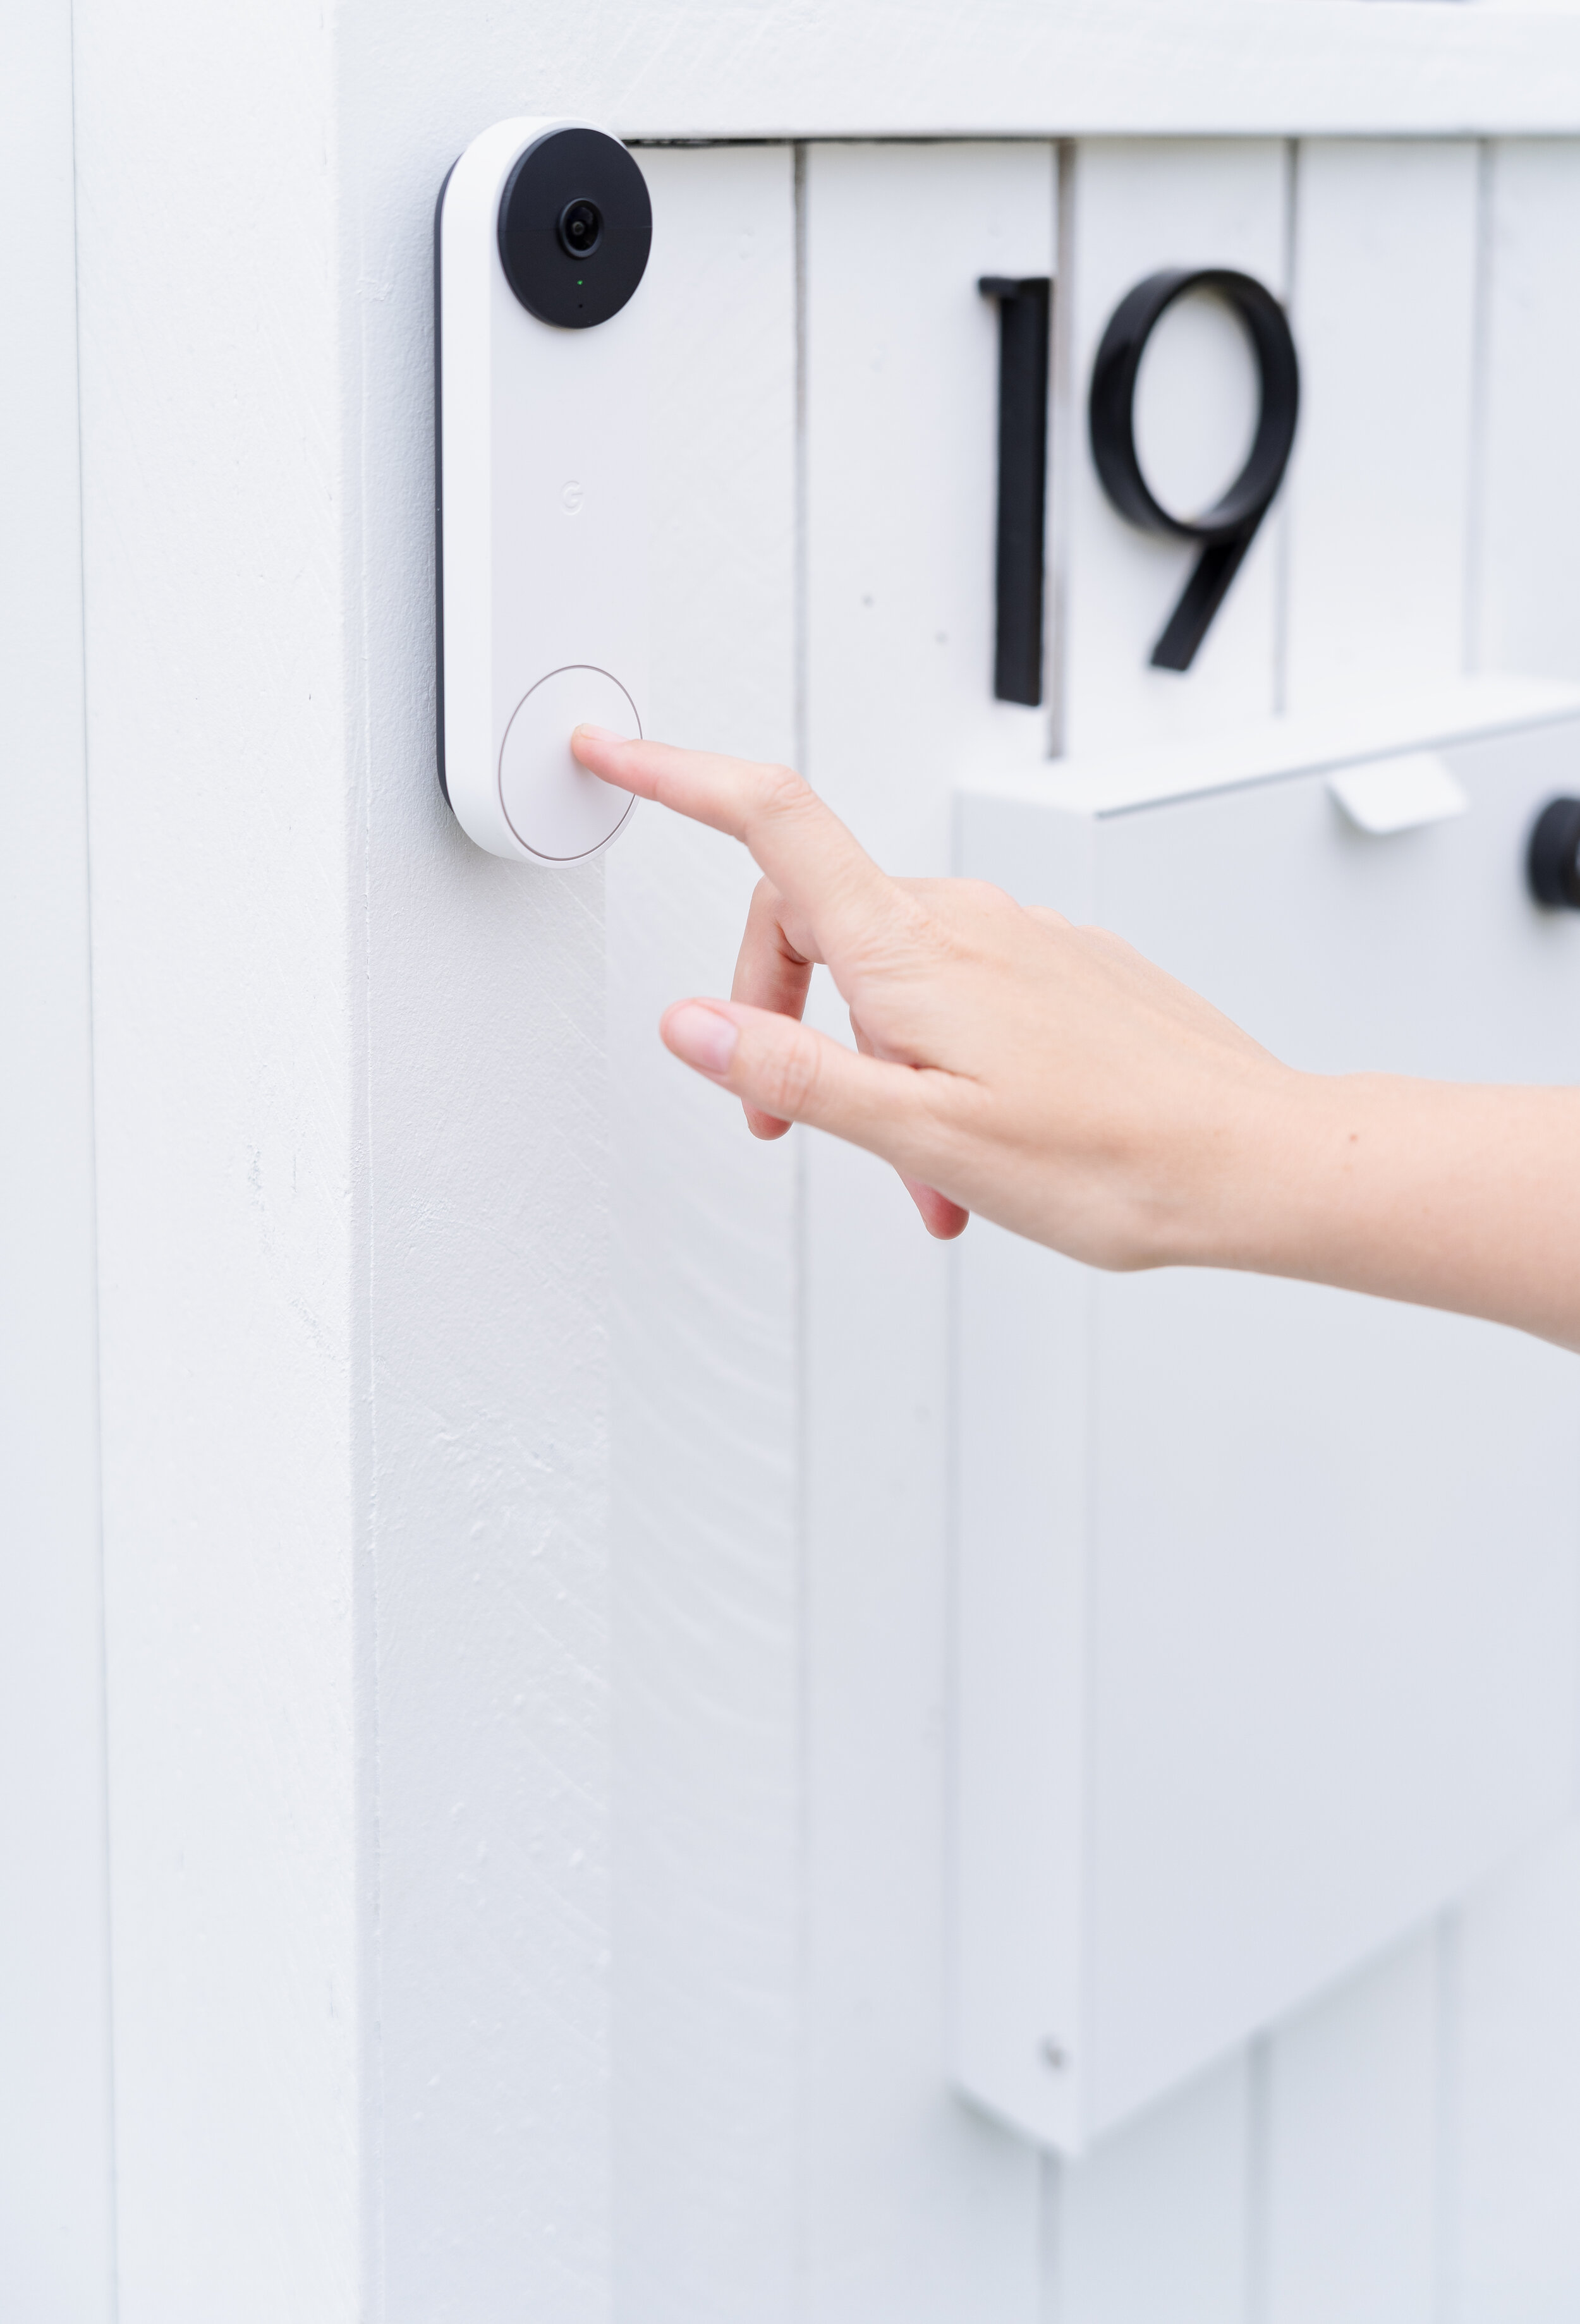
I wanted to find a doorbell that looked super stylish, so I was extremely excited to be gifted the Google Nest Doorbell. It’s like it was made for our house with its chic black and white colour scheme! I love the sleek design, and the fact that it’s battery-operated means I don’t have to worry about hard-wiring it in. This makes it an ideal product for renters or those who don’t have access to electricity outside of the house. You simply hook the Nest Doorbell up with your Google account and have it synced to your mobile phone so you get a notification when someone rings the bell. You can even reply to the person at the front of the house, which is great if you’re away. You can just talk directly to the person out the front or even do a quick reply with pre-recorded messages. For example if it’s a courier that rings, you could say, “hey I’m not home right now but can you leave it at the front door?” It’s absolutely brilliant and the clarity of vision is pretty good too - even at night.
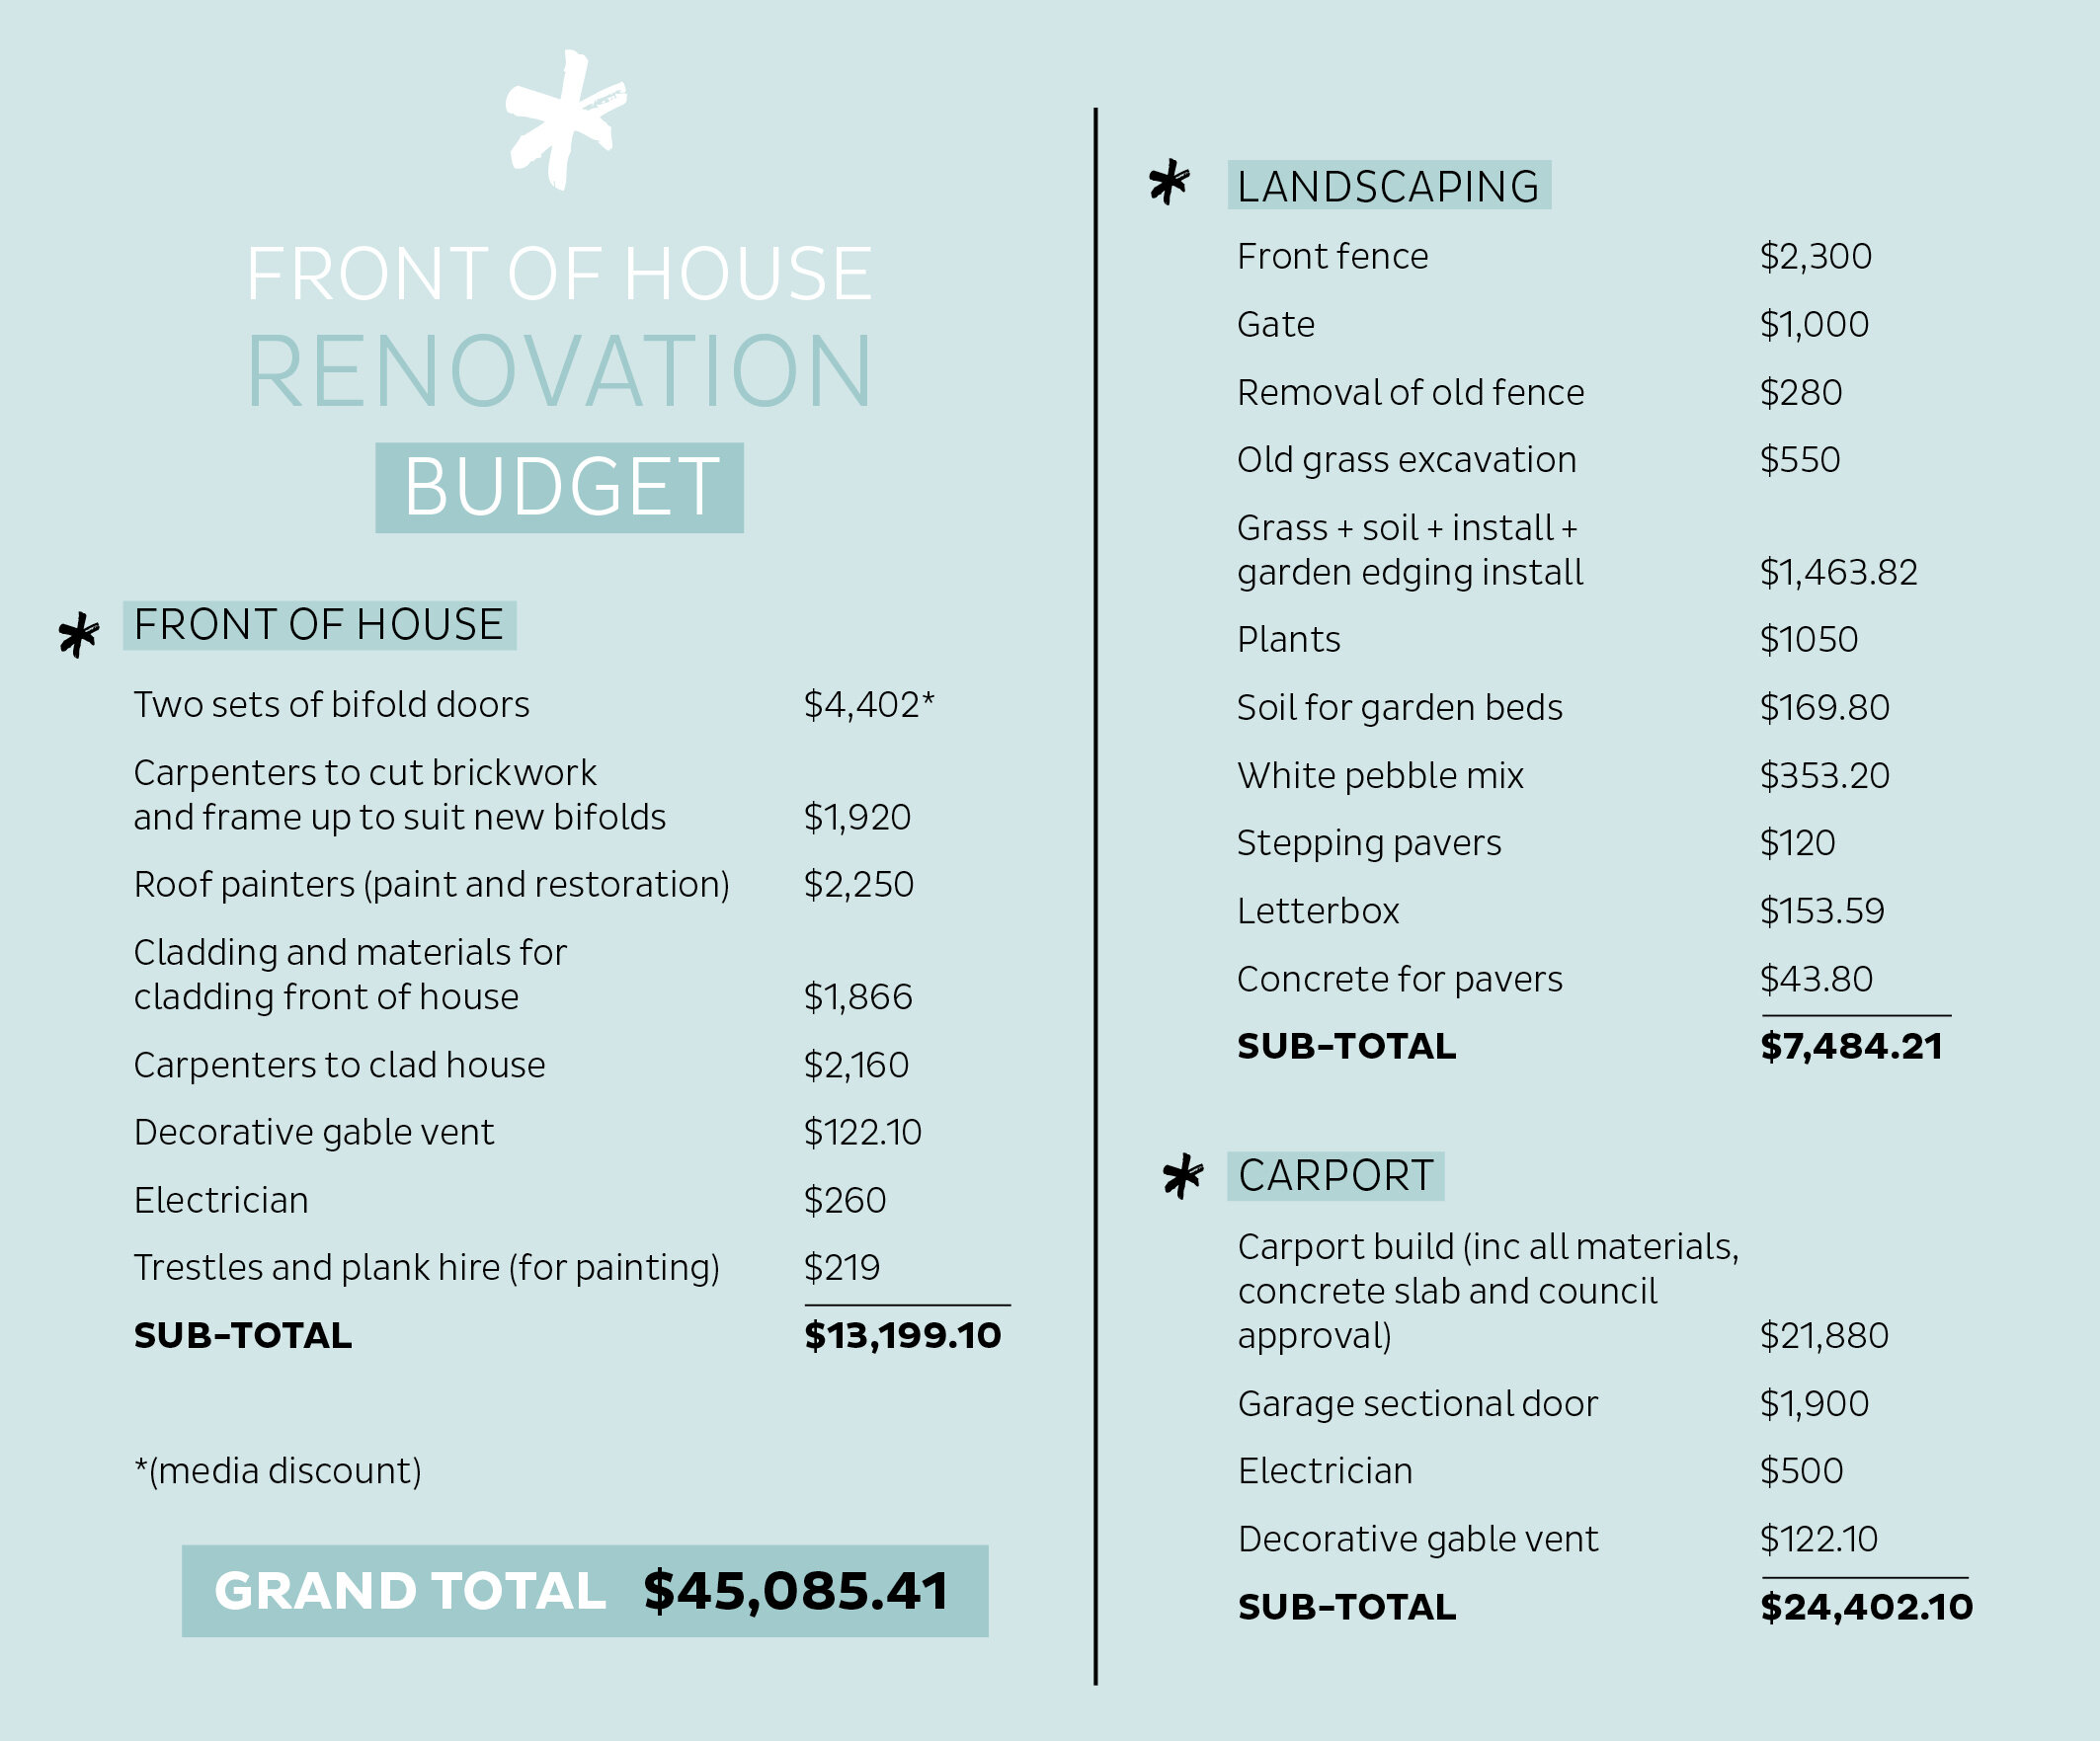
BUDGET
Let’s get down to business and discuss budget. All up the front of house reno cost just a little over $45,000. It’s a lot of money, but we had a lot to fix and improve on this house. The carport was the most expensive thing, but it was essential as the house had no garage. It has also given the impression our overall frontage is much larger than it actually is, which I think is money worth spent.
Landscaping also quickly adds up as you can see. I would like to point out though, that this includes landscaping inside of the front fence which you can’t see in the images above. That area is still a work in progress (paved seating area, and deck to come).