My Back of House Makeover

The back of my house is finally finished and I’m so excited to be revealing all today. Strap yourself in this is a long post - with lots of details!
Photography Mark Zeidler

BEFORE: Nothing to see here but yellow brick and dirty old roof tiles
The back of the house needed a lot of work. Not only did we have a rusted out old carport and lattice screen to demolish, we had an old Hills Hoist in the backyard that also needed to be replaced (we’ve now got a white fold down line on the side of the house which looks so much cleaner). There was also a horrible wire chain fence down one side. Thank goodness the owner of the house next door agreed to go halves in a new fence – that alone made such a huge difference to the feel of our backyard.
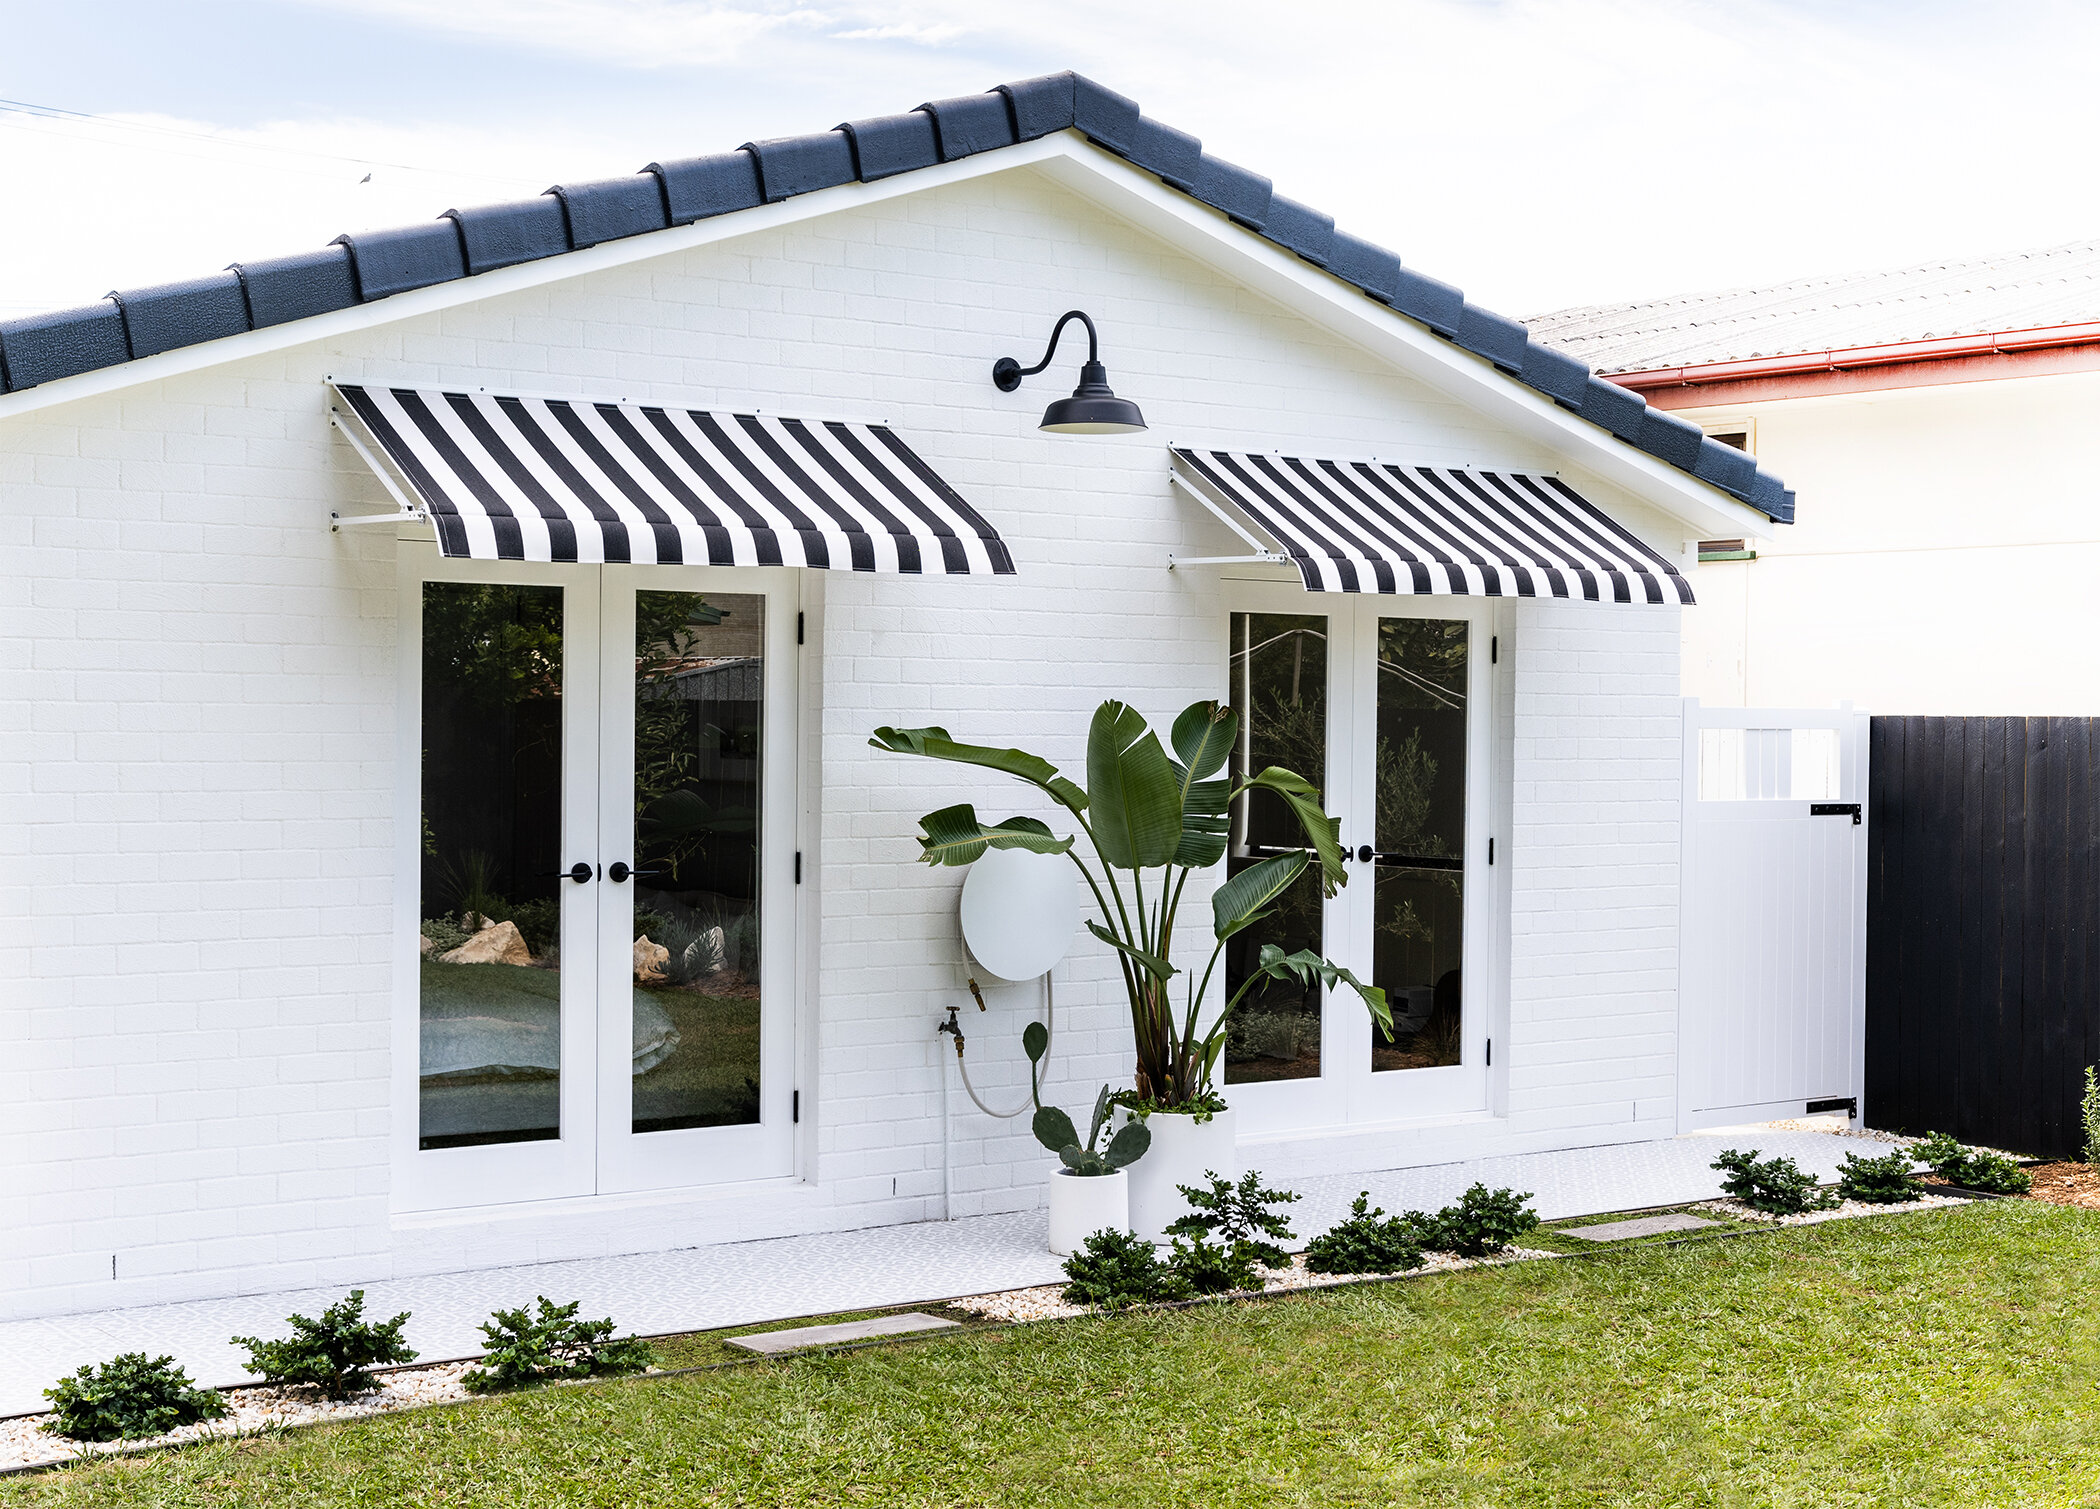
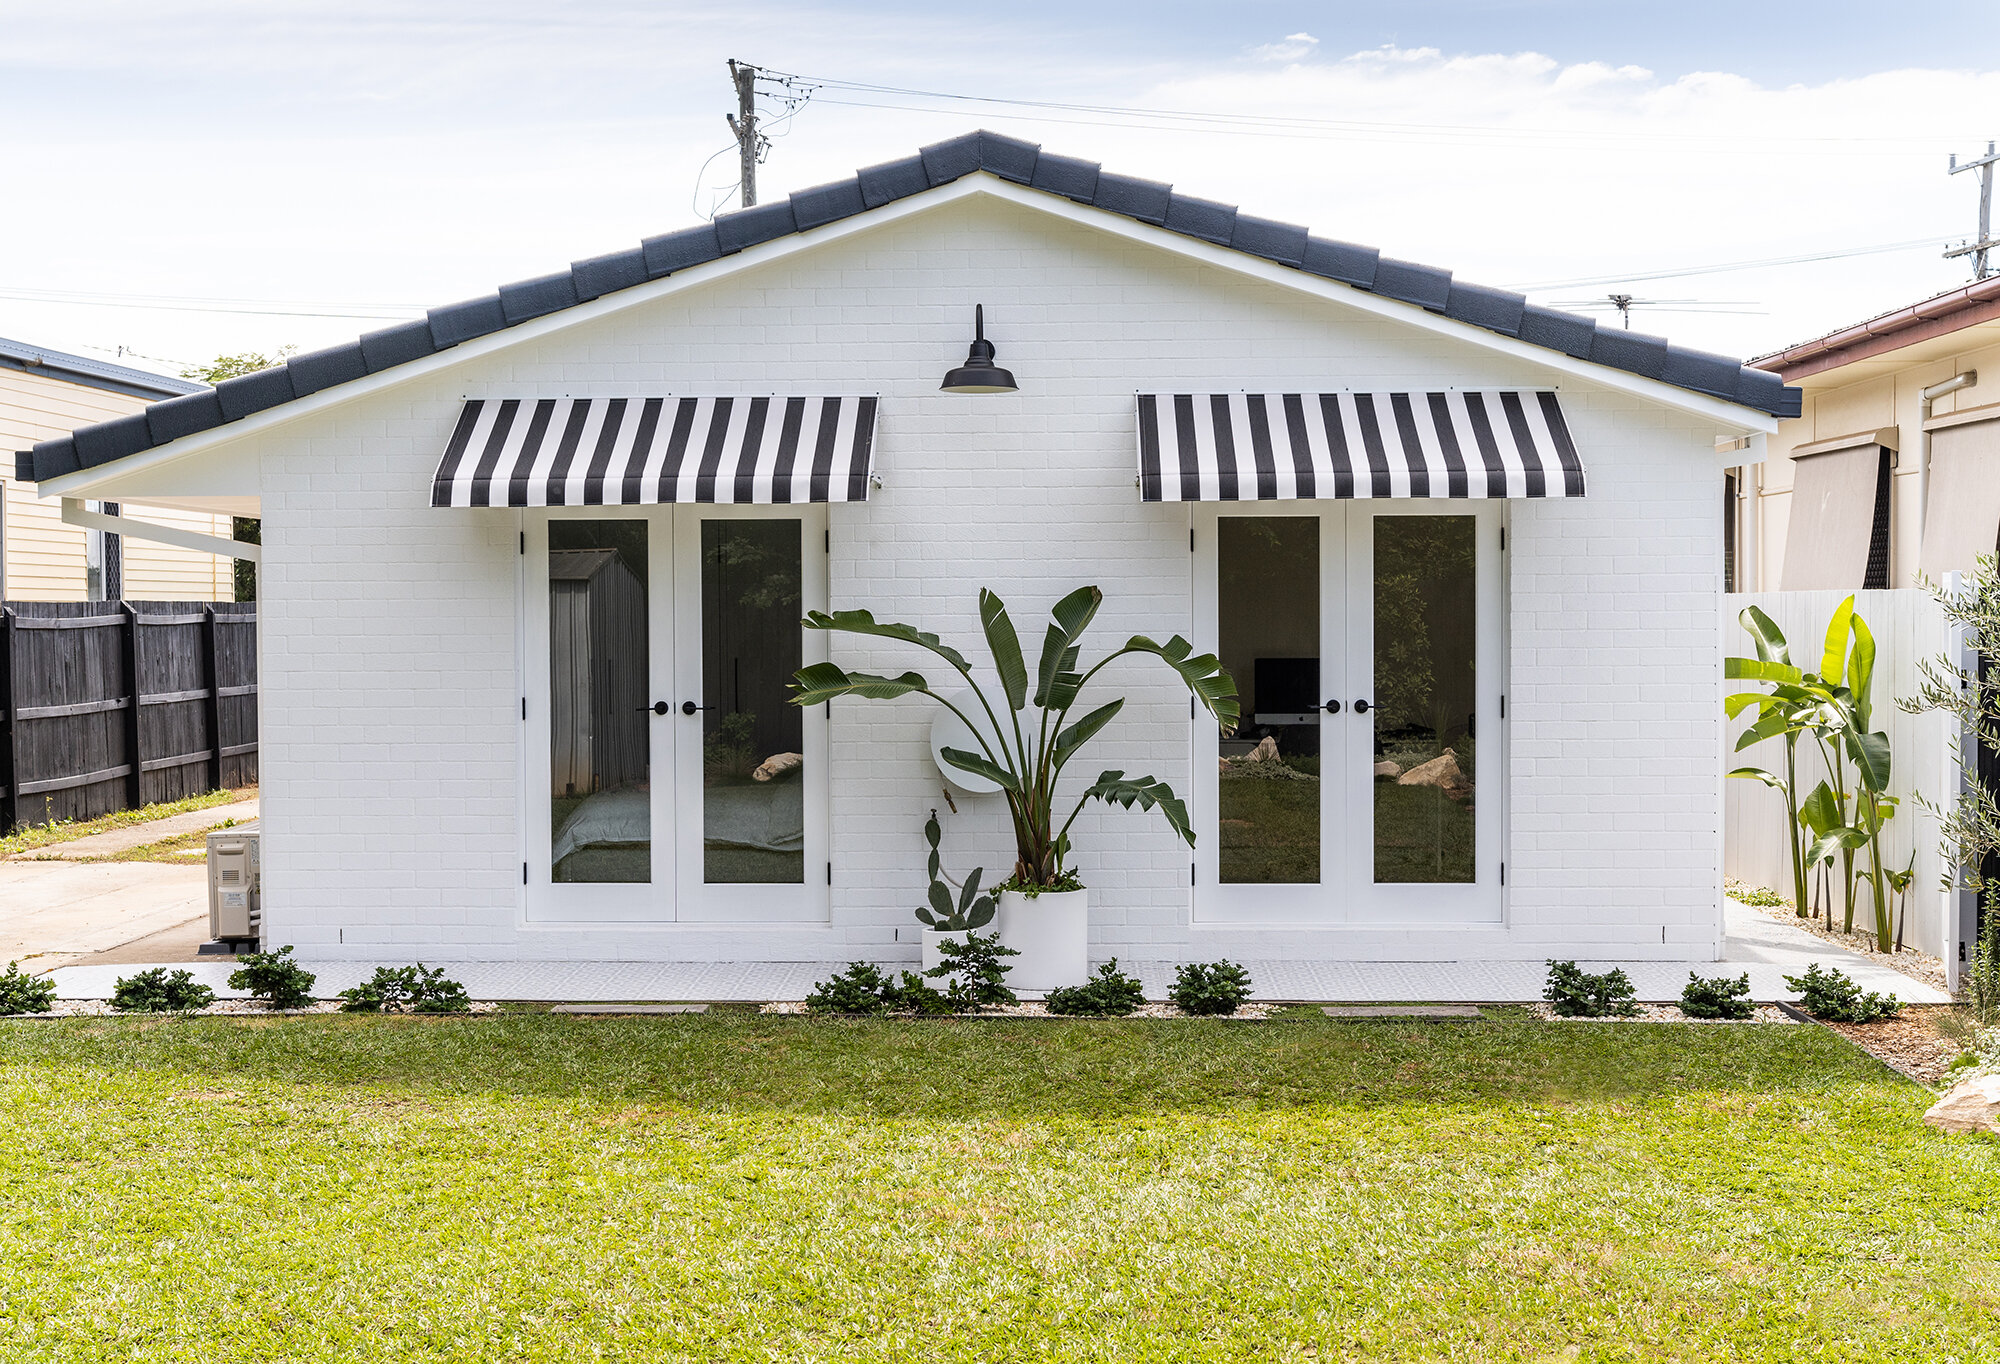
AFTER: A coastal-meets-modern farmhouse look
REPLACING WINDOWS WITH FRENCH DOORS
The very first step in creating a better looking exterior was to replace the ugly brown windows and security screens with beautiful, classic looking French doors. They have completely transformed the feel of the house, and also give us a better view out to the garden, and more of a connection to the backyard. We chose to go with DoorsPlus for the doors and installation. Why? Because they took care of everything – from measuring up the space, selecting the right doors for the job, and taking care of the installation. They have to cut the non-structural brickwork, knock them out, and then frame up for the doors. It’s a big job and takes all day to complete. Our installer was brilliant – he knows what he’s doing (he does this for a living, day in, day out), so we felt confident that the job would be completed to a high standard – which it was. We are thrilled with how they look, you can even elect to choose your own door handles (we chose the Lemaar ‘Orba’ handles in black from Bunnings). We painted our doors in Dulux ‘Vivid White’.

RENDERING THE BRICK
Whilst I complain about the ugly brick, it’s one of the reasons I was attracted to buying this house, because I could totally see the brick rendered and painted. I wanted a bagged render finish – one where you could still see the subtle lines of the brick mortar to give the appearance of an farmhouse cottage. To achieve this we used Dulux Texture Render in medium cover (you can purchase from Bunnings). It comes in an off-white colour, we chose to paint over it so that it looks even whiter. I totally recommend this product if you’re looking to render your house yourself. It’s expensive to hire a professional renderer so this is a more affordable DIY option. You simply paint the house with one coat of the Dulux Texture Primer first, and then apply the Texture Render product with a wool mitt by hand and smear it over the brick in sweeping circular motions. Because we have deep mortar joints we needed to apply two coats to fill it in without any cracks in the joints. If you had less deep joints you could probably get away with just one coat.


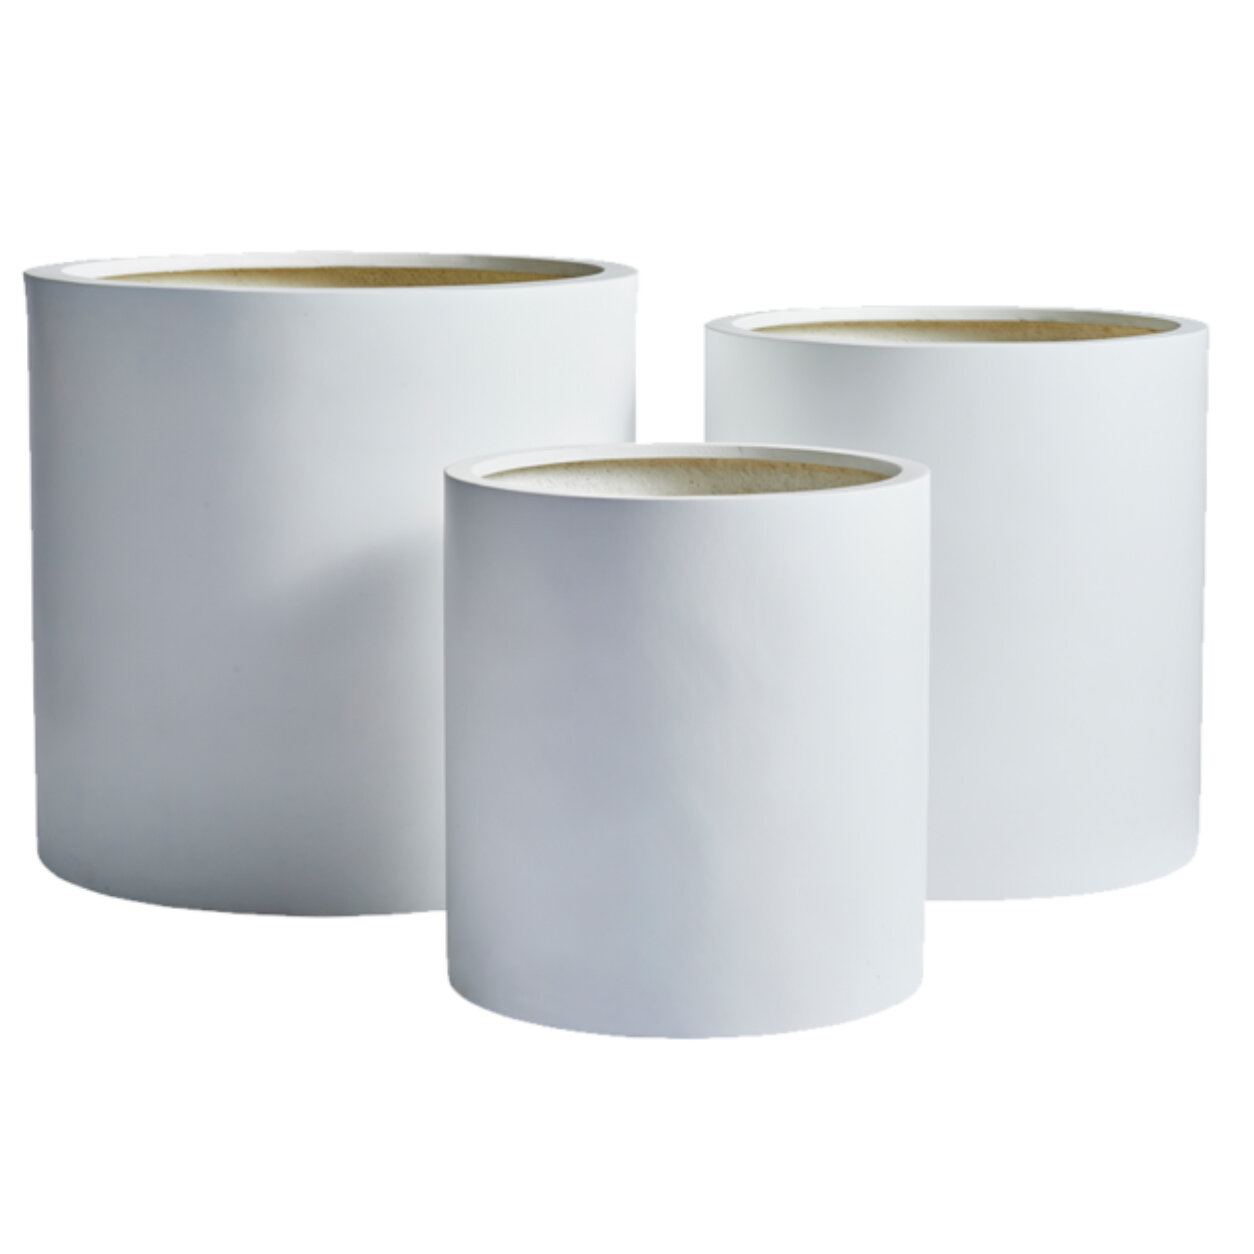
A prickly pear and a Strelitzia nicolai and dichondra planted into ‘Choob’ pots from The Balcony Garden
TILES
Ok full disclosure – the tiles have been fake ‘layed’ by myself (I’ve just popped them onto the concrete with no glue or grout). We have a few things that we need to get done prior to getting the concrete footpath tiled. But we already had the tiles here so I thought why not lay them out and get it all photographed as I’ve been itching to get this blog post done. We chose the ‘Palm Beach’ grey encaustic-look outdoor tile from Tile Cloud (can also be used indoors – for example bathrooms floors) as it has a slightly gritty texture to it making it non-slip. If you follow along on Instagram, you’ll know I sought out your opinion on which tiles to choose and the overwhelming winner was the Palm Beach design in grey! I’m so happy I went with it, it’s a gorgeous soft grey and just goes so well with the exterior. I can’t wait til these are layed professionally.


STRIPED AWNINGS
Ok so let’s talk about the awnings. I got a couple of quotes from other big-name awning companies, and let me tell you they weren’t cheap. One company was over $7000 for two awnings (gulp), and the other was close to $4,000 for two awnings (umm, ok). I get if you’re spending that money on big ticket items like french doors, but for awnings I couldn’t believe it. And that’s when I came across a company called Online Blinds (please note this business has now closed down). They’ve got pricing details on their site so it was easy for me to determine how much it was going to cost. They also have images of their fabric available and can send out small samples in the mail to help you decide. I chose the Fixed No Frame Awning in Docril acrylic fabric (014 colour - which is black and white stripe). You can choose from a wavey or straight valance.
The only catch is you have to measure up yourself, and also assemble and install yourself. We hired our electrician (who is also a handyman) and he charged us approximately $200 to install (worth every penny too, because there’s no way we could have done it ourselves). Even with paying someone to install, we still came out way cheaper - each awning costing $450 each, so total cost with install $1100. Compared to $4000, it’s a massive saving. I’m very happy with the look of the awnings and the quality also. Oh and they protect the timber French doors from rain – which is why we bought them in the first place.

THE LITTLE DETAILS
It’s all those little details that really bring a house to life. We added a couple of potted plants to help freshen it up. The white pots are from The Balcony Garden. We planted a prickly pear in one, and a Strelitzia nicolai and dichondra in the other.
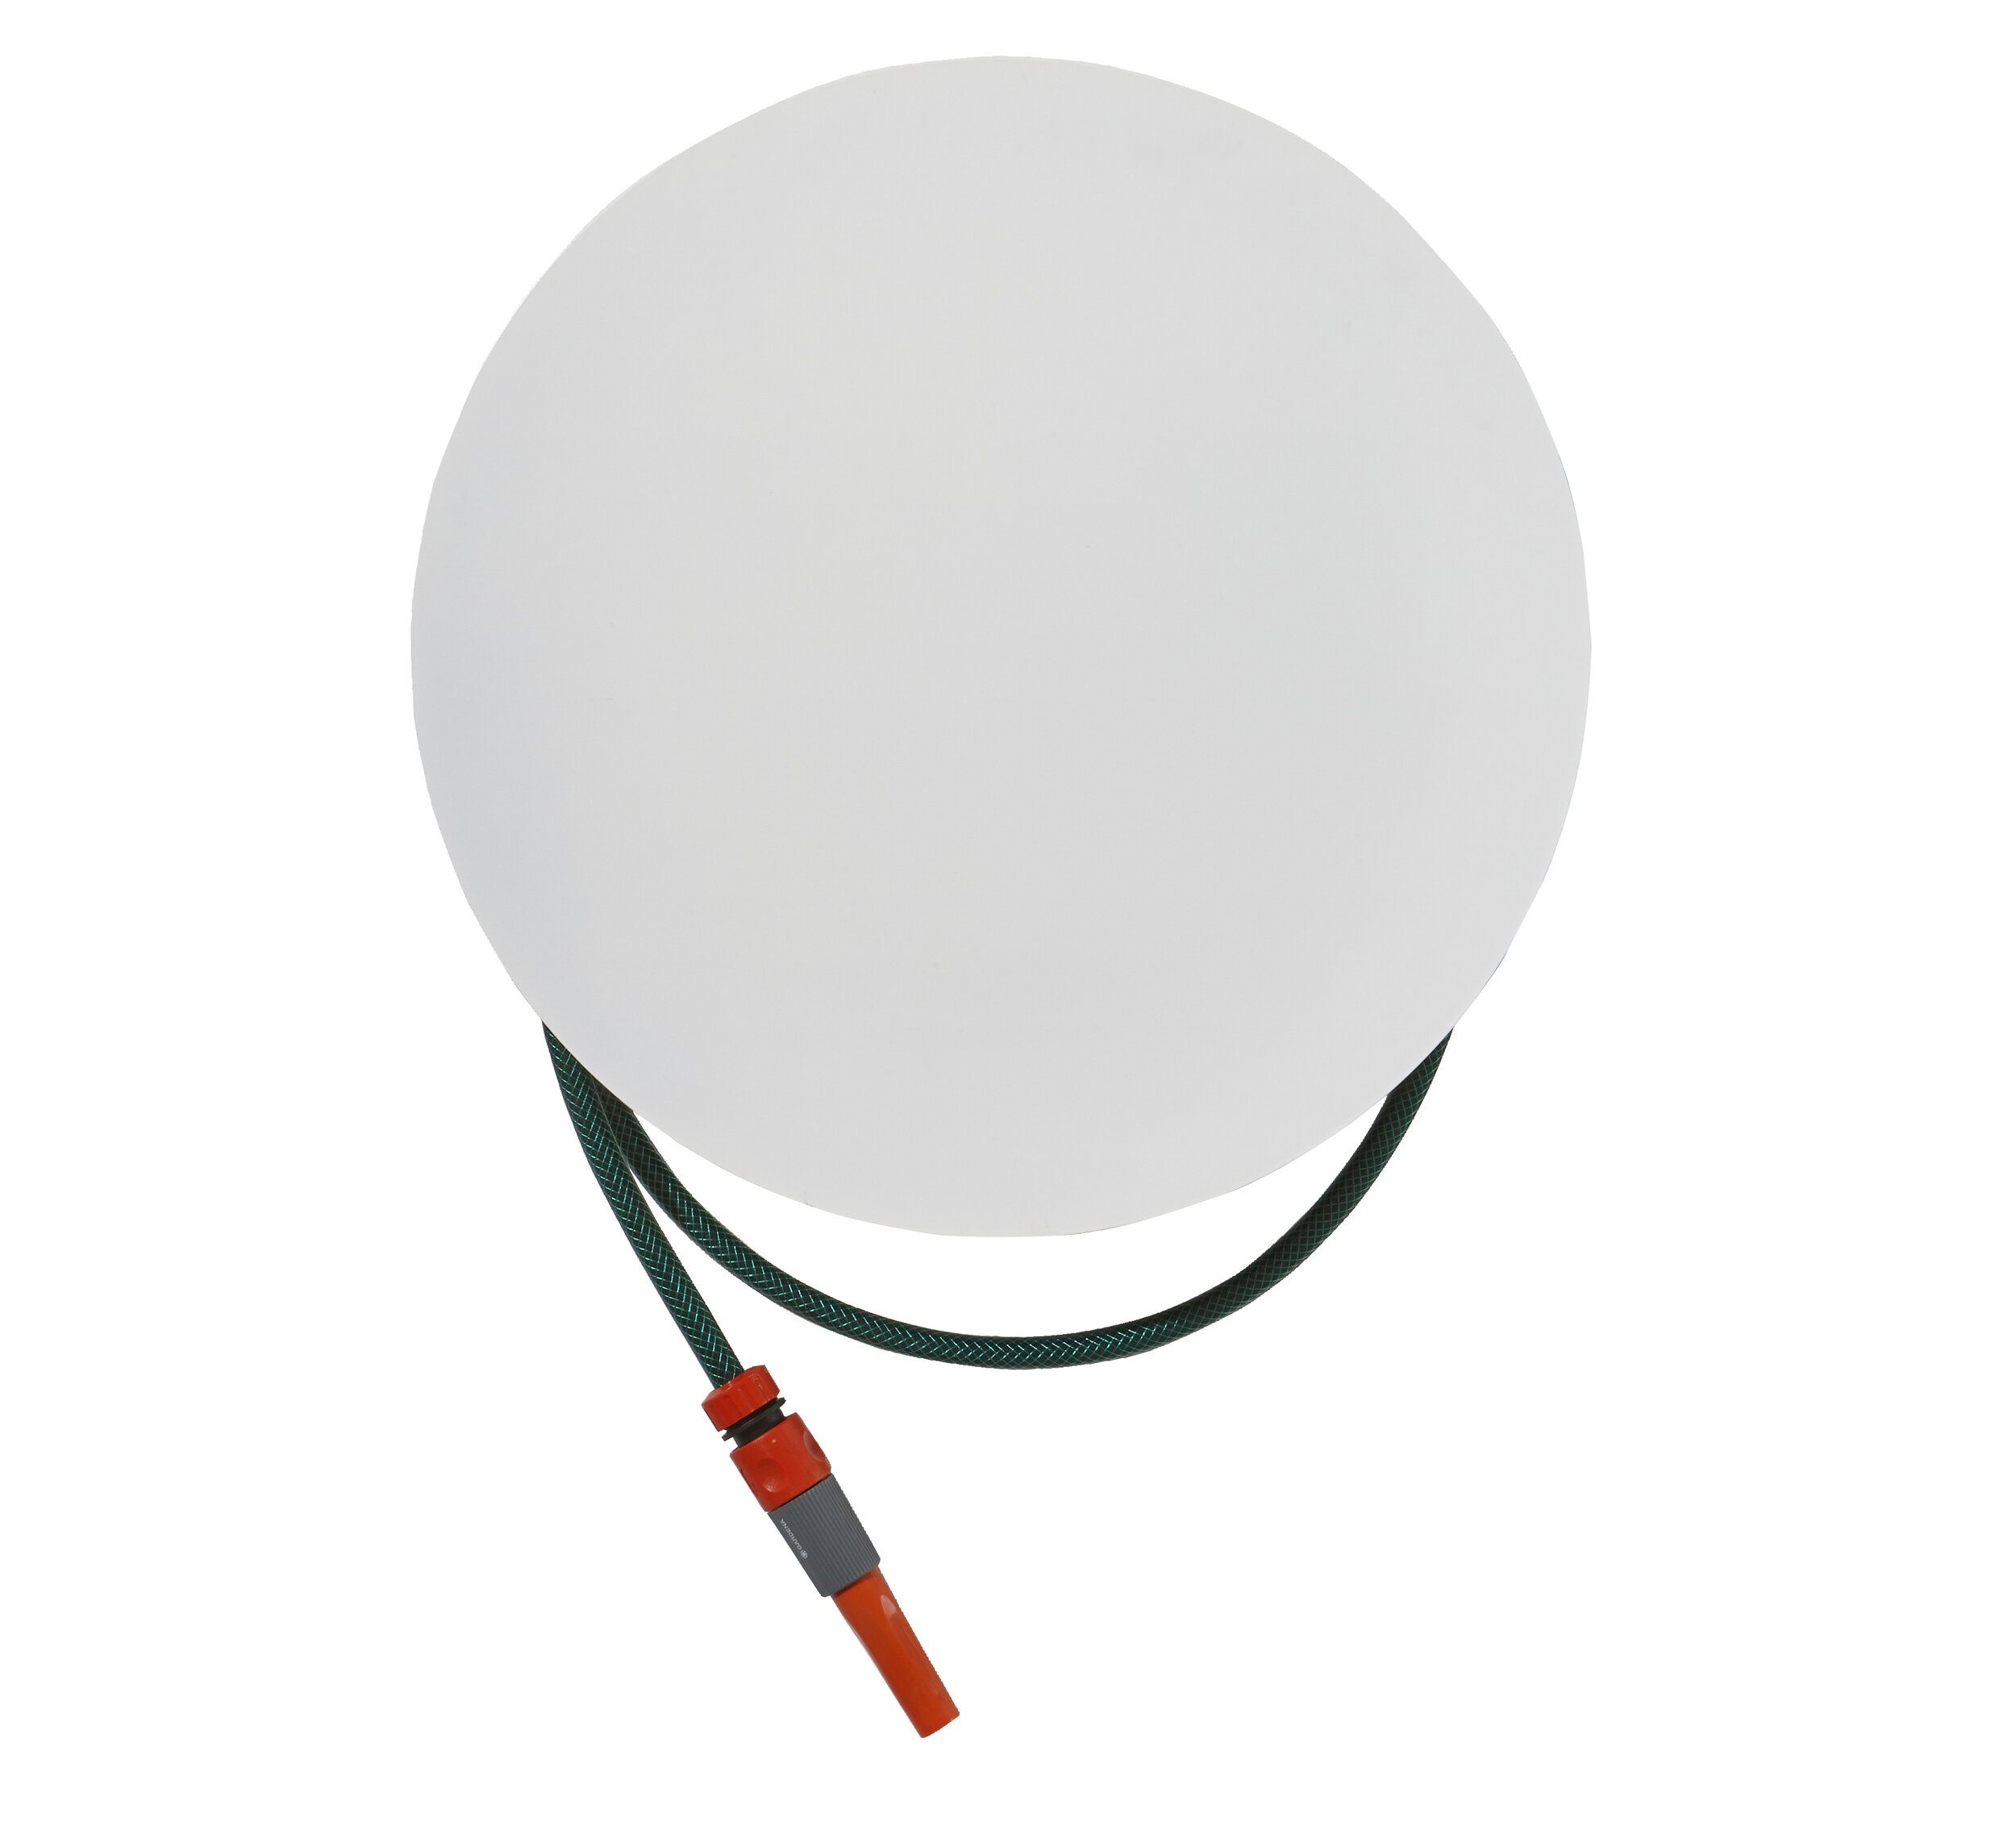
Another small detail is the ‘Dial’ hose hanger from Design By Them. I get asked by my instagram followers all the time whenever I show this in my stories. It’s so rare to find such a beautiful looking hose hanger so this was a must have for me. It also comes in black for those wondering. I’ve paired mine with a No King ivory and brass hose. I now sell these through my online shop (it also comes in a slate colour) and in 10m and 20m sizing (mine is a 20m hose). Hey if you’re going to invest in making your home beautiful, why stuff it up with an ugly green Bunnings hose!
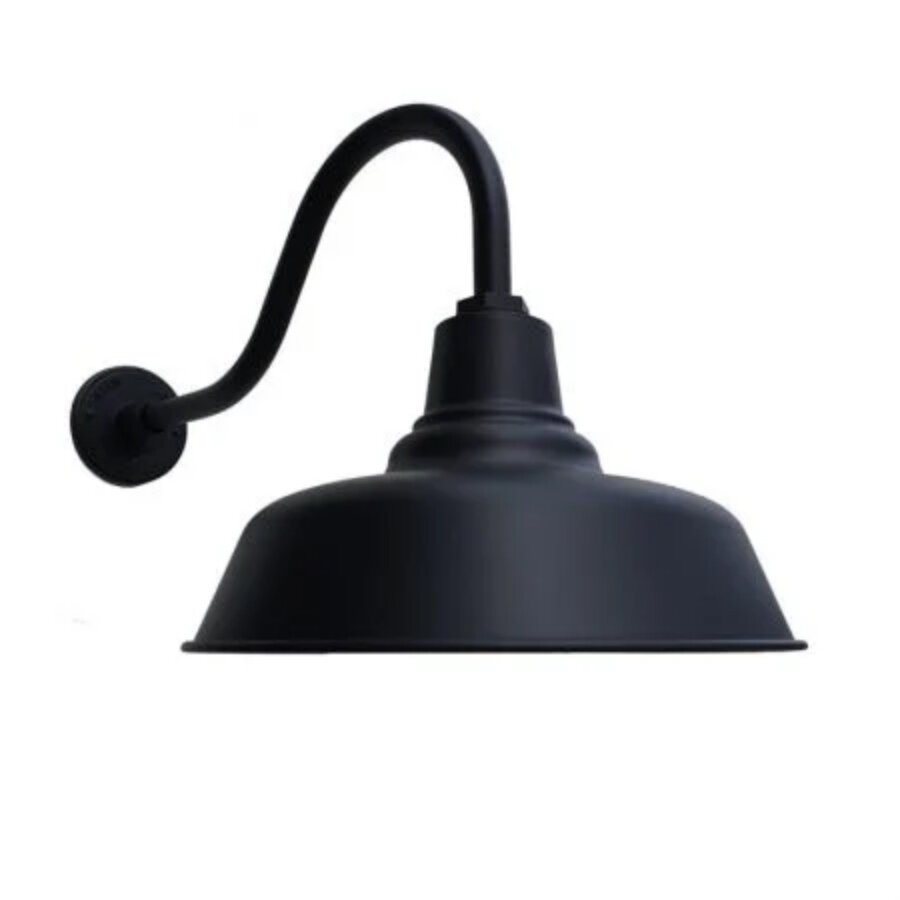
And last but certainly not least – the barn light in the middle gives the house a coastal farmhouse feel. I wanted to make sure I got the scale right and also to choose something that is able to be hung safely out in all types of weather. This one is the Universal Gooseneck in ‘Black Ace’ from Barn Light Australia. I just love the way it looks. Each one is custom-made and powder-coated in the colour of your choice.
SHOP THE LOOK

Overall I couldn’t be happier with how it has turned out and wouldn’t change a single thing. If only our front of house looked this good. In time it will, but for the time being I think my favourite place might be the backyard. Tomorrow I’ll be posting all about the back garden including all of the plant names.